Pork Chile Verde (Instant Pot Cooking)


chili verde final

The good thing about living in Southern California, besides the year round sunshine, is the food.  Here in Los Angeles, which is one of the most multicultural cities in the world, people from different countries allow us to taste different types of authentic cuisine.

There are many good Mexican restaurants and food trucks in East Los Angeles where you can find some of best tacos in the country.  If you go for the Taco Tuesday deals, each taco is as low as $1.  After your meal, you can walk along some streets in East LA, and there are some food trucks selling fresh churros, they are just delicious!

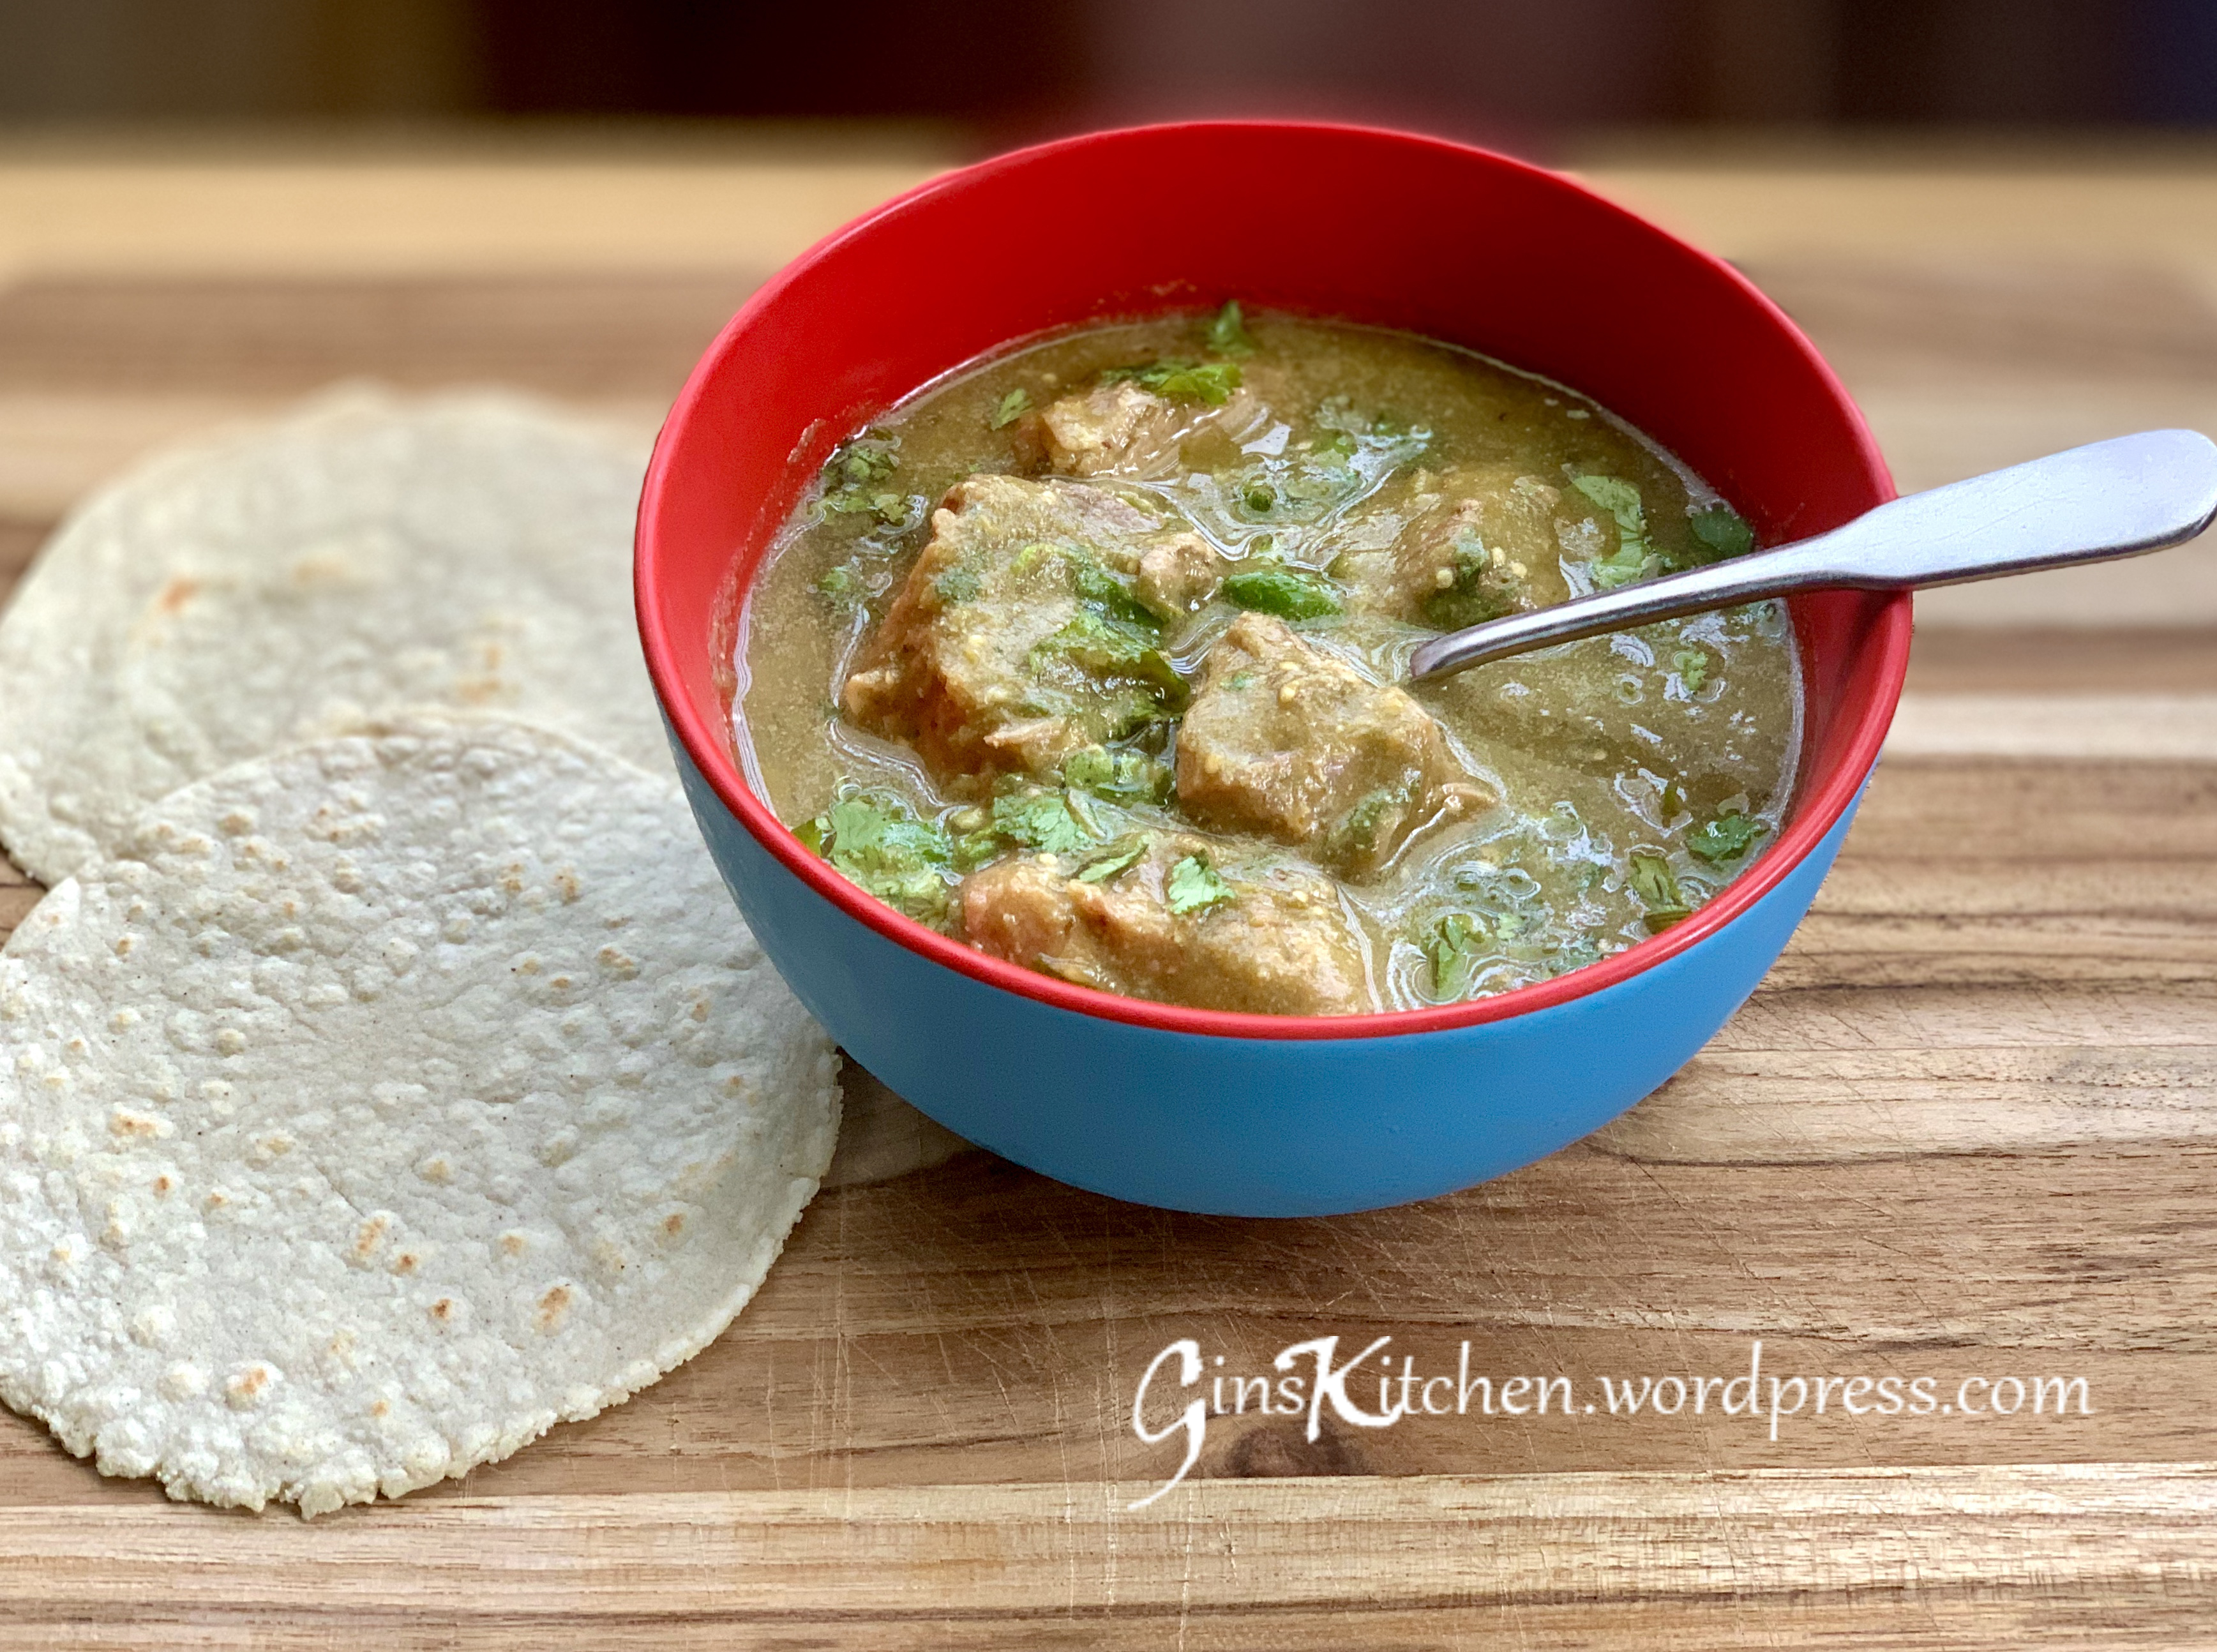
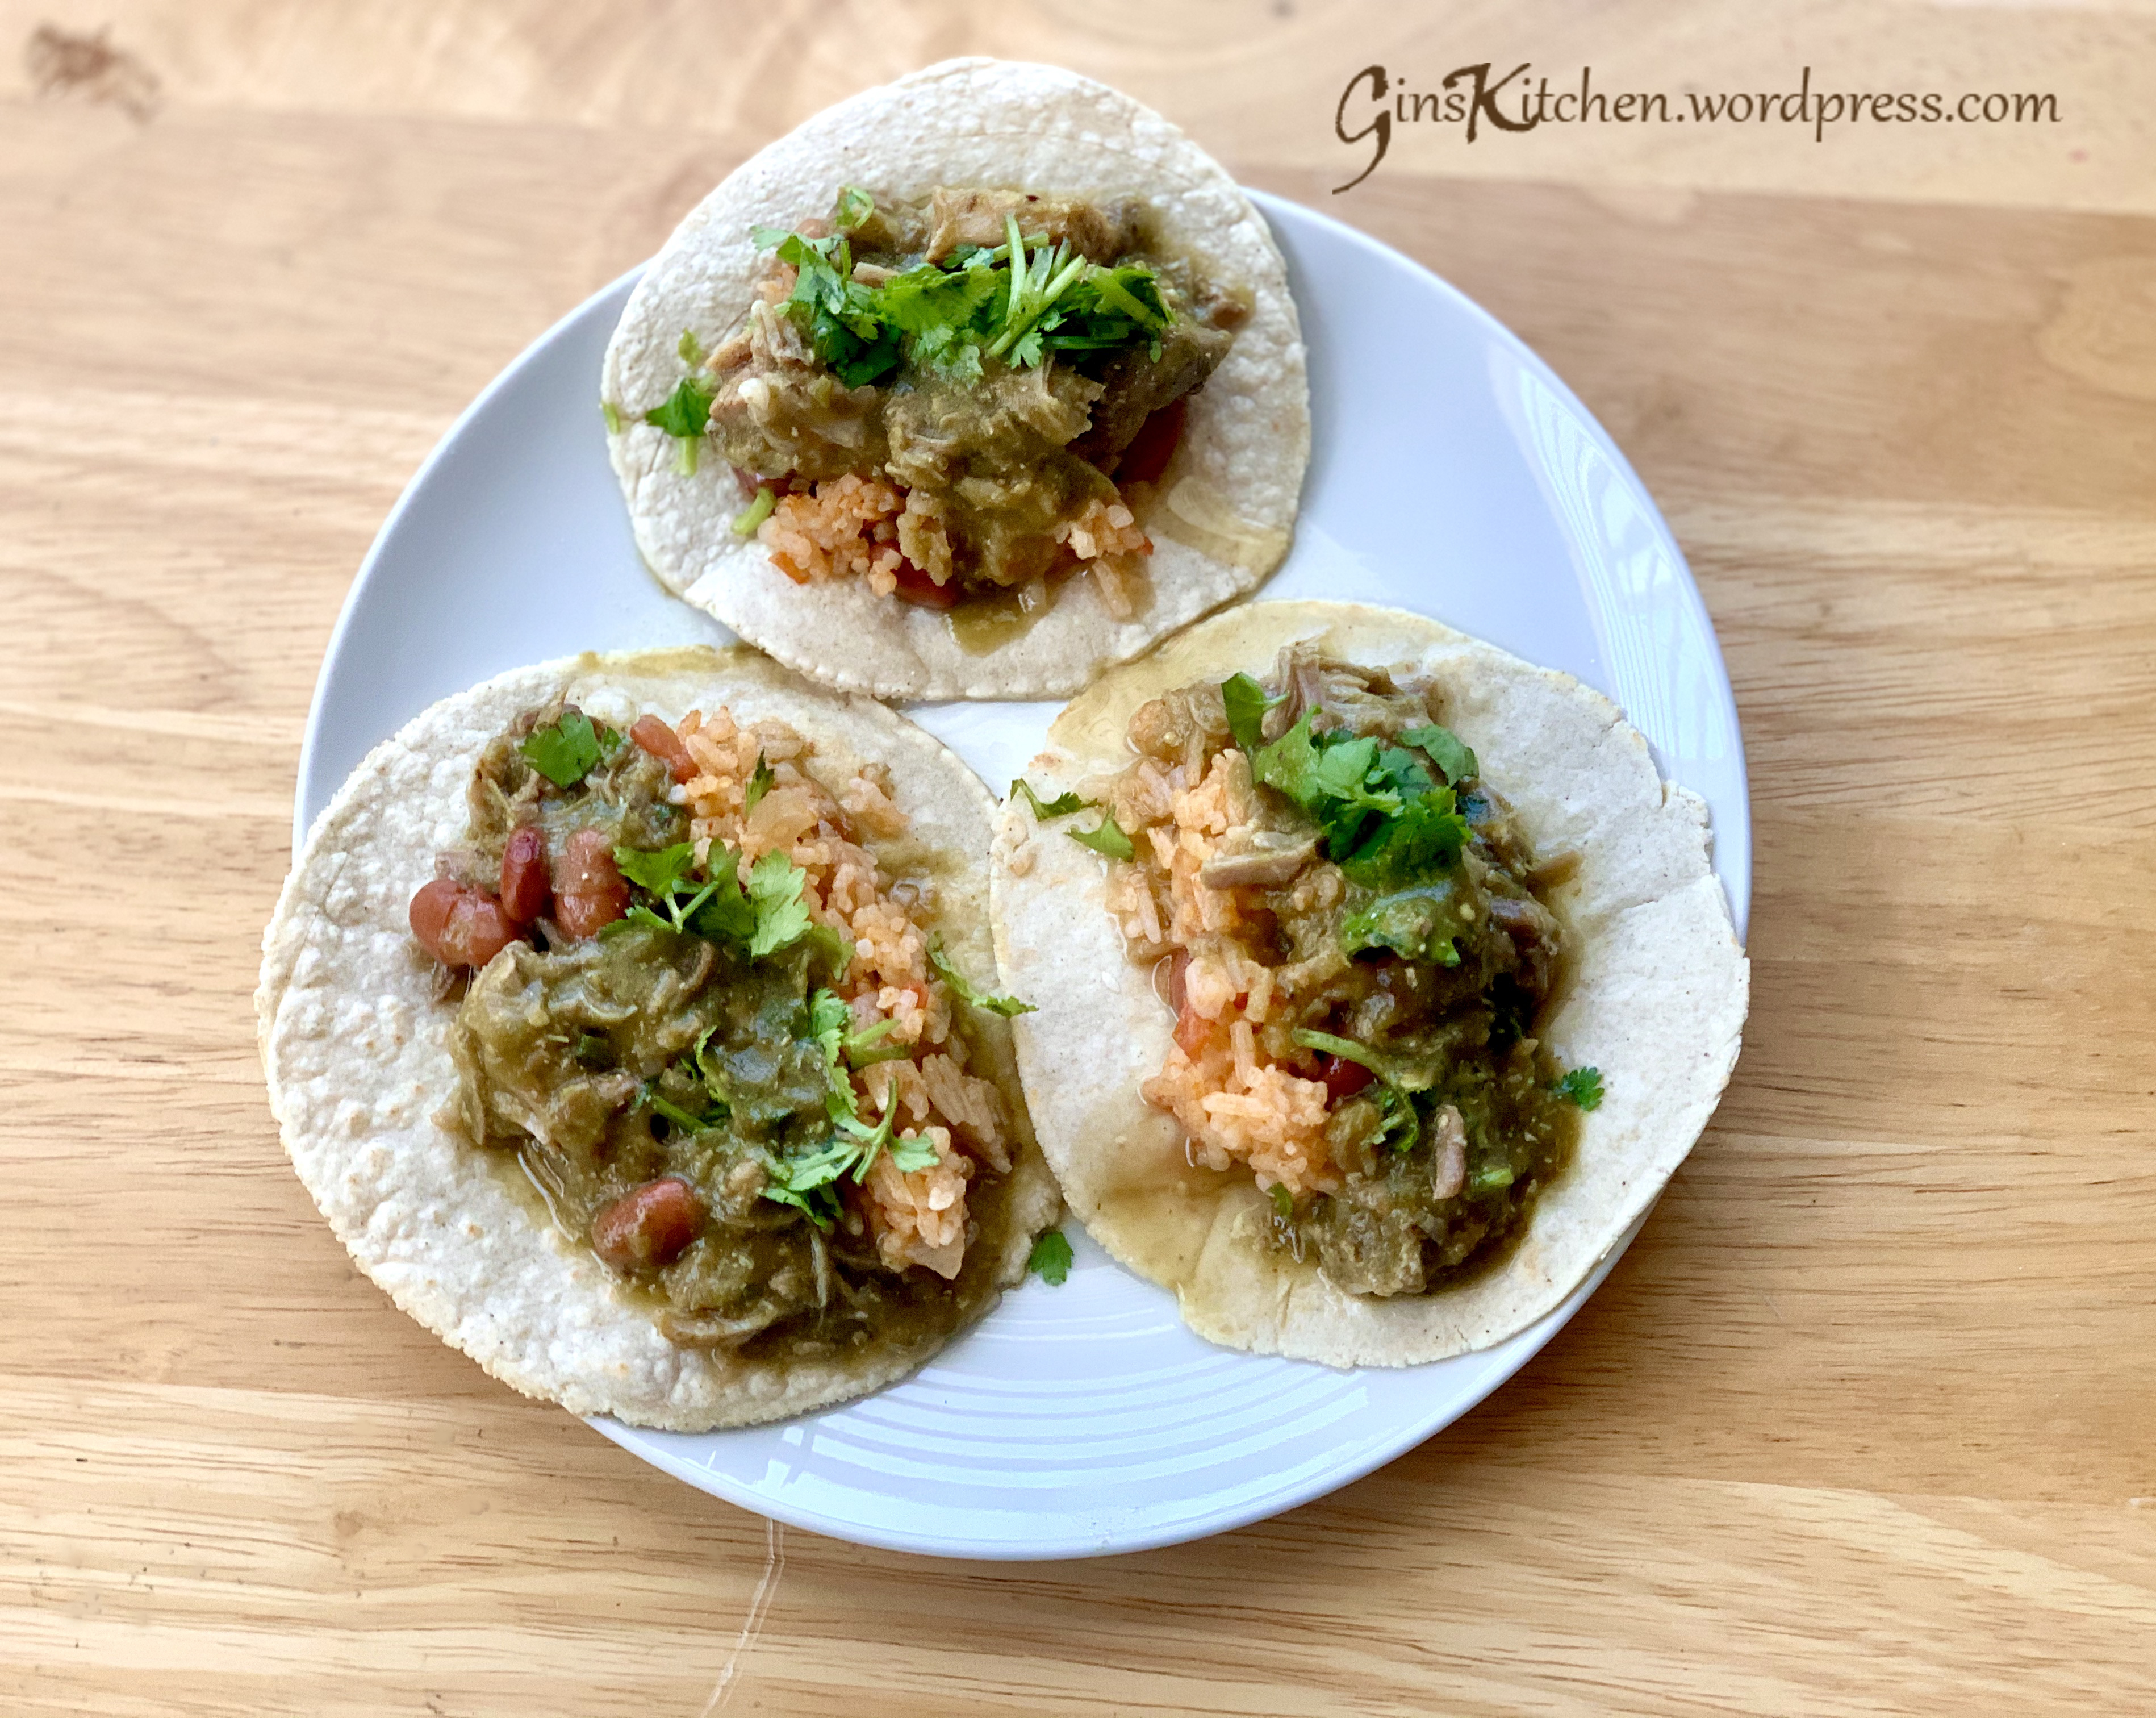
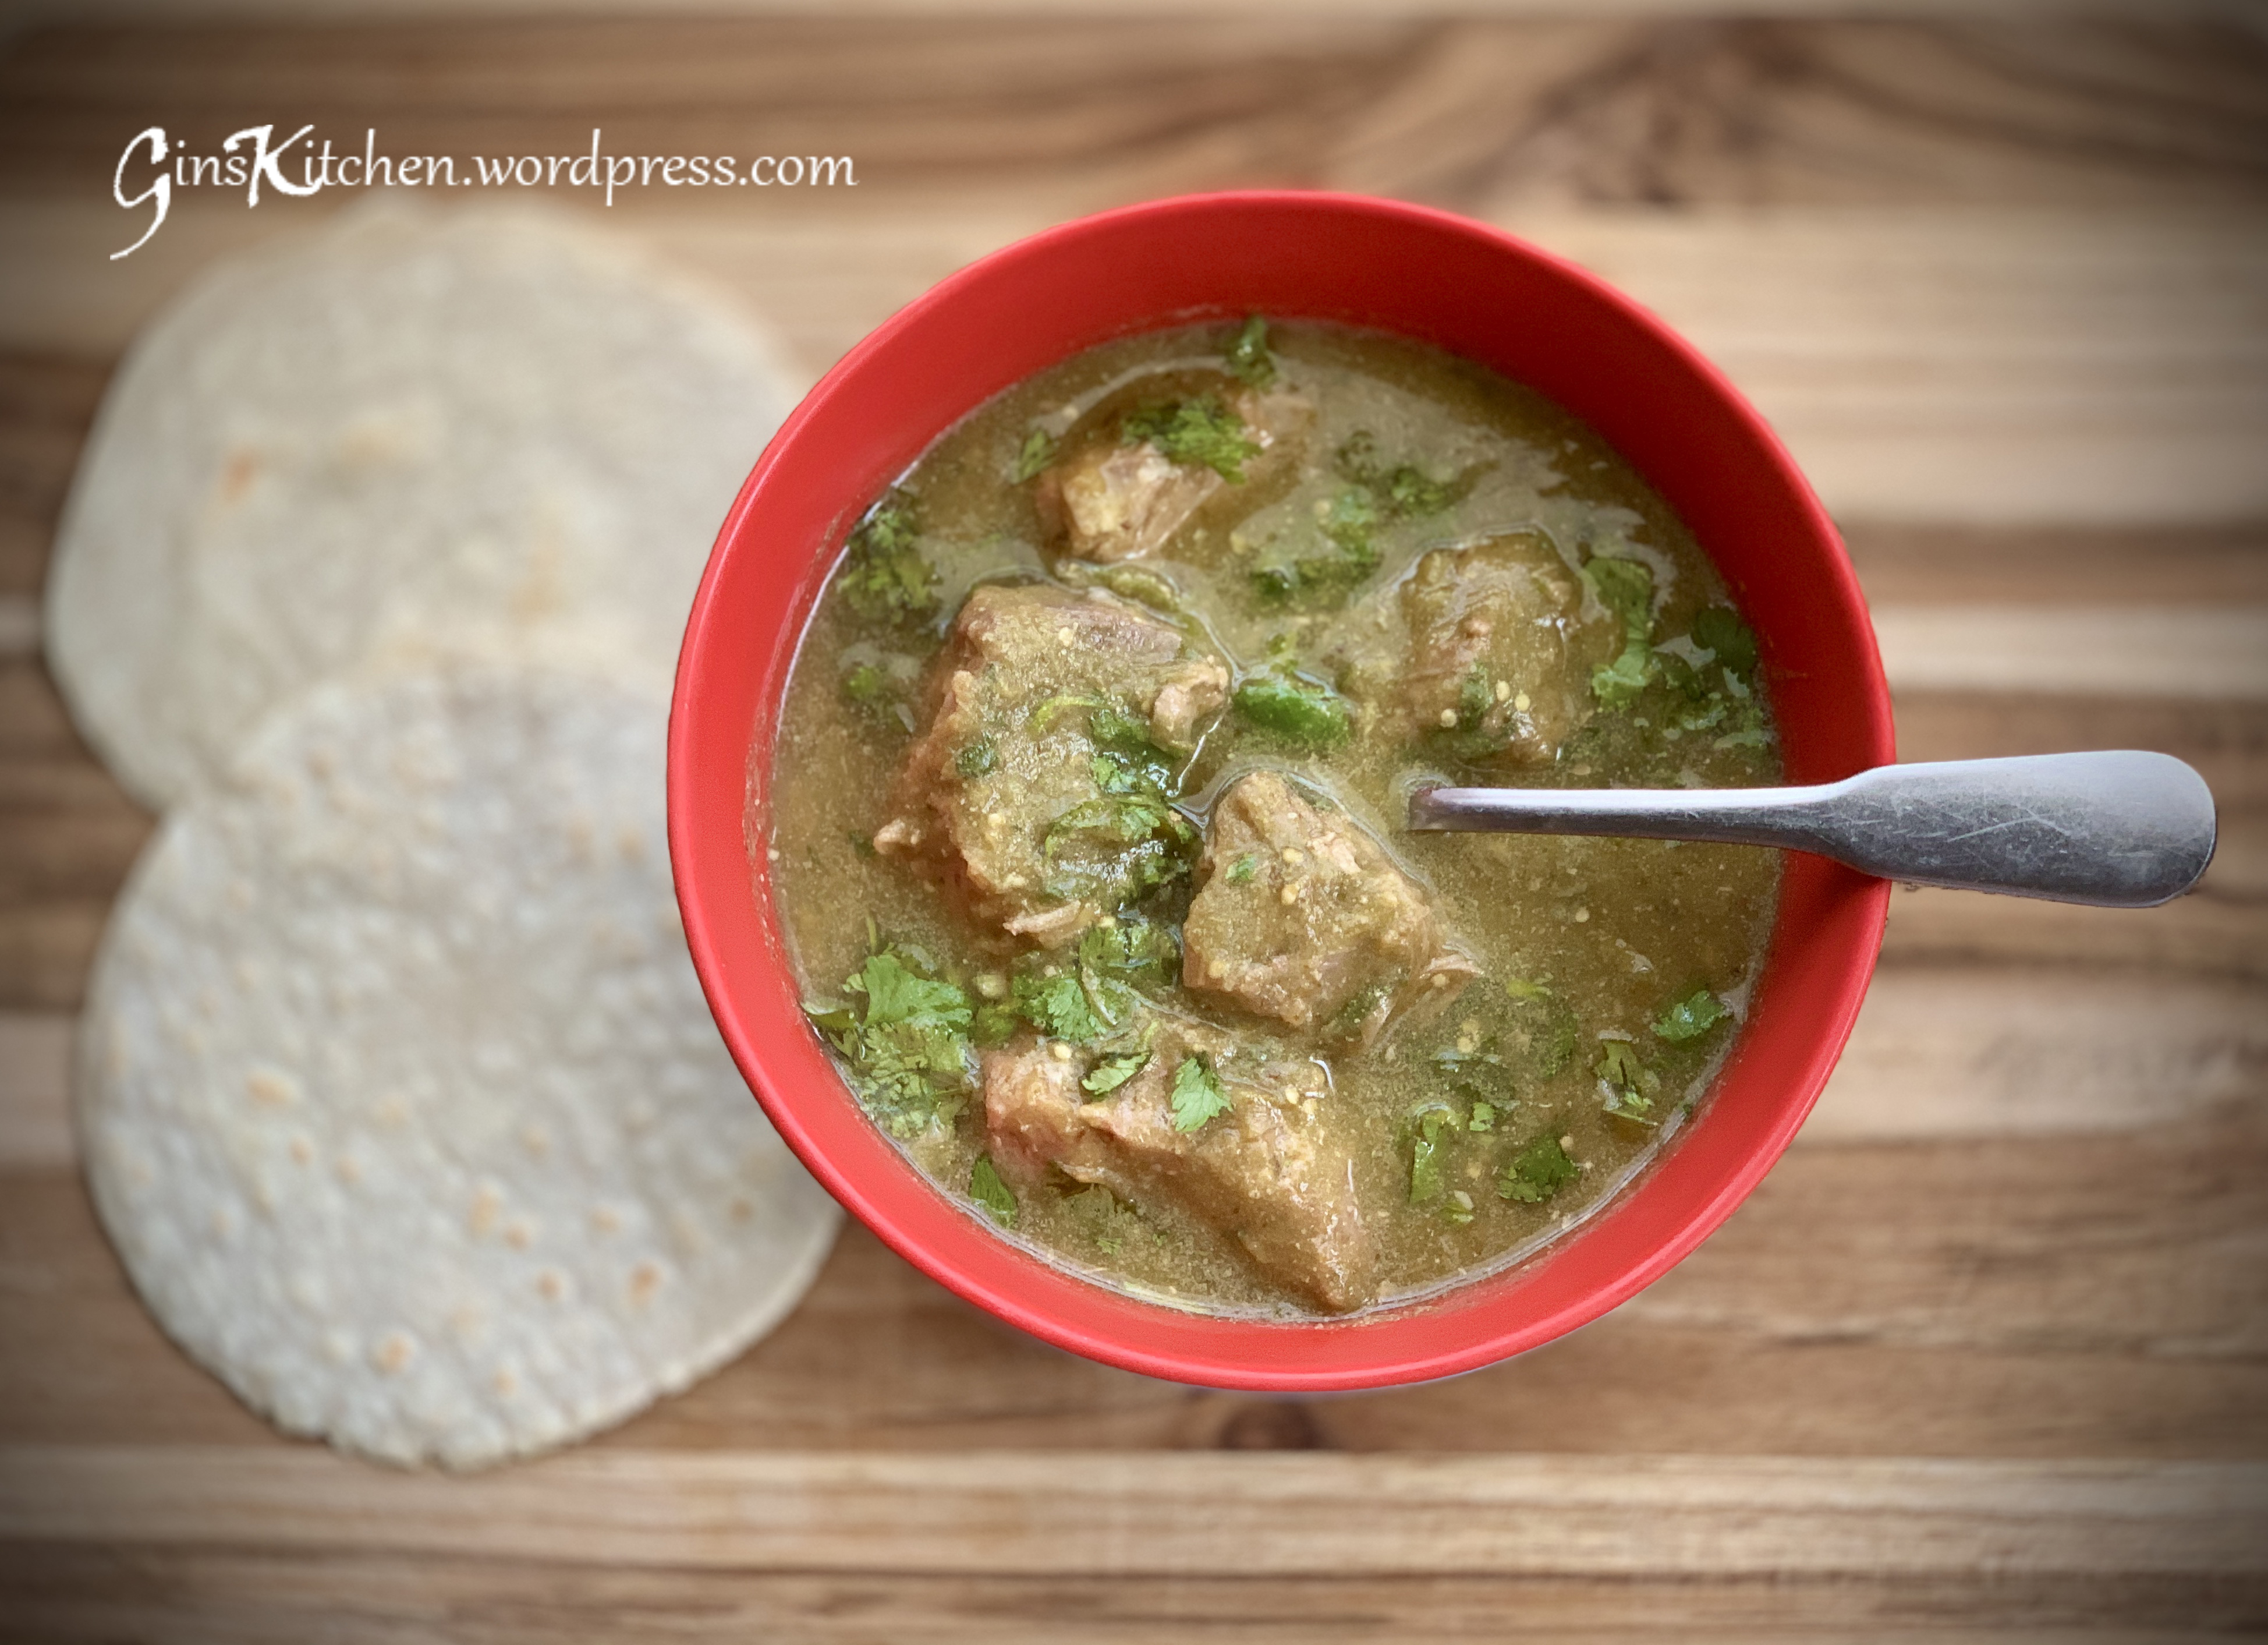
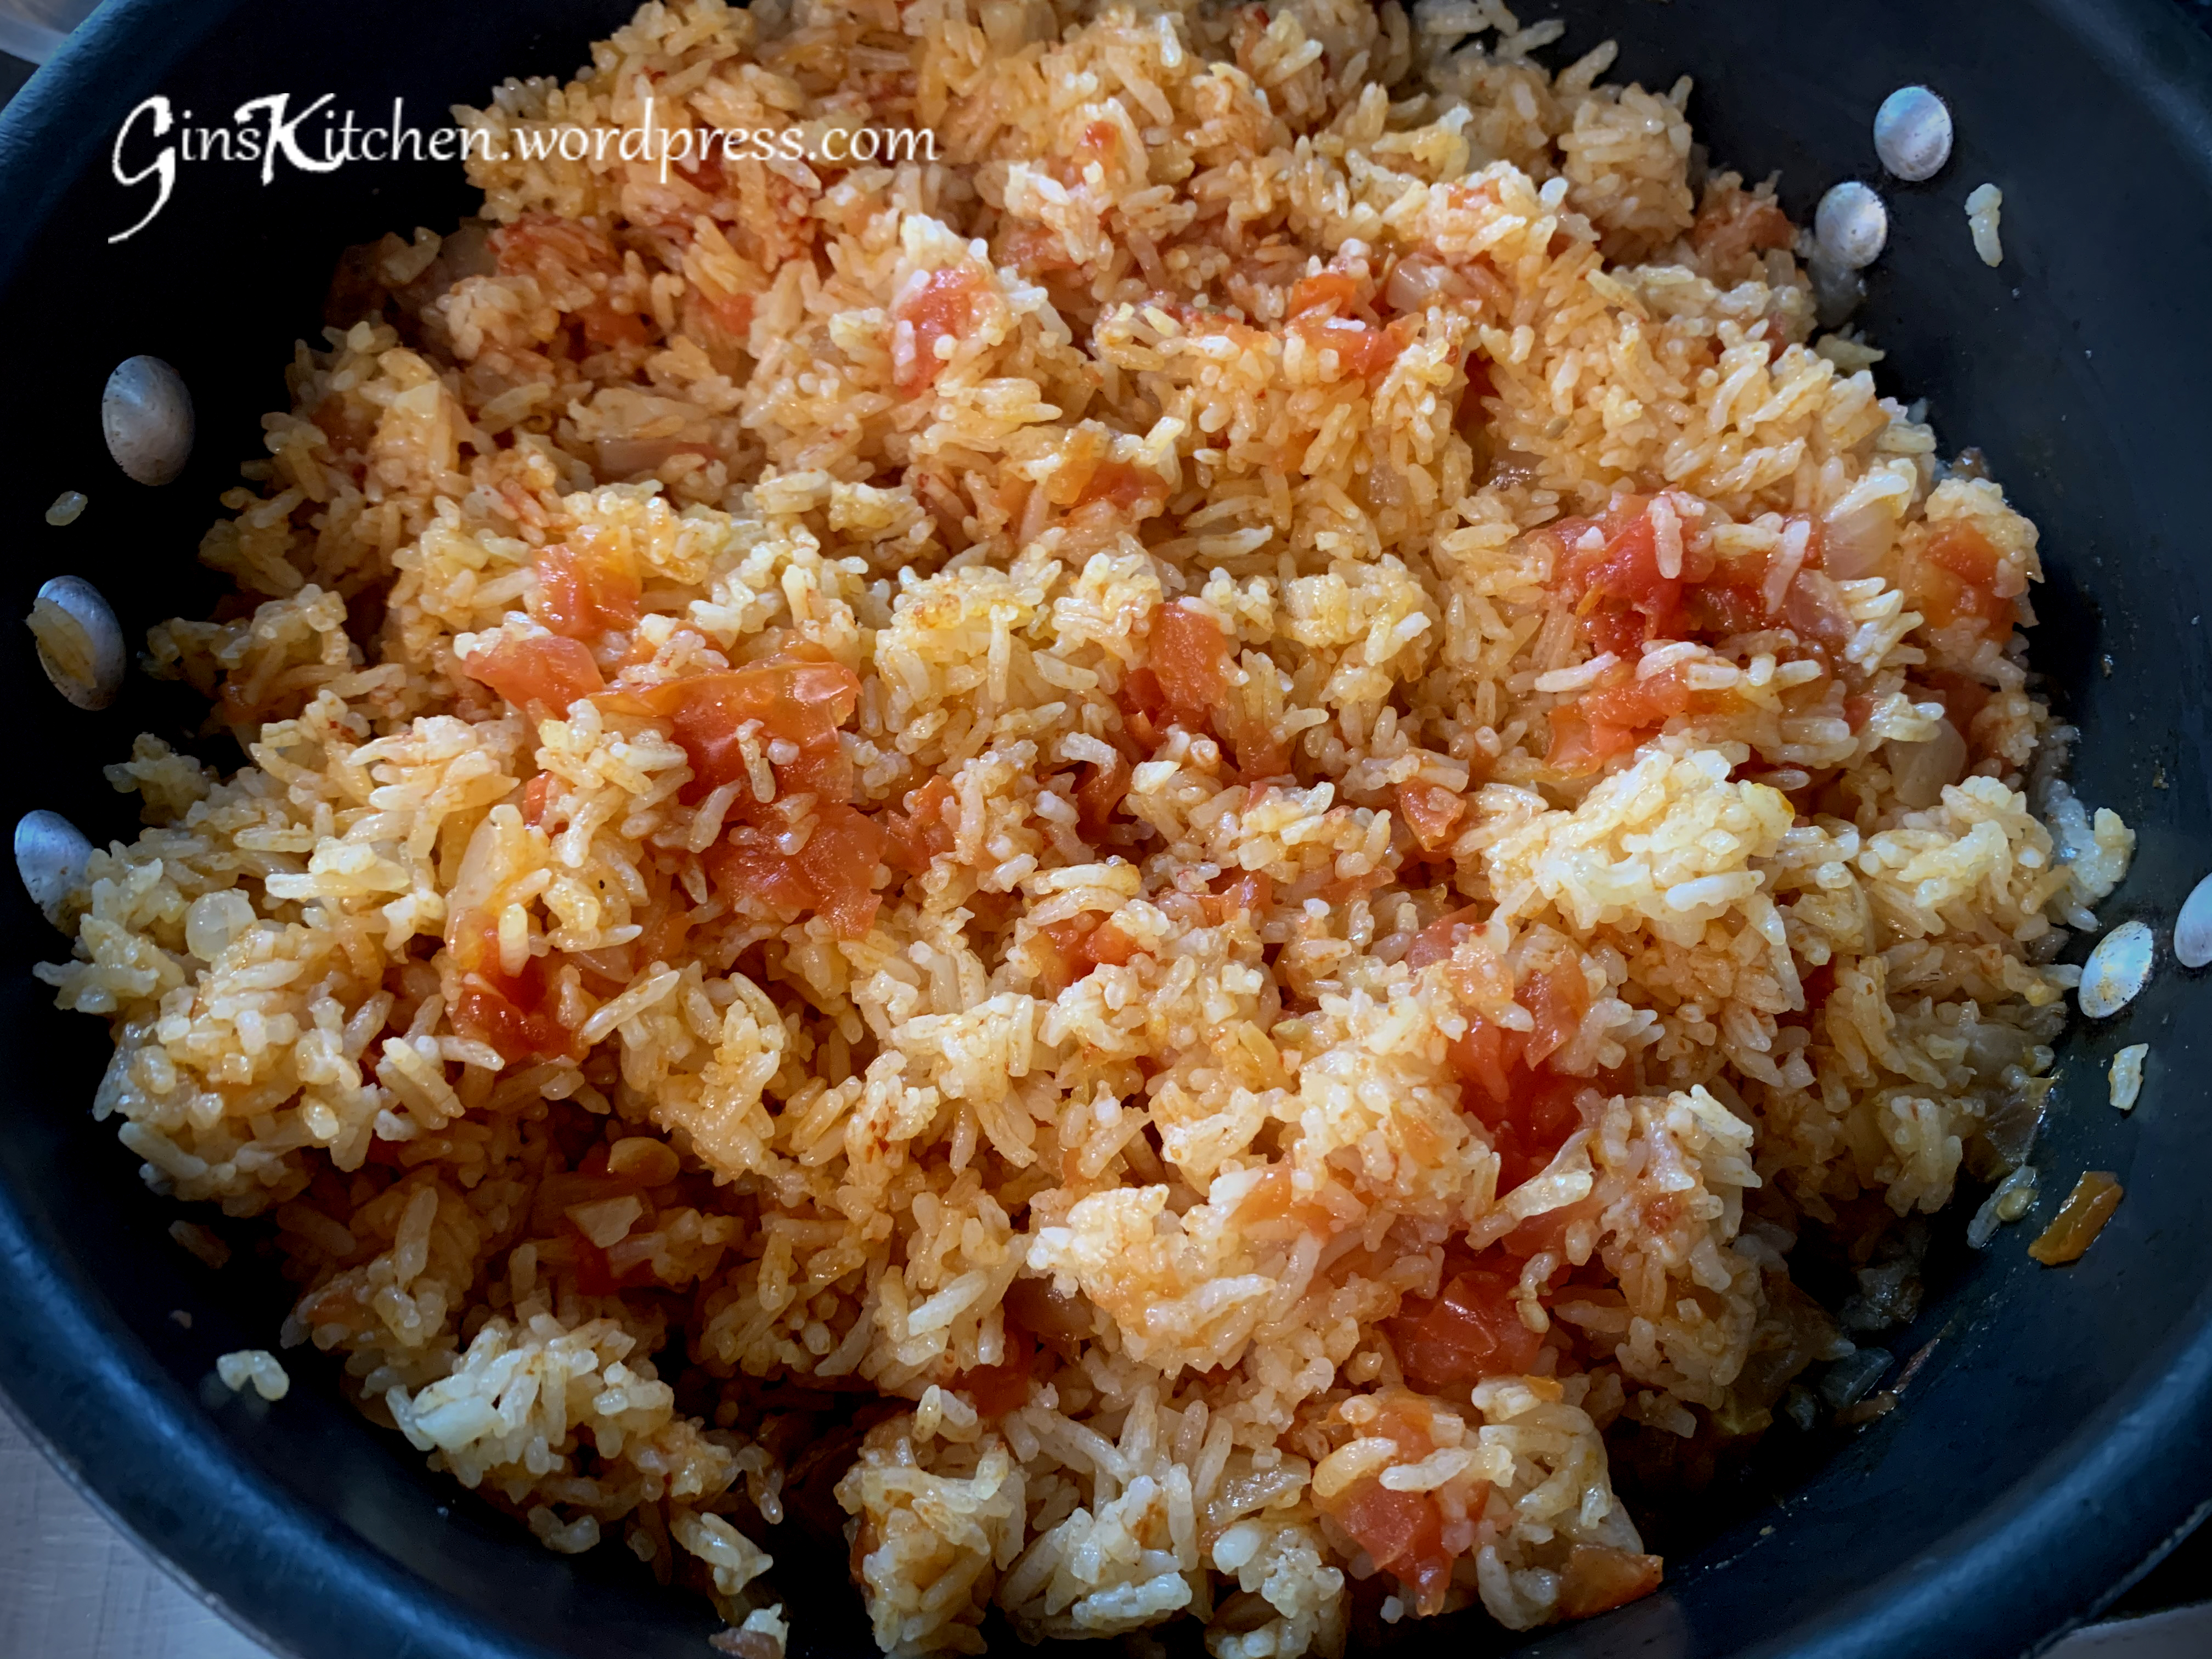
Just because my family loves Mexican food, I came across with this Pork Chile Verde recipe on seriouseats.com using a pressure cooker.  Simply add some homemade Mexican rice (recipe here), some beans and/or tortillas as your sides, and you will have a pretty satisfying meal.

Ingredients:

4 poundsPork shoulder (Cut into chunks)
350gTomatillos (quartered, papery husks removed)
300gPoblano peppers (about 2 peppers, chopped, seeds and stems discarded)
170gAnaheim peppers (about 2 peppers, chopped, seeds and stems discarded)
120gJalapeno chilies (about 2 medium peppers, chopped, stems discarded, seeds retained)
1 mediumWhite onion (chopped)
8Garlic cloves (peeled)
6gWhole cumin seed (toasted and ground)
12gKosher salt
1 TbspAsian fish sauce
 Fresh cilantro for garnish
ingredients

Directions:

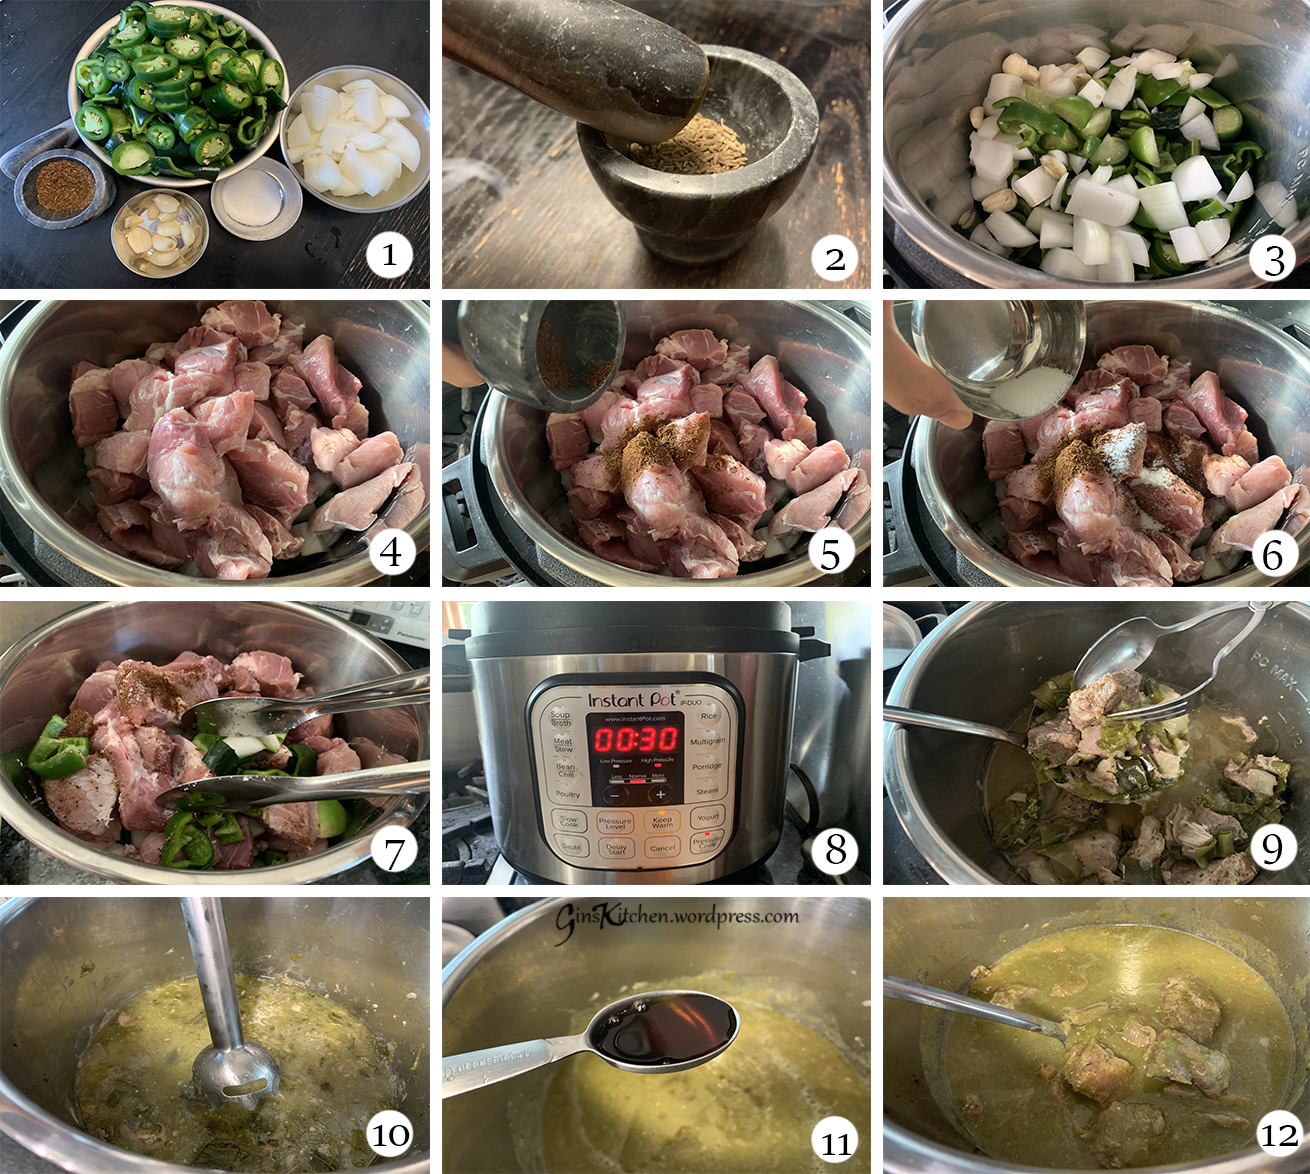
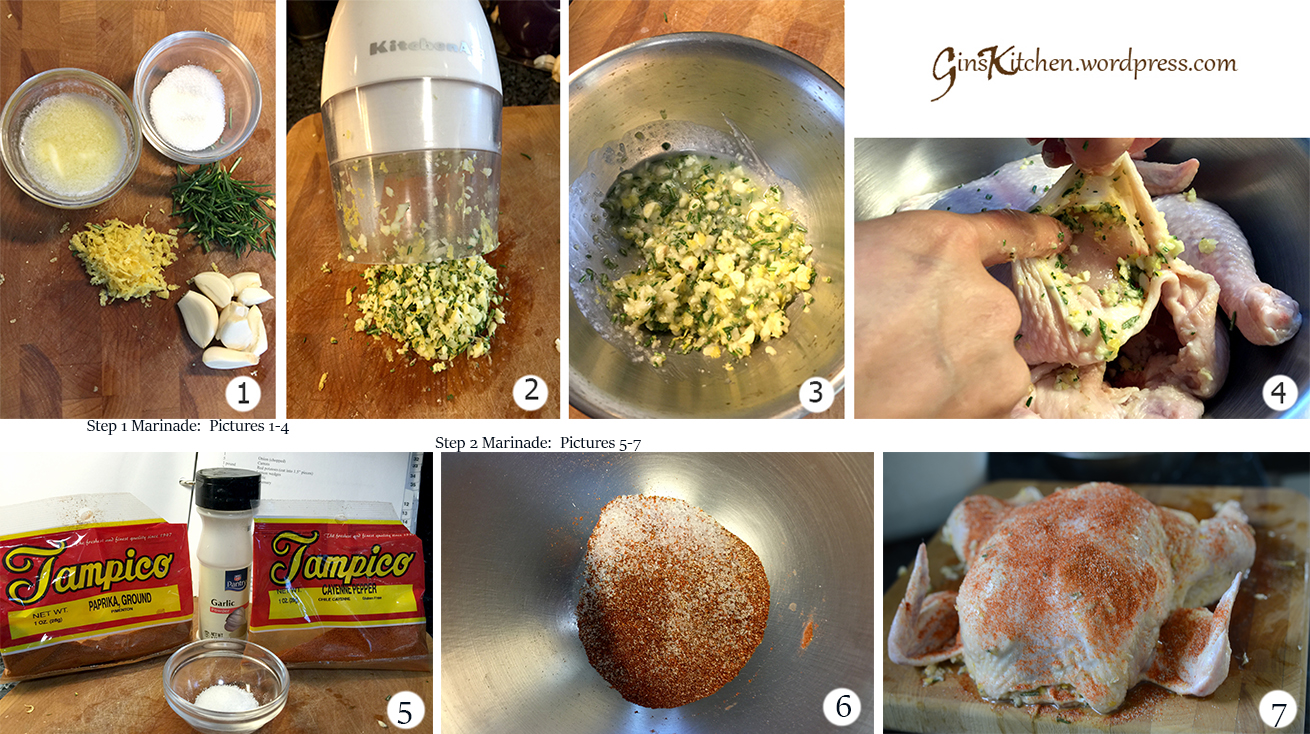
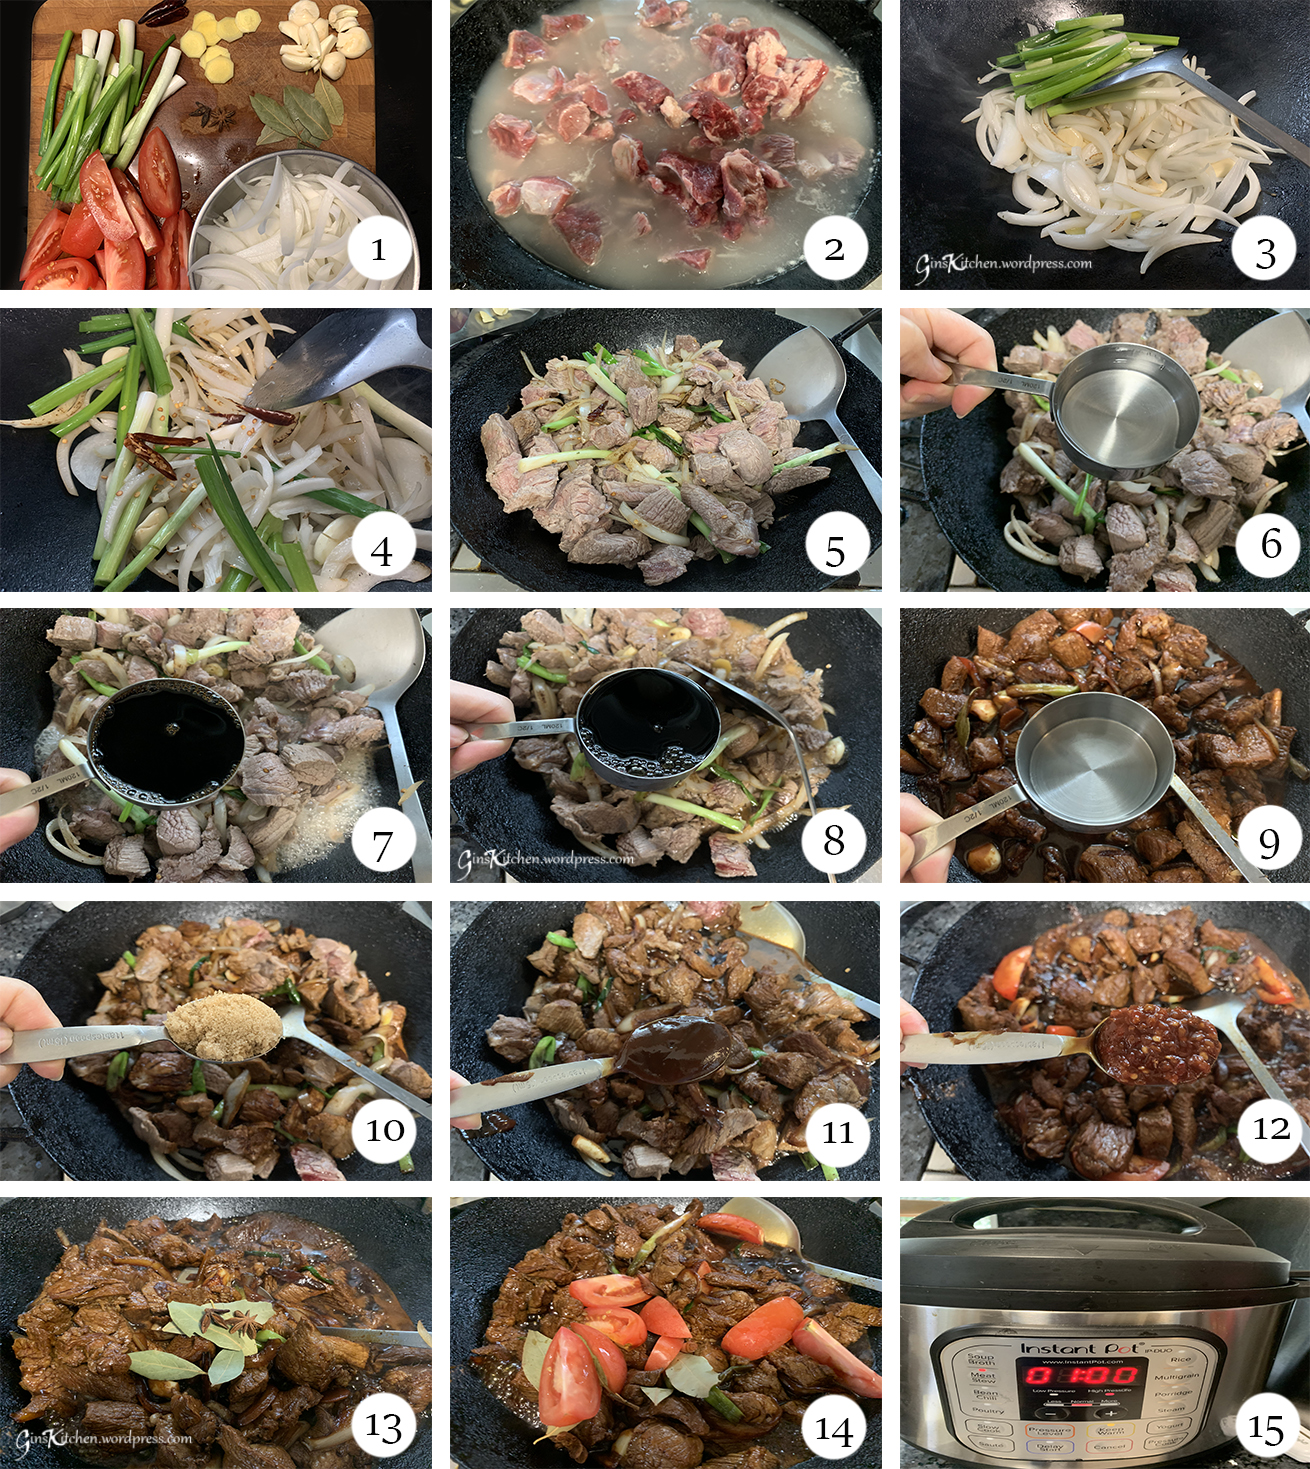
  1. Roughly chop all peppers, remember to keep the Jalapeno chili seeds.  Chop onion and peel garlic.  (Picture 1)
  2. Toast 6g of whole cumin seeds and then grind them with a mortar and pestle.  (Picture 2)
  3. Put all of the vegetables into a pressure cooker, then put meat on top.  (Pictures 3 and 4)
  4. Add ground cumin and salt to the pressure cooker, then use tongs to stir everything together.  (Pictures 5-7)
  5. Cover the lid and cook at high pressure for 30 minutes.  Turn the sealing vault to the “sealing” position.  (Picture 8)
  6. After 30 minutes, do a quick release of the pressure.
  7. Remove pork with tongs to a bowl and set aside.  (Picture 9)
  8. Use an immersion blender to blend the vegetables to a smooth puree.  (Picture 10)
  9. Add in a tablespoon of Asian fish sauce.  (Picture 11)
  10. Return pork to the pot.  (Picture 12)
  11. When serving, add a good amount of chopped cilantro.
collages

I had read some reviews about the vegetables being burned at the bottom of the pot.  The pressure cooker I’m using is an electric pressure cooker, so this problem will never happen.  If you have a traditional stovetop pressure cooker, you may want to test it out by adding a little water to the pot.

Tacos
chili verde final 2

Mexican Rice


Mexican rice 2

Rice is typically eaten to supplement meals in Asia.  I grew up eating rice almost every day when I lived in Hong Kong.  A meal without rice just feels incomplete – like something was missing.

Mexican food is not popular in Hong Kong, I never had Mexican food until I moved to Los Angeles.  I started cooking Mexican rice when one of my Hispanic co-workers gave me a recipe.  Now, whenever I make Pork Chili Verde (recipe here), my children always demand a pot of Mexican rice.  It’s not hard to make at all but it did take me several tries to get the correct water amount.  There are a lot of great recipes on the internet, but I’m recording this for my daughters because we use Jasmine rice in our household.

Ingredients:

3 cupsLong grain rice / Jasmine rice
3 cupsWater
2 mediumTomatoes
150gWhite onion
2 TbspTomato paste
2 tspMinced garlic
2 cubes (10g each)Knorr Chicken bouillon
½ tspSalt

Directions:

  1. Chop tomatoes and onion, set aside.  (Pictures 1 & 2)
  2. Dissolve 2 cubes of chicken bouillon in 3 cups of water. (Picture 3)
  3. Add chopped tomatoes to the chicken broth.  (Picture 4)
  4. Heat a tablespoon of oil in a large saucepan over medium heat, add minced garlic and onion.  Cook until onion is slightly brown.  (Pictures 5 & 6)
  5. Add rice in to the pan and stir for about 2 minutes.  (Picture 7)
  6. Add 2 tablespoons of tomato paste and stir well.  (Picture 8)
  7. Pour the chicken broth with chopped tomatoes to the pot and add 1/2 teaspoon of salt.  (Pictures 9 & 10)
  8. When water is boiling, cover the rice and turn fire to low, cook for 20 minutes.  (Picture 11)
  9. After 20 minutes, turn off fire and leave the pot covered for about 10 minutes.
  10. Use a fork to loosen the rice.  (Picture 12)
collages
Tacos

Dutch Oven Chicken with Lemon, Garlic and Rosemary


IMG_E8458

Last summer, I posted a recipe of this chicken cooked in a pressure cooker and promised to post a recipe using a Dutch Oven.   Every time I made this chicken, either one wing or a drumstick was already eaten by my family before I took out my camera to shoot a picture for my blog.   I have to say this is one of my family’s favorite dishes.

I like to use a Dutch Oven to bake the chicken as it keeps the meat very moist and tender, and it allows me to cook the potatoes and carrots together.  Once everything is cooked, I have both a meat and a vegetable dish to serve.

The chicken is best to be marinaded overnight.  It may take some time to prep, but the work is easy after you put the pot in the oven.  Some people may not like rosemary which can be substituted with other herbs or simply be omitted.

Ingredients:

1 (3-4 pounds)Whole roasting chicken
2 TbspButter (melted)
2 TbspLemon zest
2 TbspRosemary (chopped)
3 TbspMinced Garlic
3 tspSalt

Spices for Chicken Skin:

1 tspChili powder
2 tspPaprika
2 tspGarlic powder
1 tspSalt

Vegetables:

1White onion (chopped)
5Medium size carrots (cut)
1 poundRed potatoes (cut into cubes)
2/3 tspSeason salt (or salt and pepper)

Ingredients for Gravy:

2 cupLow sodium chicken broth
2 TbspCorn starch
2 TbspCooking wine/water
 Salt to taste

Chicken Marinade:

  1. Clean the chicken and pat dry.
  2. Melt butter in a microwave and prepare all herbs.  (picture 1)
  3. Use a chopper to chop garlic, rosemary and lemon zest together.  (picture 2)
  4. Mix butter, salt and herb mixture in a container.  (picture 3)
  5. Rub herb mixture evenly underneath the chicken skin and cavity.  (picture 4)
  6. Cover with cling wrap and put the chicken in the fridge overnight.
  7. Combine all spices for chicken skin in a bowl.  (pictures 5 & 6)
  8. Remove chicken from the fridge and sprinkle the skin evenly with the spice mixture right before cooking it.  (picture 7)
collages 1

Directions:

  1. Preheat oven to 350 °F.
  2. In a large Dutch oven, heat 3 tablespoons of oil with a sprig of rosemary and 2 garlic cloves.  Brown the chicken until all sides are evenly golden brown. (pictures 8 & 9)
  3. Cut potatoes, carrots and onion into cubes, season with season salt. (picture 10)
  4. Add potatoes, carrots and onion to the Dutch oven, place them around the chicken. Chicken breast should be facing up before putting it in the oven. (picture 11)
  5. Cover with lid and transfer the Dutch Oven to the preheated oven. Bake for an hour or until the thermometer registers 165 degrees Fahrenheit when inserted in the thickest part of breast. (picture 12)
  6. Transfer the chicken to a serving dish and let it rest for 20 minutes before carving and transfer vegetables from the Dutch Oven to a big container. (picture 13)
Untitled-1
IMG_E8455

To make gravy:

  1. Reserve the juice from the Dutch Oven and skim the fat from the top.  Place the Dutch Oven on stove top on medium heat.  Add 2 cups of chicken broth.  (picture A)
  2. Dissolve 2 tablespoons of cornstarch in 2 tbsp of water/cooking wine.  Pour the cornstarch slurry into the pot and use a spoon or whisk to mix (don’t pour in all cornstarch slurry, if gravy is still thin, add more in until it’s slightly thickened.)  (picture B)
  3. Transfer gravy to a sauce boat and serve hot. (picture C)
Gravy

Mango Mousse


13

Since we all are still facing this COVID-19 pandemic, many of us reached out to help each other – younger/stronger people have been helping older people with groceries and other necessities.  When friends couldn’t find masks, hand sanitizer, toilet paper, disinfection wipes or rice, as long as one mentioned it in a group chat, everyone jumped in to donate.  This coronavirus outbreak is hard to handle, but tough times always reveal true friends.  There are so many nice people around us, and even strangers will give us a hand sometimes.  When I mentioned on FB that I had to sew my own masks, a stranger in Asia (through a private group I joined) offered to mail me two free boxes.  I’m so touched by all the nice people out there!

The same goes for my friends in Los Angeles, they always dropped off fruits/foods whenever they went to the market.  In the stack I received last week, I found two Manila mangoes so I decided to make my favorite mango mousse dessert.

Ingredients:

135gMango puree (1 Manila mango)
1 wholeManila mango (cubed)
2 TbspCane sugar
125gHeavy whipping cream
1 tspKnox gelatin
2 TbspWater
OptionalMint (for garnish)

Directions:

  1. Put 1 teaspoon of gelatin in a small bowl.  Dissolve gelatin with 1 tablespoon of room temperature water, then add the 2nd tablespoon of water (HOT water) until gelatin is completely dissolved.  (Pictures 1-3).
  2. Peel and pit 1 ripe mango (135g) and cut into pieces.  In a food processor, puree mango and gelatin together on high speed.  (Pictures 4 & 5)
  3. In a stand mixer, add 2 tablespoons of sugar and 125g heavy cream and whip on high speed until soft peaks form.  (Picture 6)
  4. Slowly add puree into the whipped cream, fold it into the cream until completely mixed. (Pictures 7 & 8)
  5. Pour into individual portion cups and refrigerate for 2 hours to set.
  6. Peel and pit the 2nd mango, dice the mango and put on top of the mousse.  Garnish with fresh mint sprig. (Picture 9)
collages

I poured this into 2 big wine glasses.  The ingredients here will make 4 mini cups.

11

Taiwanese Taro, Sweet Potato and Purple Yam Balls (芋圓, 地瓜圓)


Taro balls

The Chinese name for these balls are 芋圓 “Taro Balls”, but they could be made from taro, sweet potato and purple yam.  You will find the texture of these balls slightly different, as sweet potato balls have an elastic texture.  The main reason is because sweet potatoes contain more liquid and need more tapioca flour to form the dough while kneading (more flour means higher elasticity).  In order to make these balls a little more chewy, I increased the water amount to make the dough more wet and add more flour during the kneading process.  Play around with it and you will get to the texture you like.

Ingredients:

Taro BallsPurple Yam BallsSweet Potato Balls
Taro:100gPurple yam:100gSweet potato:100g
Tapioca flour:55g*Tapioca flour:55g*Tapioca flour:55g*
Boiling water:40gBoiling water:40gBoiling water:25g
Cane sugar:20gCane sugar:20gCane sugar:20g

* Plus extra tapioca flour for kneading (this will give the elasticity to the balls).

Directions:

  1. Measure flour in 3 separate bowls (100g each) and set aside.
  2. Slice taro, purple yam and sweet potato, put them in separate containers and then steam for 20 minutes until soft.
  3. Bring a pot of water to a boil.
  4. Start with one type of root vegetable first.  Pour 40g of boiling water into the first bowl of flour and let it sit for 30 seconds.   (Picture 1)
  5. Mix the flour and water and then add purple yam.  Use a fork to mix yam and flour (be careful, it may be very hot).  (Picture 2)
  6. Transfer the yam mixture to a clean floured work surface, use your hand to knead the dough.  (Picture 3)
  7. The dough will be very sticky in the beginning, add tapioca flour while kneading until you get a soft and smooth texture.  (Picture 4)
  8. Cut the dough into small portions.  Take a small portion of dough and roll it out into thin long log (around 1.5cm in diameter).  (Picture 5)
  9. Repeat steps 4-8 to make the taro balls and sweet potato balls (water amount for sweet potato balls is 25g).  (Pictures 6 and 7)
  10. To cook the taro balls, bring a pot of water to a boil then add the balls in.  When the balls float to the top, they are cooked.  (Picture 8)
  11. Use a strainer to take the balls out from the pot and put them in a bowl.  Add sugar to the bowl and mix well.  If you want to freeze some uncooked balls, adjust the sugar amount.  (Picture 9)
taro collages

Note:

Dust the balls with a thin layer of tapioca flour to prevent them from sticking together. Put them in a container and store in the freezer.

6

These balls are best eaten with the (i) taro, coconut and tapioca dessert, (ii) red bean dessert, or (iii) just pure brown sugar water.

To make the red bean tapioca pearls dessert:

200gAdzuki beans
130gBrown sugar
6 cupsWater
1 cupTapioca pearls

Put all ingredients (except the tapioca pearls) in the pressure cooker and cook at high pressure for 60 minutes and then natural release the pressure.

Bring a pot of hot water to a boil, add 1 cup of small tapioca pearls and cook for 10 minutes.  Turn off the heat, cover and let the pearls soak for 10 minutes.  They will become translucent.  Drain and rinse with running water.

Add tapioca pearls and taro balls to a bowl of red bean dessert.  You can eat it hot or cold but the taro balls have to be made fresh without being refrigerated. Otherwise, the texture is very hard.

taro ball 3

To make the brown sugar drink:

2 SlicesFresh ginger
4 CupsWater
1/4 CupBrown sugar

Put all ingredients to a pot and bring to a boil until sugar has dissolved.  Serve taro balls and brown sugar water in a bowl.

Turmeric Sourdough


Turmeric sourdough 3
Tumeric bread cover

Turmeric, known as the Golden Spice, originated in India where it was used as a culinary spice.  It comes from the root of the Curcuma longa plant which is part of the ginger family.  It’s interesting to learn that, before it was commonly used as a spice for food, it was used to as a natural dye for skin and clothing.

Turmeric is high in antioxidants and contains powerful anti-inflammatory properties, which is why it has been used in Chinese medicine for thousands of years.  It is still used for menstrual pain, traumatic injuries, spleen, etc. and also has shown strong evidence of being a preventative herb, helping to ward off many diseases like cancer, diabetes and heart disease.

When I make curry, I usually add a teaspoon of turmeric.  Turmeric has a spicy and bitter flavor, so adding too much turmeric to your dish will probably overtake the flavor.  Today, I made my sourdough by adding just 1/4 teaspoon of turmeric.  The color is beautiful and it doesn’t affect the flavor of my sourdough.

Ingredients (Hydration is about 72%):

Step 1 – Mix and rest for 1 hour

400gBread Flour
30gDark Rye Flour
15gSpelt Flour
¼ tspTurmeric
320gWater

Step 2 – Mix and rest for 30  mins

10gSalt
90gStarter

Directions:

  1. Feed your starter with equal amount of water, flour and starter until it is active and ready to use (you will see a lot of bubbles).  (Picture 1)
  2. In a mixing bowl, combine all flour, turmeric and water.  Cover with a towel or plastic wrap and let it rest in room temperature for 1 hour.  (Pictures 2-3)
  3. After 1 hour, add 90g of starter and 10g of salt.  Use your hand to pinch and fold the dough over and over to get it nice and mixed.  The dough is much more wet and sloppy than it was during the first mix.  Cover the dough and set the timer for 30 minutes.  (Pictures 4 & 5)
  4. Now we are going to stretch and fold the dough – Lift one side of the dough straight up until you meet resistance and fold it across the center.  Turn the bowl 90 degree and perform the stretch-and-folds (the dough is probably very relaxed in the beginning).  Once you have finished all the way around the bowl back to where you started, you have completed one set.  Cover the dough with plastic wrap and set the timer for 30 minutes.  (Pictures 6 & 7)
  5. Repeat Step 4 above three more times.
  6. After the last set of Stretch-And-Fold, lightly fold the dough a couple of times, cover the dough and let it rest for 1-2 hours.
  7. Dust your work surface with flour, and fold the dough a couple of times and shape the dough to a ball.  (Pictures 8-11)
  8. Dust the banneton basket with rice flour, carefully transfer the dough to the basket. Cover with a towel and put it in the refrigerator for 5-10 hours.  (Pictures 12-14)
collages

Baking the bread:

  1. During the dough’s last 45 minutes of final proof, preheat the oven and the cast iron pan at 500F (preheating the pan for at least 45 minutes).  (Picture A)
  2. Remove the basket from the fridge.  Put a piece of parchment paper on top of the banneton basket and put a chopping board on top of the parchment paper. (Picture B)
  3. Now hold the basket and chopping board tight and flip over the banneton basket.  (Picture C)
  4. You can score the dough either a line or a cross.  (Picture D)
  5. Remove the cast iron pan from the oven and slide the dough to the pan.  (Picture E)
  6. Cover the cast iron pan and turn the oven temperature down to 450F and set the timer to bake for 20 minutes.
  7. After 20 minutes, uncover the pan and continue to bake for another 20 minutes.**’
  8. Let the bread cool down completely on a cooling rack before slicing it.

Note:  Each oven is different, you may need to adjust the cooking time for longer.

collages 2
sliced sourdough
Turmeric sourdough 2
Turmeric sourdough slices 2

Chinese Beef Noodle Soup (Instant Pot cooking)


Beef noodle in soup

It has been raining for a few days already.  When the weather is cold and wet, a bowl of hot beef noodle soup sounds very comforting.  Noodles are very popular in China, as there are many ways of cooking noodles.  They can be served with sauce or in soup, as well as pan fried or deep fried until crispy.  My favorite way of cooking noodles is to make it in soup.

Beef stew usually takes at least 2 hours to simmer on the stove top, until tender.  However, if you use a pressure cooker, the cooking time can easily be reduced in half.  I’m using my favorite Instant Pot for this dish. Once everything is in the pressure cooker, I can sit back and relax.

Ingredients for Beef Stew (8 servings):

4 poundsBeef stew meat
6 stalksGreen onion
8 slicesFresh ginger
2 wholeAnise star
10Garlic cloves
1White onion
3Tomatoes
5 leavesBay leaf
2Red chili (either fresh or dried)
3 TbspBrown sugar
¾ CupLight soy sauce
¾ CupDark soy sauce
1 ½ CupRice cooking wine
1 ½ CupWater
2 TbspGround Bean Paste (磨鼓醬)
1-2 TbspChili Bean paste (depending on how spicy you want)

Ingredients for noodle soup (4 servings):

8 BundleShrimp noodles/Rice noodles
8 CupsChicken broth
2 CupsBok Choy
1 tspSalt

Directions for making Beef Stew:

  1. Slice the onion, peel the garlic, halve the red chilies, halve the green onions, slice the ginger root, rinse the star anise and bay leaves.  Set aside (Picture 1)
  2. Bring a large pot of water to a boil, put 4 slices of ginger in the water.  Add beef into the pot and cook for 5 minutes.  Discard the water and rinse beef under running tap water.  Set aside.  (Picture 2)
  3. Add a little oil to the wok, fry onion, garlic, green onion, remaining ginger and red chili. (Pictures 3 & 4)
  4. When onion is a little brown, add in beef and stir for 2 minutes. (Picture 5)
  5. Pour in cooking wine, light soy sauce, dark soy sauce and water. (Pictures 6-9)
  6. Add brown sugar, ground bean paste, chili bean paste, bay leaves and star anise.  (Pictures 10-13)
  7. Add in tomatoes and stir well. (Picture 14)
  8. After the sauce is boiled, transfer everything to the Instant Pot (Pressure Cooker).  Select “Meat Stew” and set timer for 1 hour.  Turn knob to the “sealing” position.  (Picture 15)
  9. When finished cooking, do a quick pressure release before you open the lid.
Beef noodle soup

Directions for making noodles in soup:

Noodles may be cooked from either their fresh or dry forms.  Below is a picture of the dried shrimp noodle.

IMG_7937
  1. Bring a large pot of water to a boil and cook the noodles according to the package instructions.  Remove noodles from the pot and rinse it under cold water.
  2. Add 8 cups of chicken broth to a pot and bring to a boil.  Add a teaspoon of salt for taste.  The broth can be a little light as we are going to add in a few spoons of the sauce from the beef stew.
  3. When the broth is boiling, add bok choy and cook for 1 minute.
  4. Put noodles and broth in a large bowl, lay bok choy on top and add some beef and its sauce to your bowl of noodles.  Garnish with cilantro or green onions.

Jalapeño Cheese Sourdough


_DSC6649a

sourdough
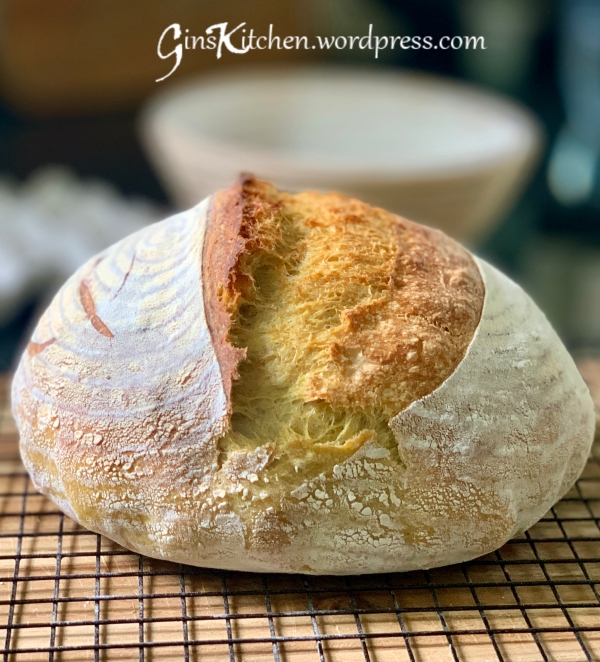
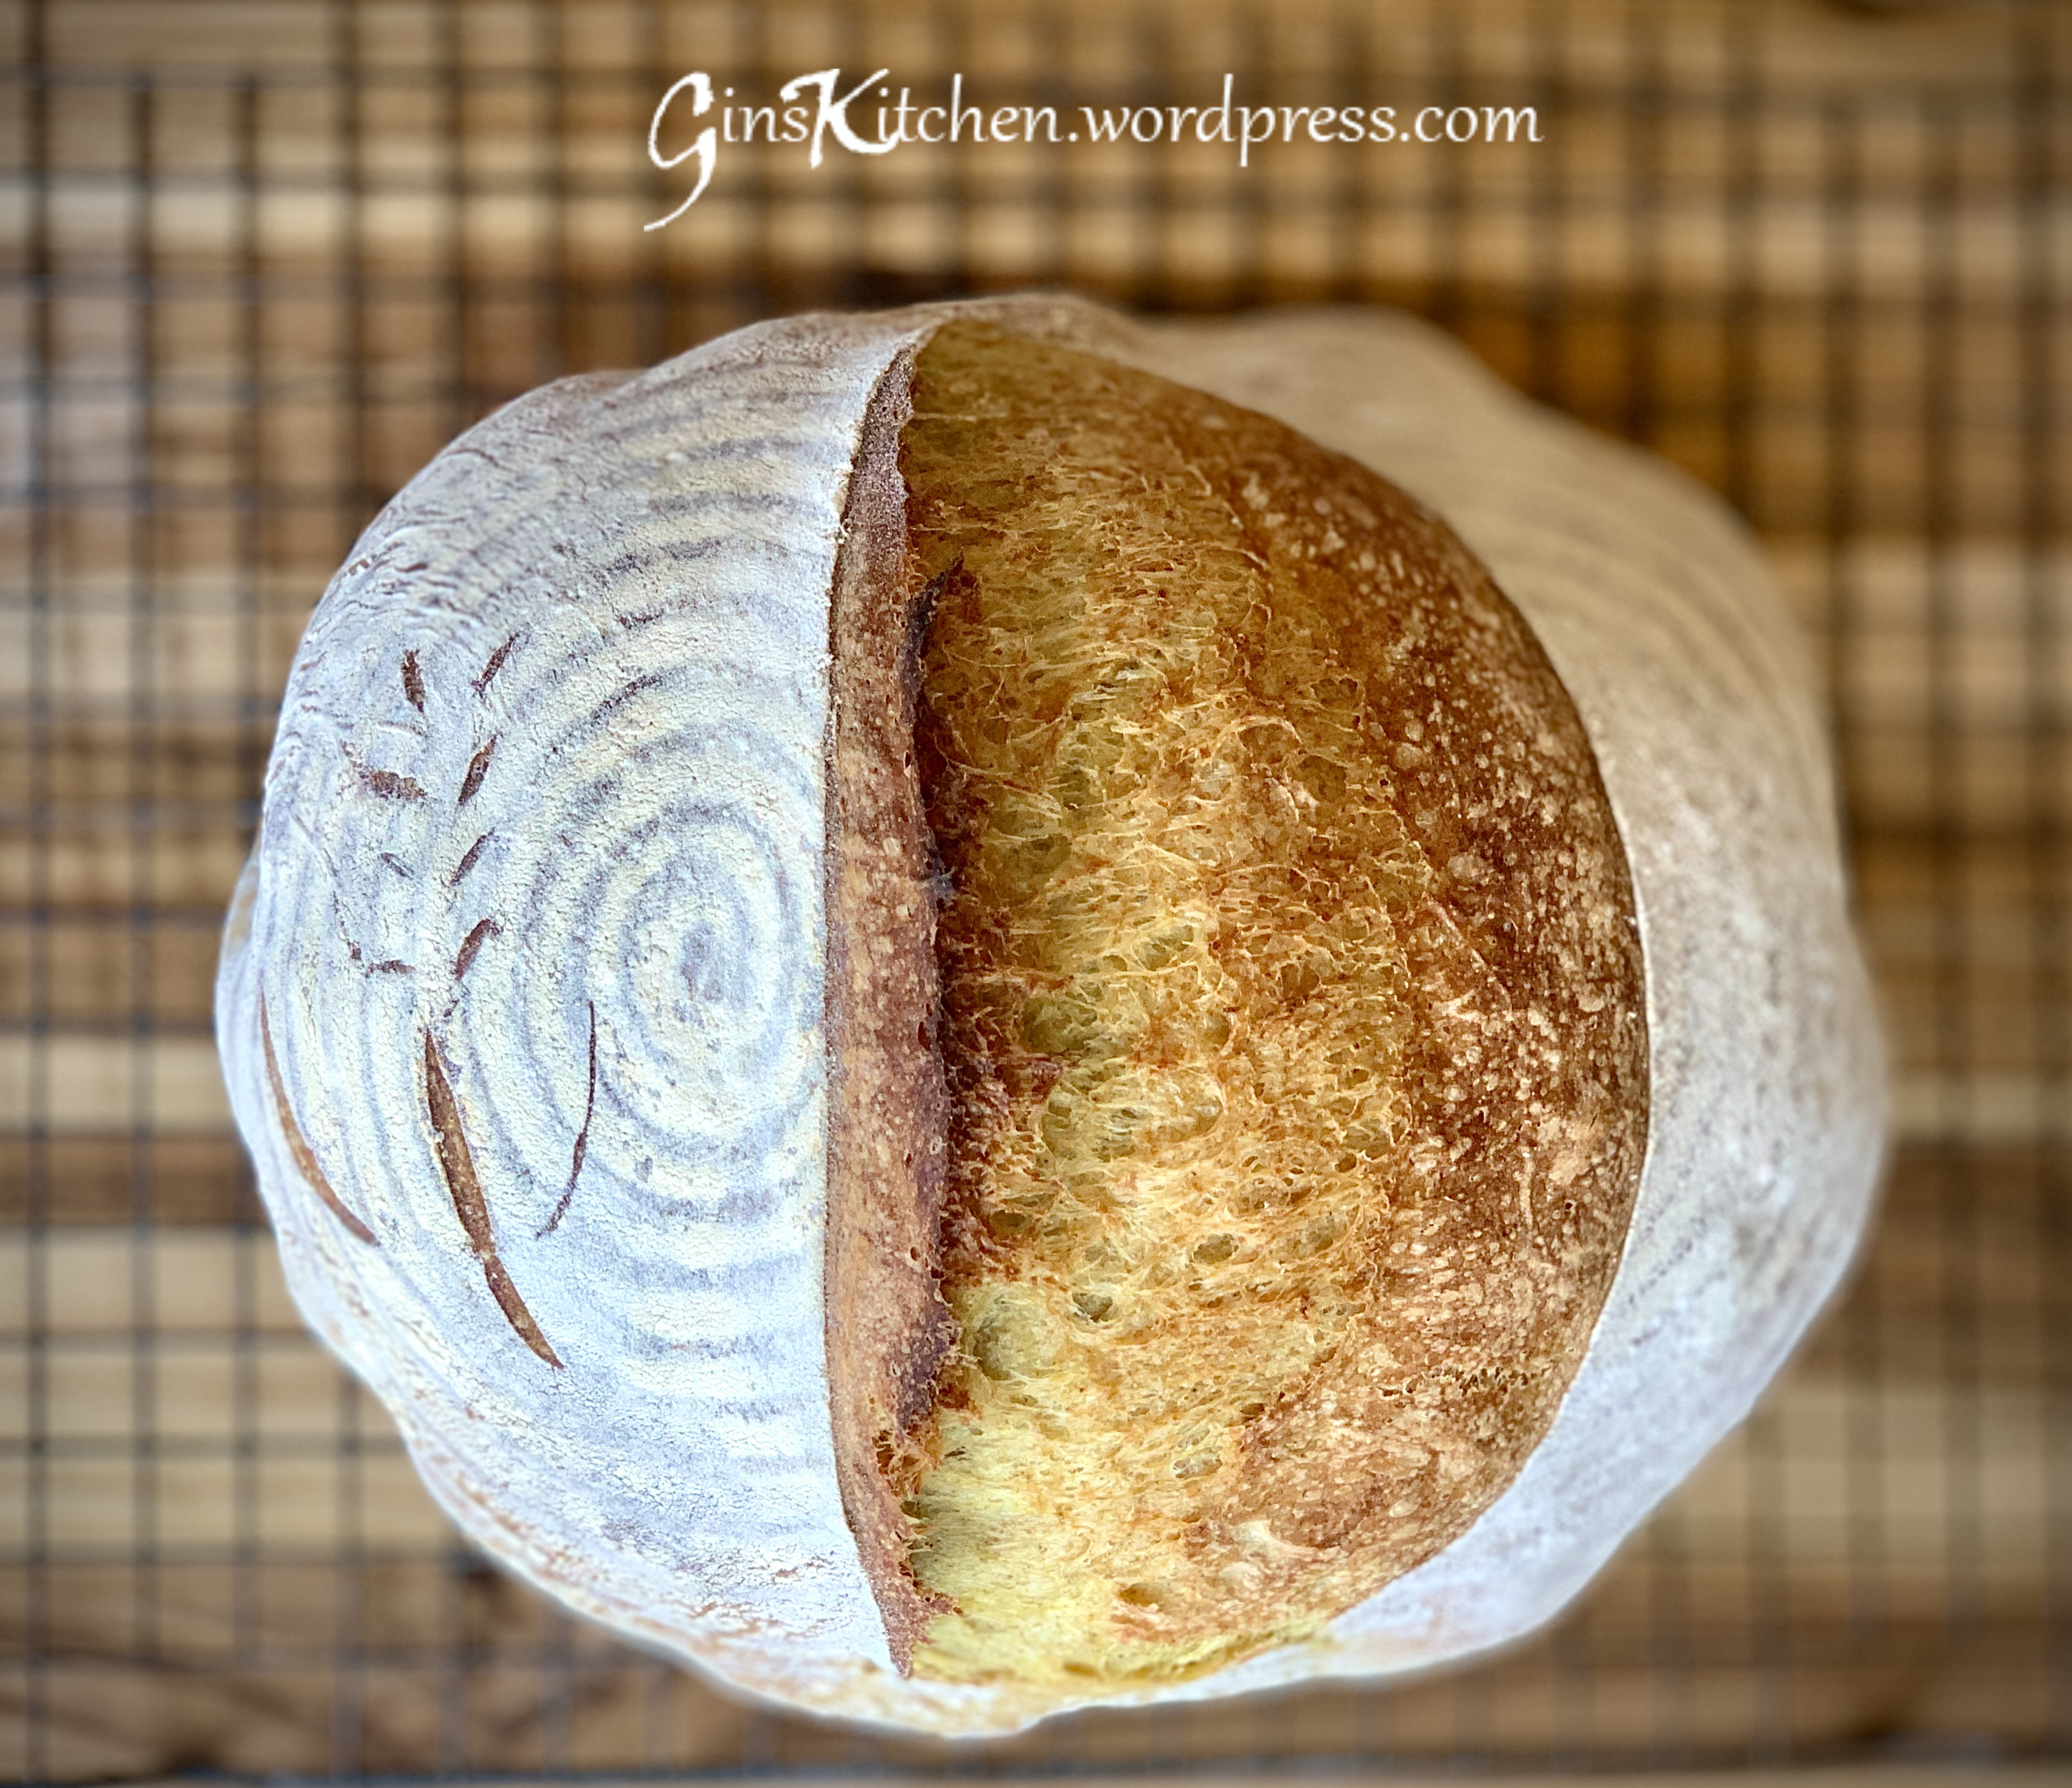
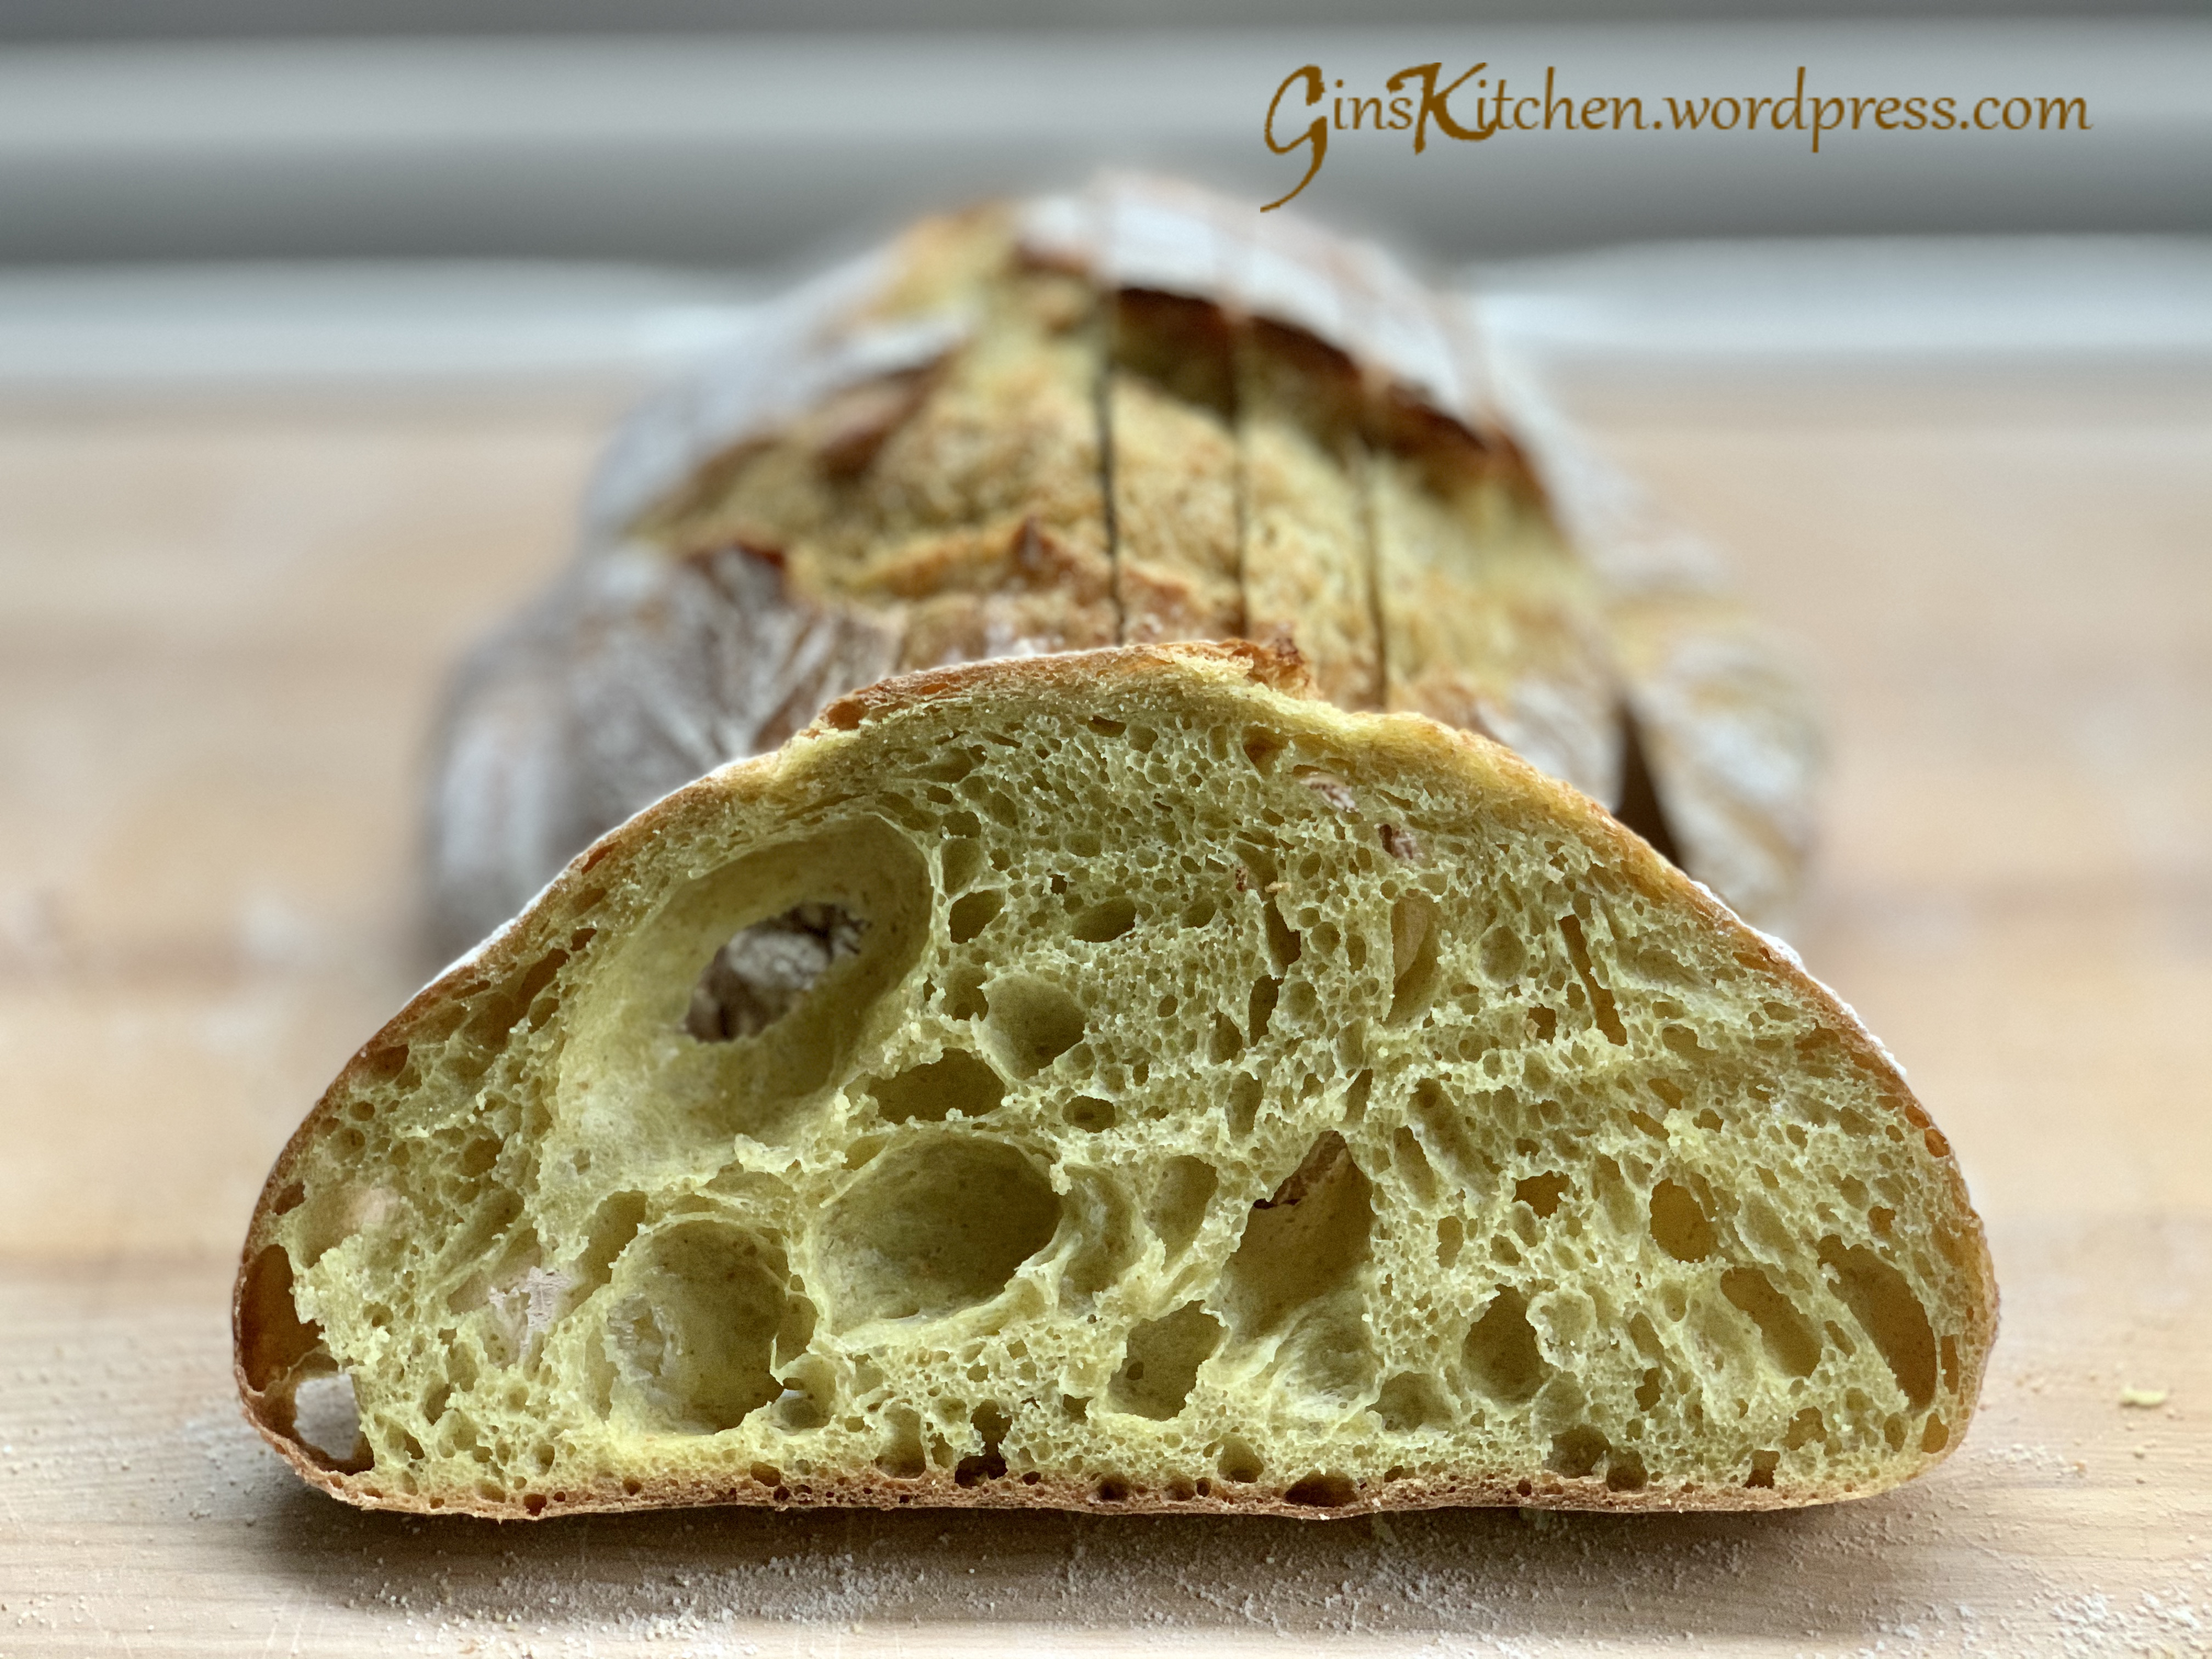
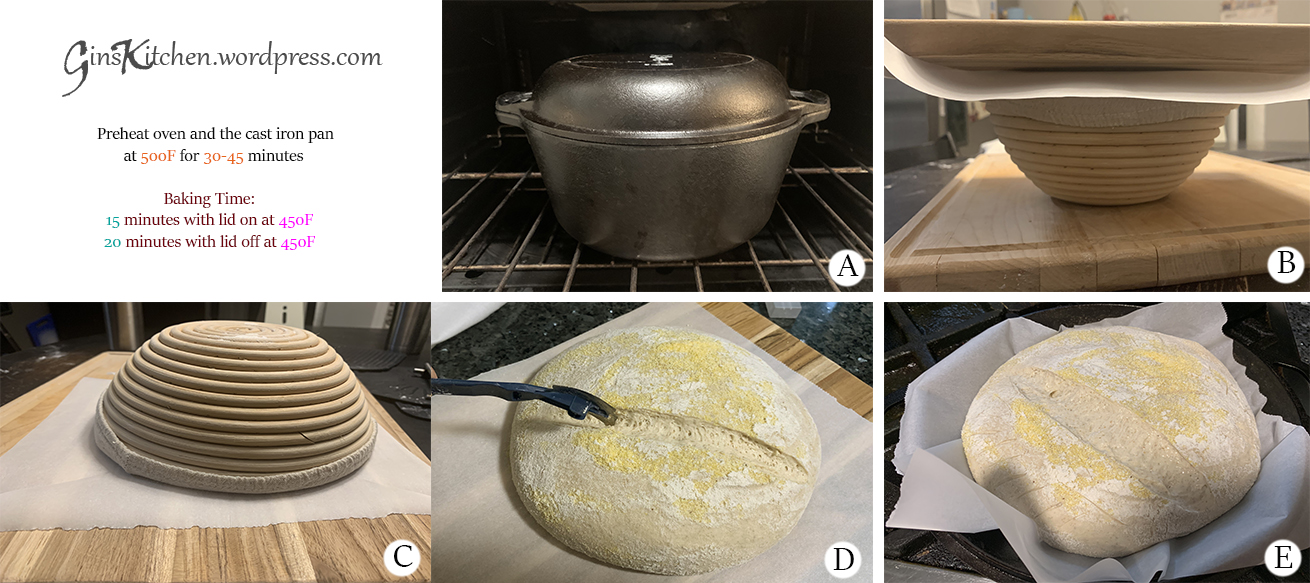
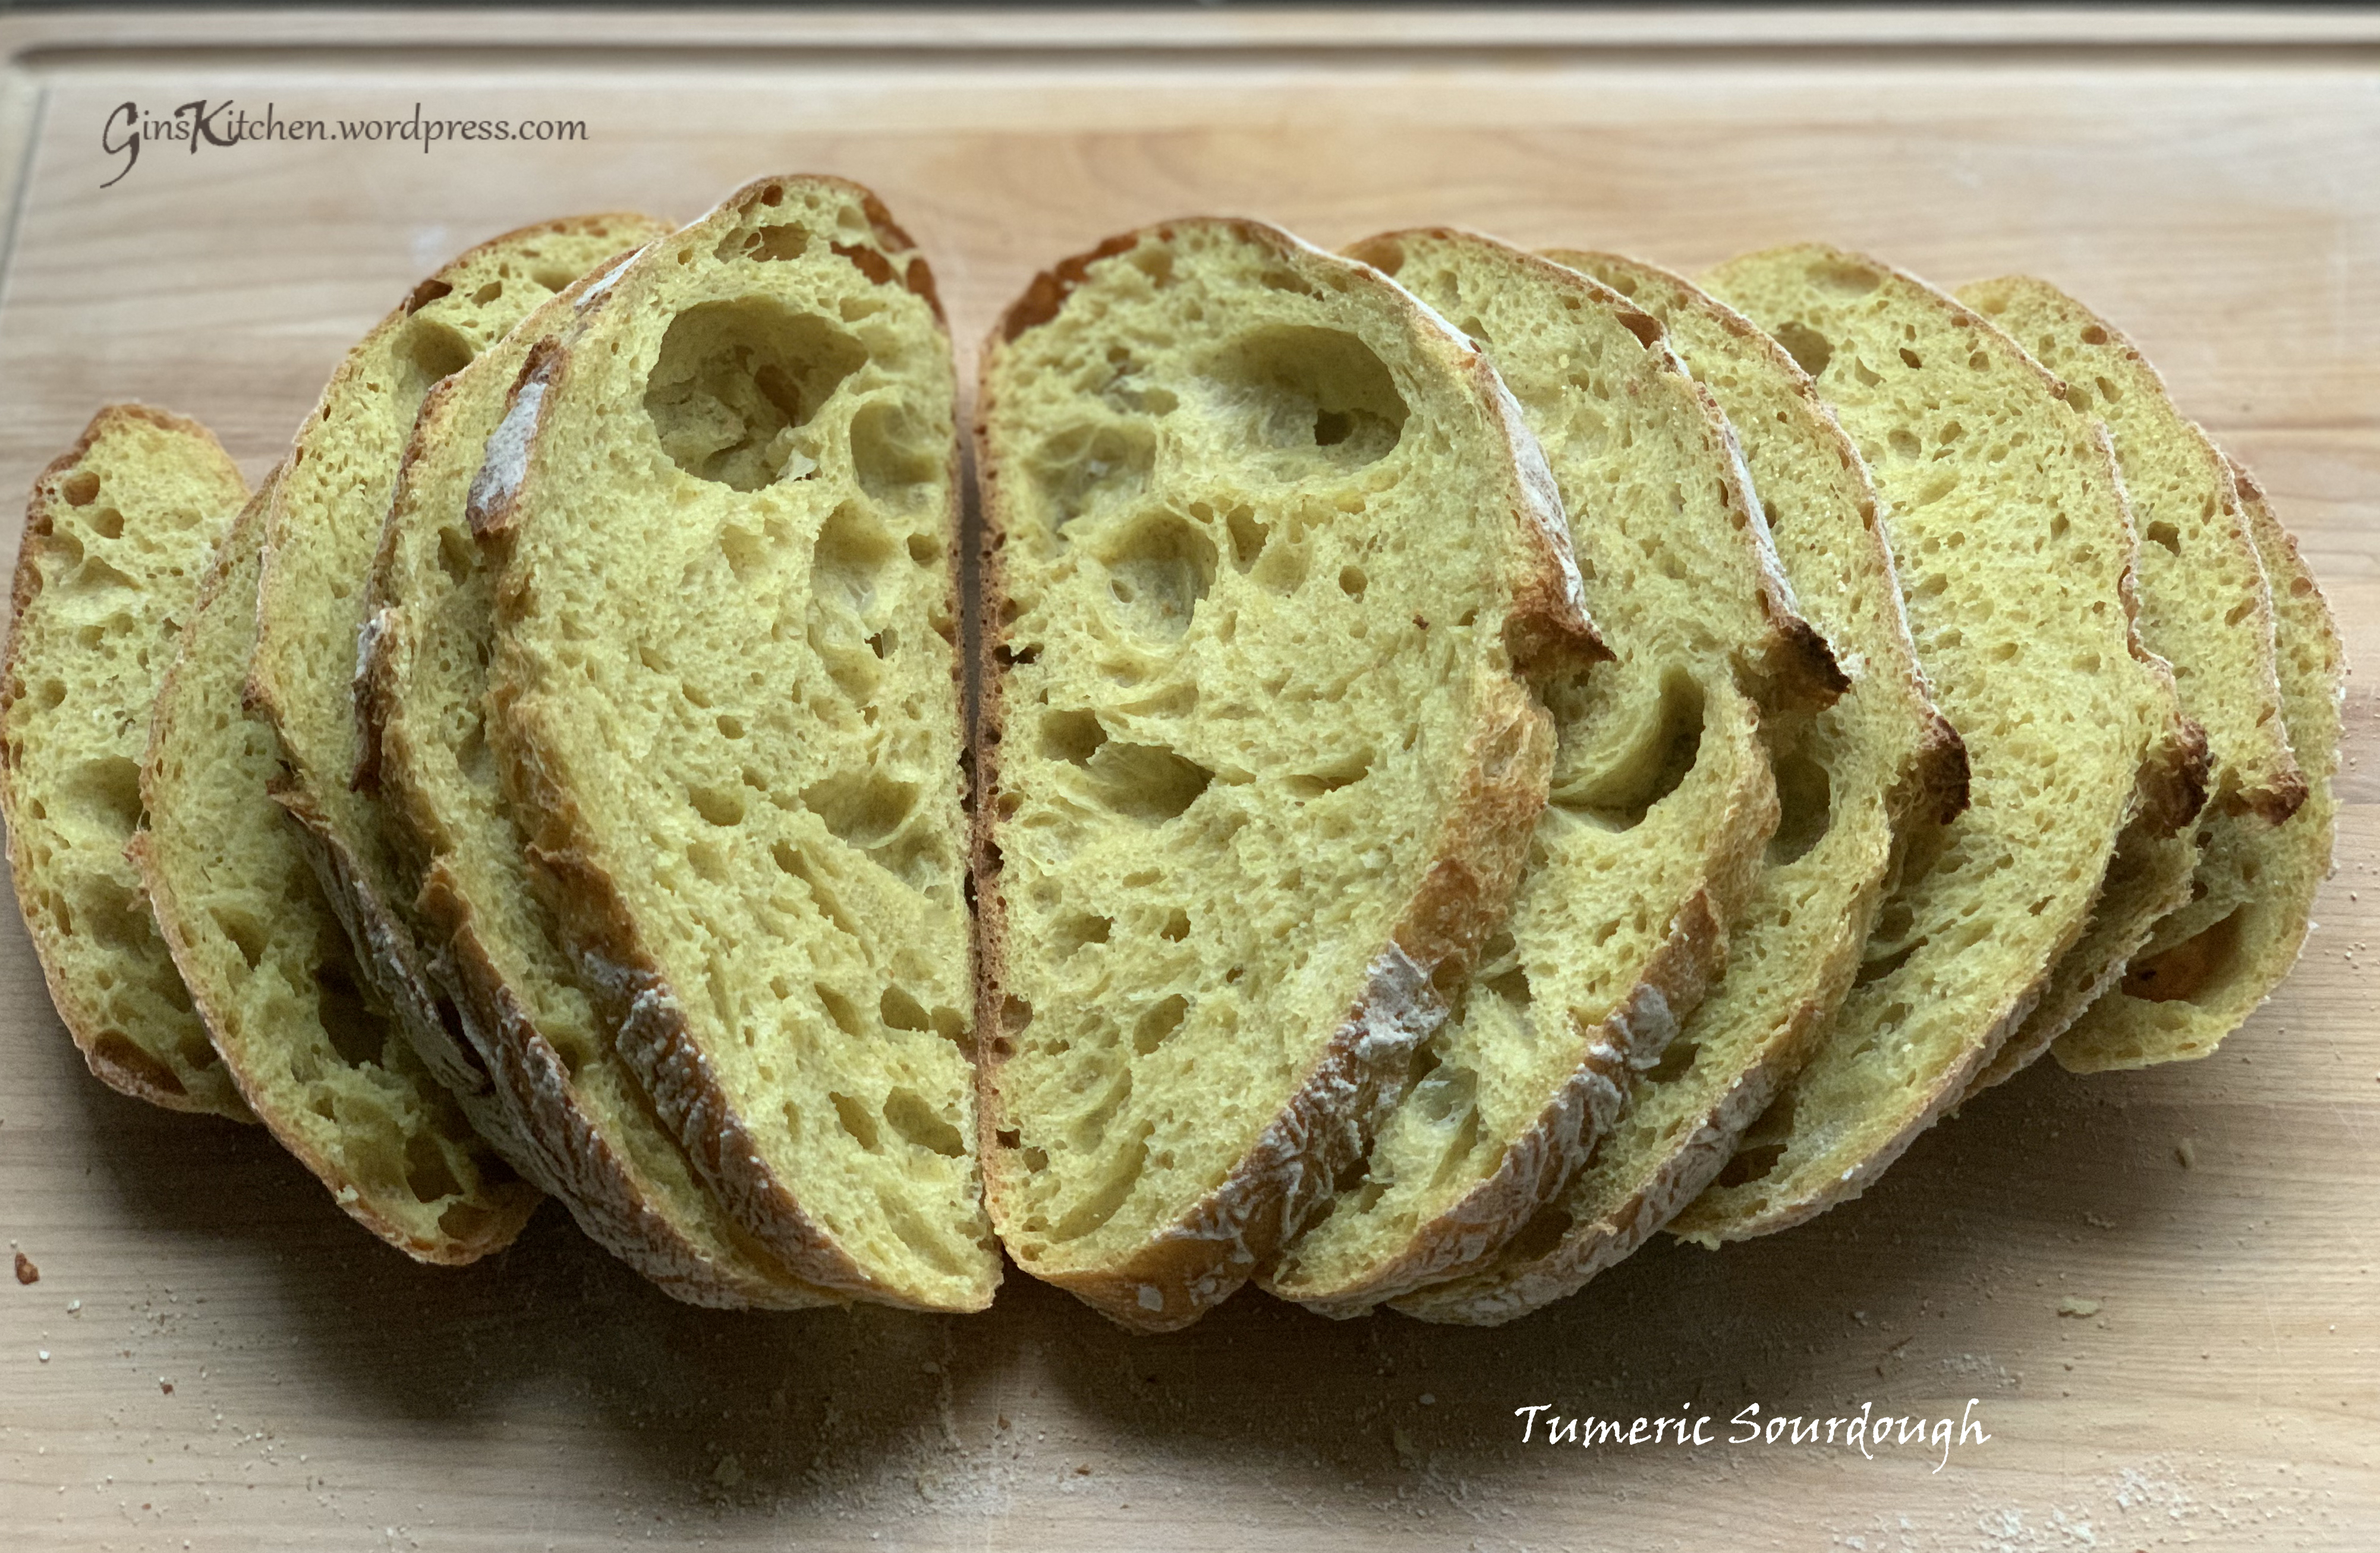
Sourdough is known to be healthier and have a more complex flavor than white bread.  Good sourdough bread should have chewy crust and an airy moist interior characterized by lots of holes.  However, it will take some practice to make a good sourdough.

To make your own sourdough starter, you can follow King Arthur Flour’s page.  I am very lucky to have a sourdough starter passed down to me from my co-worker, who is also my good friend.  She has great enthusiasm for sourdough baking.  She practiced uncountable times to make perfect sourdough and started to be creative by using different ingredients.  Her energy motivated me, but I failed many times to reach today’s result.  This is one recipe that I tested out a few times and adjusted the ingredients to suit my taste.

I’m using the “Stretch-And-Fold” technique for my sourdough as the hydration is 78%.  When the dough is very wet, the traditional kneading method is impossible to handle.  Before you make this bread, make sure you have time staying home to stretch and fold your dough every 30 minutes for 2 hours.

_DSC6636a

Ingredients:

Step 1 – Mix and rest for 1 hour 
445gBread flour
320gWater
Step 2 – Mix and rest for 30 mins 
10gSalt
25gWater
90gStarter

Ingredients to add before final proof:

60gJalapeno
170gCheddar Cheese/Mozzarella Cheese (save some for sprinkling on top of the dough)

Making the Dough:

  1. Feed your starter with equal amount of water, flour and starter until it is active and ready to use (you will see a lot of bubbles).  (Picture 1)
  2. In a mixing bowl, combine 445g of bread flour and 320g of water.  Cover with a towel or plastic wrap and let it rest in room temperature for 1 hour.  (Pictures 2-4)
  3. After 1 hour, add 90g of starter, 10g of salt and 25g of water.  Use your hand to pinch and fold the dough over and over to get it nice and mixed.  The dough is much more wet and sloppy than it was during the first mix.  Cover the dough and set the timer for 30 minutes. (Pictures 5-9)
  4. Now we are going to stretch and fold the dough – Lift one side of the dough straight up until you meet resistance and fold it across the center.  Turn the bowl 90 degree and perform the stretch-and-folds (the dough is probably very relaxed in the beginning).  Once you have finished all the way around the bowl back to where you started, you have completed one set.  Cover the dough with plastic wrap and set the timer for 30 minutes.  (Pictures 10-12)
  5. Repeat Step 4 above three more times.
  6. After the last set of Stretch-And-Fold, lightly fold the dough a couple of times, cover the dough and let it rest for 1-2 hours.
  7. Chop jalapeno in small pieces.  Leave the seeds if you like spicy food.  (Picture 13)
  8. Cut cheese into small chunks.  (Picture 14)
  9. Final proof – Lay 1/2 of the cheese and jalapeno into the middle of your dough, fold the dough and lay the second 1/2 of the cheese jalapeno onto the dough.   Dust your work surface with flour, and carefully transfer the dough and gently shape the dough to a ball.   (Pictures 15-16)
  10. Dust the banneton basket with rice flour.  Lightly flour the surface of the dough and place the dough in the banneton basket (seam side down).  (Pictures 17-18)
  11. Cover the basket with a towel and put it in the refrigerator for 5-10 hours.  Proofing the dough in the fridge will improve the gluten structure.  (Picture 19)
Collages 2a

Baking the bread:

  1. During the dough’s last 45 minutes of final proof, preheat the oven and the cast iron pan at 500F (preheating the pan for at least 45 minutes). (Picture A)
  2. Remove the basket from the fridge.  Put a piece of parchment paper on top of the banneton basket and put a chopping board on top of the parchment paper.  (Picture B)
  3. Now hold the basket and chopping board tight and flip over the banneton basket.  (Picture C)
  4. You can score the dough now and sprinkle shredded cheese on top.  Remove the cast iron pan from the oven and slide the dough to the pan.  (Pictures D and E)
  5. Cover the cast iron pan and turn the oven temperature down to 450F and set the time to bake for 20 minutes.
  6. After 20 minutes, uncover the pan and continue to bake for another 20 minutes.**
  7. Let the bread cool down completely on a cooling rack before slicing it.

Note:  Each oven is different, you may need to adjust the cooking time for longer.

Instructions
_DSC6641a
cheese sourdough

Spanish Seafood Paella


Seafood Paella

My family visited Barcelona in March 2019, which was the 2nd time I went to this beautiful city.  Besides enjoying their delicious tapas, I also love their seafood paella.  If you have a chance to visit Barcelona, make sure you stop by La Mar Salada.  They had the best seafood paella I ever ate!  Although other restaurants have good reviews on their paella, it was too salty for us.   The reason I decided to make this seafood paella at home is because I cannot find one restaurant in California that serves the paella similar to La Mar Salada’s.  I have made this several times already and it reminded my family of Barcelona.  The most important thing in making this dish is to use fresh clams, large shrimp and fresh mussels.

Ingredients:

1 lbsShrimp with head
2 lbsFresh clams
2Squids
10Fresh mussels
4 cupsSpanish Paella rice
3Medium size tomatoes
1Large white onion
4Garlic cloves
6 cupsChicken broth
1.5 cupDry white wine
2 tspSalt
2 tspPaprika
1 tspBrown sugar
1 pinchSaffron
 Clam juice from steaming

Directions:

  1. In a small bowl, soak saffron threads in hot water for 20 minutes.  (Picture 1)
  2. Use a toothpick to remove the digestive vein along the back of the shrimp without peeling off the shell.  (Picture 2)
  3. Scrub the calms with a kitchen toothbrush and set aside.  (Picture 3)
  4. Scrub and debeard mussels, set aside.  (Picture 4)
  5. Slice squid just below the eyes, separating the tentacles from the head and reserve tentacles.  Gently pull out the head, intestines, ink sac, and clear skeleton; discard innards.  Slice body crosswise into rings.  (Picture 5)
  6. Finely chop the white onion. (Picture 6)
  7. Finely chop garlic.  (Picture 7)
  8. Chop tomatoes. (Picture 8)
  9. In a small pot, bring the chicken broth and white wine to a boil.
  10. Fry the onion in a cast iron paella pan until soft.  (Picture 9)
  11. Add in minced garlic and fry for 1 minute.  (Picture 10)
  12. Add in tomatoes.  (Picture 11)
  13. Add sugar, 1 tsp of salt and paprika (Pictures 12-14)
  14. Add saffron threads and its water, stir well and cook until tomatoes are a little pasty.  (Picture 15)
  15. Add the squid and stir for about a minute.  (Picture 16)
  16. Add rice and stir well until all the grains are coated. (Picture 17)
  17. Pour hot stock over the rice, bring to a boil, add the remaining 1 teaspoon of salt to taste.  Move the pan around and rotate it so that rice cooks evenly.  (Picture 18)
  18. Lay shrimp on top after 10 minutes of cooking the rice, and turn them when they become pink on one side.  Continue to cook the rice for another 15 minutes. (Picture 19)
  19. 5 minutes before the rice is ready, steam the mussels and calms.  Reserve the shell fish juice and pour the juice to the rice and cook the rice for 2 additional minutes.
collages

Furikake Chex Mix


Chex Mix
Furikake Chex Mix

Here I am, writing my blog again.  I have already been working remotely for 2 weeks  due to the Coronavirus outbreak.  State announced the “Safer-At-Home” order on March 19, so all of us are now home 24/7.  As of today, USA has 331,234 confirmed cases, this number is rising rapidly.  Besides purchasing necessities at the markets, cleaning, cooking or baking is a good way to kill time.

This Hawaiian-style chex mix is incredibly addictive, it is very crunchy with a combination of sweet and savory taste.  It is perfect to have for parties, gatherings and even for just the family!  Get your youngsters to bake together and have some family quality time!

Ingredients:

2 cupsRice Chex
2 cupsCorn Chex
2 cupsWheat Chex*
2 cupsPretzel
1.5 cupsGardetto’s Garlic Rye chips
170gButter
¼ cupHoney
½ cupBrown sugar
1 TbspSoy sauce
1 TbspWorcestershire sauce
1 bottle (about 2oz)Furikake seaweed

* The Chex mix could be any combination of rice/corn/wheat.  Wheat is more flat and hard in texture.

IMG_7638

Method:

  1. Preheat oven to 250 °F.
  2. Mix dry ingredients like Chex mix, pretzels and garlic rye chips together in a very large bowl.  (Picture 1)
  3. Melt butter in a pot, add in sugar, honey, soy sauce and worcestershire sauce until everything is combined.  (Pictures 2 – 6)
  4. Pour hot sauce mixture into the dry mix and mix well.  (Pictures 7-8)
  5. Add in Furikake seaweed .  (Picture 9)
  6. Line a large baking sheet with alumni foil and drizzle a little oil.  This will prevent the chex from sticking to the pan.  (Picture 10)
  7. Evenly spread the chex mix on to the baking sheet.  (Picture 11)
  8. Bake for 1 hour and 15 mins, turn Chex mix every 20 mins (Picture 12)
Hawaiian Chex Mix

You can store the Chex mix in an air tight container.

Chex Mix in the jar