Traditional Mooncakes 廣式月餅


Mooncakes.jpg

I made these traditional mooncakes two years ago with a 63g mooncake mold.  I’m posting this again with the ingredients for a 75g mold.  Please plan ahead of time as (i) the paste needs to be made and refrigerated (or you can buy the paste from a store), and (ii) the skin normally needs to rest for 2 days after baking to get the best texture,  called “回油” in Chinese.  If you have a sweet tooth, you may want to increase the sugar amount as my recipe is a healthier version – less sugar and less oil.

moon-cakes

Ingredients for Lotus Paste (yield: 17 pieces – 23g each paste ball):

400gLotus seeds
240gSugar
200mlGrape seed oil/Olive oil
2 TbspsHoney
2 TbspsCondense milk
1/4 tspSalt

Directions for making the lotus paste are in my previous mooncake recipe here.

Ingredients for making the dough:  (yield: 17 mooncakes – 52g each dough ball) 

200gAll purpose flour
140gGolden Syrup (recipe courtesy of Christine Ho – here)
1 tspAlkaline water
50g/mlGrape seed oil
  
Fillings: 
900gLotus Paste
9Salted Egg Yolks
1 TbspRose-flavored cooking wine (玫瑰露酒)
1Egg (for egg wash)

Directions: (The dough/filling ratio is 3:7)

  1. Mix salted egg yolks with wine. Wipe dry the yolks with kitchen paper after a few minutes.  Cut each into two halves. Set aside.  (Note: if you don’t want to use cooking wine, you can use salt water to rinse the egg yolks to remove the excess egg whites).
  2. Place golden syrup in a bowl.  Add in alkaline water, stir to combine. Add in oil and mix well.
  3. Add flour into the syrup mixture and combine well. Gently knead the dough till smooth (takes 1~2 mins). Shape it into a round ball and wrap with cling wrap. Leave it in the fridge to rest for at least 2 hours or overnight.
  4. Before making mooncakes, bring the dough to room temperature for 30 mins. Divide dough into 17 equal portions, each weighs 23g.  Roll each portion into a ball shape.  Divide lotus paste into 17 equal portions as well, each weighs 52g, the salted egg yolks are roughly 5g each half.  (Pictures 1-3)
  5. Take a lotus paste ball and poke a hole in the middle with your finger. Place egg yolk inside. (Picture 4).
  6. Flatten each dough into a small disc with a rolling pin. The dough is sticky, I suggest putting a piece of cling wrap on top and roll it out.  (Picture 5)
  7. Wrap the dough around the filling and shape it into a ball. (Picture 6)
  8. Lightly dust the stuffed dough with some flour and lightly dust the mold.  Place the stuffed dough into the mooncake mold.  Tip:  When wrapping the filling, the dough is thicker on the closing end, the thicker side of the dough should go into the mold first as you will get the pattern pressed on this side.  (Picture 7)
  9. Press the handle, then remove the mooncake from the mold.  Dust off any excess flour with a brush.  (Pictures 8-9)
  10. Line the baking sheet with parchment paper and place mooncakes on top.
  11. Preheat oven to 350F. Prepare the egg wash by whisking the egg, sift through a fine sieve.
  12. Lightly spray some water on the mooncakes. (Note: this step prevents the mooncakes from cracking during baking.)   (Picture 10)
  13. Position the rack in the upper third of the oven and bake for 10 mins. Remove from oven and leave to cool for 15mins (Note:  this step helps stabilizing the pattern on top).
  14. After 15 minutes, brush the top with very little egg wash (Note: too much egg wash, the pattern will disappear after baking). Return to oven and change the oven temperature to 325F and continue to bake for another 25-30 mins. (Picture 11)
  15. After baking, the skin doesn’t have the shiny look (picture 12).  Leave mooncakes to cool completely and store in air tight containers. Wait for 2 days before serving, the skin will become soft and shiny, called “回油” in Chinese.
mooncake-steps

This is the clear pattern before baking.

moon-cake-print

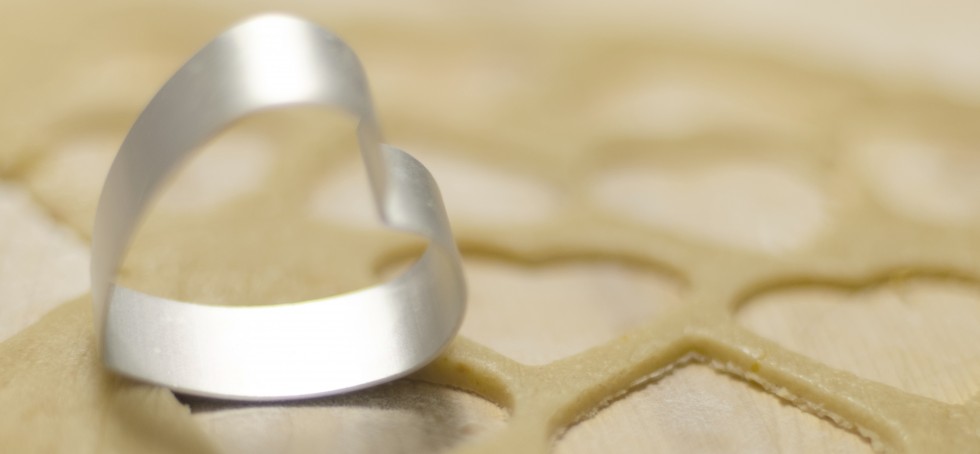
I ordered this customized mooncake mold in Hong Kong.  The disk can be removed for easy cleaning.  I personally do not like anything bigger than 75g or smaller than 63g.  However, you may like the 100g as it’s easier to work with.

hkg_4703

I also bought these containers and bags in Hong Kong.  They look nice and neat when giving them as a gift.hkg_4789

Pistachio Macarons with Pistachio Buttercream Filling


Pistachio Macaroons

Pistachio Macarons

Pistachio macaroons and almond Macaroons

Once you have a good handle on macarons technique, you can make different flavors.  Now these pistachio macarons are my favorite.  I added green food coloring to the macarons for my pictures, but the natural hue color is always healthier.

Choosing the right macaron fillings is important, my suggestion is to have the not-so-sweet fillings since the macaron shells are quite sweet.  For the pistachio macarons, I made the buttercream filling with pistachios which goes very well with the cookies.

Pistachio flour could be hard to find depending on where you live, when I spot the unshelled pistachios at Whole Foods (it’s pricey $29.99 per pound), I bought some and ground them myself with a food processor.  The extra pistachio flour can be used to make pistachio paste.  Below are the recipes for the pistachio macarons, pistachio buttercream filling and pistachio paste.  Hope you will get a chance to make these.

Ingredients for Pistachio Macarons:

100gEgg whites (about 3 eggs)
35gCaster sugar
200gIcing sugar (Powdered sugar)
75gAlmond meal
45gPistachio flour
1 tspCream of tartar
1 dropGreen gel food coloring (optional)

Directions:

  1. Measure almond meal, pistachio flour and powdered sugar. Sift together to remove any clumps, sift twice if possible.  Discard any big clumps. (pictures 1-3)
  2. Weigh out the egg whites into a large stainless mixing bowl. Begin beating the egg whites on low speed then gradually adjust to medium until the egg whites are foamy.  (picture 4)
  3. Add in sugar as you beat.   Increase the speed from medium to high, if necessary. (picture 5)
  4. Add a teaspoon of cream of tartar and beat the meringue to stiff glossy peaks. (picture 6)
  5. Add the food coloring and mix until well blended.  Remove the whisk. (Pictures 7 and 8).
  6. Add about 1/3 of the almond/pistachio/sugar mixture to the egg white meringue. Fold in until no streaks remain. Continue to add the remaining mixture (1/3 of the mixture at a time), fold until you reach the proper batter.   (picture 9)
  7. It should take roughly 50 folds until the mixture is smooth and a very viscous liquid, not runny. Over-mixing the batter, your macarons will be flat and have no foot, under-mixing the batter, your macarons shells would be lumpy.  When you lift the spatula, the batter should drop down smoothly.  (picture 10)
  8. Pour the batter into your prepared piping bag.  You can place the bag into a measuring cup and cuff the bag’s opening over the top, this makes the bag easy to fill hands-free. (Picture 11)
  9. Line baking sheets with parchment paper or silicone liners.  Place a tiny drop of batter at each corner of the baking sheet to secure the parchment paper.  Pipe rows of batter (dollops a little bigger than a quarter) onto the baking sheets, giving them space to spread. (picture 12)
  10. Tap the pan on the counter several times to break any air bubbles (this prevents cracking). The little peak on the top of the macaron should go down after tapping the pan. However, if you still see the little peak, simply wet your finger and gently smooth the bump down. (pictures 13 and 14)
  11. If you want to sprinkle nuts on top, do it now so that they will stick to the top of the shells.
  12. Allow the cookies to rest on a level surface for 30-60 minutes.  Until they are no longer tacky to a light touch.
  13. Preheat your oven to 300F and bake the macarons for 16-20 minutes.
  14. You will see the macarons have lovely feet when they are done correctly. (picture 15)
collage
  • Use a piping bag to pipe your favorite filling to one side of the macaron and top with another half of macaron to form a sandwich.
sandwich

Directions for making Pistachio Paste (unsweeten version):

  1. You only need pistachio flour and water to make the paste.  I processed the nuts in a food processor  when I made the macarons at first.  (picture 1)
  2. Now return the pistachio flour to the food processor, then slowly add a bit of water (water amount depends on how much flour you have, just add a little bit at a time).  Process it until it is smooth and forms a paste.  That is it!!  We have our paste for the buttercream filling.  It’s super easy!  (pictures 2-3)

Ingredients for Pistachio Buttercream:

2Egg yolks
60gGranulated sugar
30mlWater
60gUnsalted butter (softened)
3 tspsPistachio paste

Directions:

  1. In a mixing bowl, whisk the egg yolks until smooth. (Picture 4)
  2. In a small saucepan, combine water and sugar and heat it over medium heat. Stir the mixture until the sugar is completely dissolved. Then bring it to a boil and cook until the syrup reaches 250°F.  Use a candy thermometer to check the temperature. (Picture 5)
  3. Slowly pour the hot syrup into the egg yolks and run the mixer on low. Increase the speed to medium high, and beat the mixture until well combined. You can use the egg yolk/syrup mixture now but I always like to take one more step to set a bowl of mixture over a pot of simmering water.  Keep whisk until the mixture registers 160°F.  Meringue becomes very smooth at this point.  Remove from heat and let cool. (Picture 6)
  4. In a mixing bowl, beat butter until whipped and white.  Add in pistachio paste and food coloring (if desired), continue to beat the cream until well combined.  (Picture 7)
  5. Add in meringue and beat until well bended.  (Picture 8)
  6. Transfer the pistachio cream into a pastry bag and fill the macarons. Pipe the filling to one side of the macaron and top with another half of macaron to form a sandwich.  (Picture 9)
pistachio paste
macaroons 2

Holiday Snowball Cookies


Holiday snowball cookies

My full time job has been keeping me very busy these months but now that the holiday season has approached, I am having a little break with my family on the mountains which means I have time to bake again!  I remember a friend gave me these holiday snowball cookies last year and they tasted sooo good so I searched for the recipe and found it on the ‘Very Best Baking by Nestle’ website.  It was such a simple recipe and didn’t take too much effort.

Ingredients:

1½ cups (3 sticks)Butter (softened)
¾ cupPowdered sugar
1 TbspVanilla extract
½ tspSalt
3 cupsAll purpose flour
1 2/3 cups (10oz pkg)Nestle Toll House Holiday Morsels
½ cupFinely ground almonds
Extra powdered sugar(for sprinkling on top)

Directions:

  1. Preheat oven to 375◦F.
  2. Beat butter, sugar, vanilla extract and salt in a large mixer bowl until creamy.  Gradually beat in flour; stir in morsels and nuts.  Shape level tablespoons of dough into 1 1/4-inch balls.  Place on ungreased baking sheets.
  3. Bake for 10-15 minutes or until cookies are set and lightly browned.  Remove from oven.  Sift powdered sugar over hot cookies on baking sheets.
  4. Cool on baking sheets for 10 minutes; remove to wire racks to cool completely.  Sprinkle with additional powdered sugar, if desired.
snowballs steps
Nestle chocolates

Easter Fondant Cookies


Easter Cookies

I was asked to make these cookies for my son’s Easter party at school.  It took me 5 hours to make 32 cookies but it was quite fun to decorate them.  I chose to use fondant for decoration as the results are beautiful.   Please refer to my Fondant Cake with Strawberry Filling post for the marshallow fondant recipe.  Happy Easter!!

Ingredients for Sugar Cookies:

1 cup (2 sticks)Butter, softened
1 cupSugar
1Large egg
3 cupsAll purpose flour
¼ tspSalt
1 tspVanilla extract

Directions:

  1. Preheat oven to 350°F.  Beat butter and sugar at medium speed with an electric mixer until fluffy.  Add egg and vanilla extract, beat until blended.
  2. Combine flour and salt, gradually add to butter mixture, beat until just blended, don’t over mix it.
  3. Divide dough into 2 equal portions.  Cover and chill for 30 minutes or longer.
  4. Place 1 portion of dough on a lightly floured surface, and roll to 1/8-inch thickness.  Cut with a cookie cutter (I did not have an easter egg cookie cutter, so I cut the dough with a round cookie cutter and shape cookies into an egg shape).  Place cookies on a parchment-lined baking sheet.
  5. Freeze shaped cookies for 10 minutes before baking.
  6. Bake at 350°F for 20 minutes or until edges are lightly browned.  Cool cookies on wire racks.
  7. Roll out fondant and decorate your cookies after they are completely cool.

Related articles

Linzer Cookies


Linzer Cookies

I was asked to make cookies for the Valentine’s day party for my son’s class.  I though about linzer cookies as they are so pretty.  As you may know, the main ingredients for linzer cookies are butter, flour, ground nuts and jam.  Nowadays, a lot of people are allergic to nuts and I did not want to take the risk, especially when I bake for little kids.  I made two batches, one with ground nuts, one with no nuts (basic butter cookies).  Below is the traditional linzer cookies recipe which was adapted from Joy of Baking.  Please go to my Halloween Witch Fingers Cookies post for the butter cookie recipe.  Happy Valentine’s Day everyone!

Ingredients:

2 Sticks (1 cup)
260g (2 cups)
150g
150g (1 cup)
¼ tsp
½ tsp
1 Tbsp
1 tsp
2
½ cup
¼ – ½ cup
Unsalted butter, softened
All purpose flour
Granulated sugar
Whole almonds (blanched)
Ground cinnamon
Salt
Lemon zest (from one small lemon)
Vanilla extract
Egg yolks
Strawberry jam
Powdered sugar (for dusting)

How to Blanch Almonds:

  1. Bring a small pot of water to a boil (good enough to cover your almonds).
  2. Place your raw almonds into the boiling water and boil them for just ONE minute.  To avoid almonds from getting soft, one minute is sufficient.  (picture 1)
  3. Drain the almonds in a colander and rinse them with cold running water immediately.  Pad dry the almonds with a paper towel.  Skins will be slightly wrinkled.(picture 2)
  4. Use your fingers to gently squeeze each almond out from the skin.  (picture 3)  Let almonds dry completely and discard the skins. (picture 4)
  5. To ground the almonds, preheat oven to 350 ◦F.  Place the almonds on a baking sheet and bake about 8-10 minutes, or until lightly browned. Place almonds in a food processor after they are cooled, along with 50 g of granulated sugar (save the remaining 100g sugar for making cookie dough).  (When sugar is added, the mixture tends to loosen a bit, it won’t be too pasty). (picture 5)  Process almonds until finely ground.  (picture 6)

blanch almonds

Directions:

Making cookie dough:

  1. In a separate bowl, combine the flour, cinnamon, salt, and lemon zest.  Set aside.  (Picture 1)
  2. Beat in a mixing bowl the butter and remaining 100g sugar until light and fluffy. Beat in the vanilla extract and egg yolks. (Pictures 2-3)
  3. Add in ground almonds and then the flour mixture. (Picture 4)
  4. Divide the dough, form 2-3 balls and cover each ball with plastic wrap, and refrigerate until firm (30-60 minutes, or overnight). (Picture 5)
  5. Preheat oven to 350 ◦F.   Line two baking sheets with parchment paper.
  6. Remove one ball of dough from the refrigerator.  On a lightly floured surface roll out the dough until it is about 1/8 inch thick (you can make it thicker, but not any thinner). Using a cookie cutter of any shape to cut out the cookies. Place the cookies on the prepared baking sheet.  (Picture 6)
  7. Use a smaller cookie cutter to cut out the centers of half of the cookies on the baking sheet.  Reroll any scraps and cut out the remaining cookies.  Repeat with the second ball of dough.   (Picture 7)
  8. Bake the cookies for about 12 minutes or until lightly browned around the edges. Remove from oven and place on a wire rack to cool.

Assemble Cookies:

  1. Place the cut out cookies on a baking sheet and lightly dust the tops with powdered sugar.  (Picture 8)
  2. Spread a thin layer of jam on the bottom surface of the full cookie (top of cookie will face out).  Place the cut-out cookie on top and gently sandwich them together.  (Picture 9)

Linzer Cookies

Notes:

  • Place the baking sheets with the unbaked cookies in the freezer for about 10 minutes to chill the dough. This will prevent the cookies from spreading and losing their shape when baked.
  • The filled cookies will soften when stored.  If you want the cookies to stay crisp, assemble the day of serving. The assembled cookies can be stored in the refrigerator, in an airtight container, for several days.

Raisin and Walnut Biscotti


Biscotti

Biscotti is Italian and literally means twice baked, this is how you get their dry, crisp texture.  Biscotti is traditionally served with a cup of coffee or tea.  Some people like dipping it into hot chocolate, no matter how you like to eat them, they can be found  in all sorts of flavors.

Ingredients:

120g
120g
2
1 tsp
220g
1 tsp
¼ tsp
75g
120g
1
Unsalted butter, melted
Sugar
Eggs
Vanilla extract
All purpose flour
Baking powder
Salt
Raisins
Walnuts, chopped
Egg white, lightly beaten (for brushing)

Directions:

  • Preheat oven to 350◦F.
  • Beat melted butter, sugar, eggs and vanilla in a large mixer bowl.  Combine flour, baking powder and salt, stir until just combined.
  • Add in walnuts and raisins, stir well to combine.

Biscotti dough

Form mixture into a log or divide mixture into two smaller logs.

Biscotti dough

  • Place on a lined baking tray and brush with egg white.
  • Bake in the oven for 20-30 minutes or until light golden.  Remove from the oven and allow to cool for about 15 minutes.
  • Place the log on the cutting board, using a sharp knife, cut the log on a diagonal into 1/2-inch thick slices.  Arrange the biscotti, cut side down, on the baking sheet.  Return biscotti to the oven and bake until they are golden brown, about 15 minutes.

Biscotti dough

  • Transfer the biscotti to a rack and cool completely.

Spritz (Norwegian Butter Cookies)


Spritz

These Norwegian cookies are typically made with a cookie press.  The cookie press comes with a variety of discs to make various shapes of cookies and children love to help make them.  Spritz are crisp, fragile and buttery tasting, great for Christmas goodies.  Your Christmas holiday cookie plate won’t be complete without these cookies!

Directions:

  1. Preheat oven to 350◦F .
  2. Sift together flour, baking powder and salt.
  3. Beat together butter, sugar and extracts in a large mixing bowl at moderately high speed until pale and fluffy, about 3 minutes.
  4. Add egg and beat well.  Add flour mixture and mix at low speed until just combined.
  5. Quarter dough and put 1 piece into cookie press.  Holding press slightly above ungreased baking sheets, squeeze out dough to form cookies (follow manufacturer’s instructions).  Form more cookies with remaining dough in same manner.  (see picture below)
  6. Freeze shaped cookies in the freezer for about 10 minutes before baking.
  7. Bake cookies in batches in middle of oven until edges are golden, 10 to 15 minutes, then transfer to racks to cool.

cookie press

I added sprinkles to make the cookies more festive.

Spritz cookies

Notes:

If you don’t have a cookie press, you can flatten dough to 1/3 to ½ inch thick and cut with a cookie cutter.  Cookies can be kept in an airtight container at room temperature up to 3 weeks.

Mexican Wedding Cookies


Mexican Wedding Cookies

It has been a while since I last posted a recipe.  With Christmas approaching, all the Christmas songs and decorations reminded me tis is the season for baking.  Winter holidays are definately the time for sugar.  Every year, about one week before Christmas, my co-workers always bring in their delicious homemade goodies so I like to walk around and sample all of them.  These Mexican wedding cookies are one of my favorites – they are simply delicious and good as a gift for friends, neighbours and relatives.

Ingredients:

2 sticks (1 cup)
½ cup
1½ cups
1 tsp
2 ¼ cups
¾ cup
¾ tsp
Unsalted butter, softened
Confectioners sugar
Confectioners sugar (for rolling only)
Vanilla extract
All-purpose flour
Very finely chopped pecans
Salt
  1. Finely chopped pecans and set aside.  (picture 1)
  2. Beat together butter and ½ cup confectioners sugar in an electric mixer at moderately high speed until pale and fluffy, about 4 minutes.  (picture 2)
  3. Beat in vanilla extract, then add in flour and salt (picture 3).
  4. Add chopped pecans, mix everything at low speed until just combined (picture 4).  Covered and chill in the fridge for about 30 minutes.
  5. Preheat oven to 375 ◦F.
  6. Line baking sheet with parchment paper, roll level teaspoons of dough into ¾ – inch balls and arrange about 1 inch apart on the baking sheet.  I shaped cookie dough into a ball and a moon shape.  (picture 5)
  7. Sift remaining 2 ½ cups confectioners sugar into a large shallow bowl, set aside.
  8. Bake in batches in middle of oven until bottom are pale golden, about 10 minutes.  Immediately transfer hot cookies to confectioners sugar, gently rolling to coat well, then transfer to a rack to cool completely.
  9. Roll cookies in confectioners sugar again when cooled.

Mexican Wedding cookies

Mexican Wedding Cookies

Note:

Cookies can be kept in an airtight container at room temperature up to 3 weeks.

cookie can

I received this snowman container from my neighbour, it has three tiers.  I put butter cookies in the first tier, Mexican wedding cookies in the second tier and Biscotti in the third tier.  Isn’t it cute?

Tier 1Tier 2tier 3

Recipe for Spritz (Norwegian Butter Cookies) is here and recipe for Raisin Walnut Biscotti is here.  Happy baking!!

Halloween Witch Finger Cookies


Witch Fingers
Witch Fingers

It’s Halloween!  Want to gross everyone out with these creepy finger cookies?  They surely taste a thousand times better than they look.  These fingers are a spooky addition to a Halloween party and kids absolutely love them.  I just shaped the fingers with my hands instead of using a finger cookie mold (each one only had 8 witch fingers cavities, not practical at all).  To prevent your cookies from flattening after baking, the trick is to freeze the shaped fingers for 30 minutes before putting them into the oven.

Recipe adapted from Pattie T.  http://pattietierney.blogspot.com/2011/10/witch-finger-cookies.html

Ingredients:

225g (2 sticks)Unsalted butter (softened)
120g (1 Cup)Confectioner’s sugar
1Egg
1 tspAlmond extract
1 tspVanilla extract
340gAll purpose flour
1 tspBaking powder
1 tspSalt
40-60Whole almonds
1 tubeRed decorator gel
1 Tbsp (Optional)Cocoa powder (For decorating only)

Directions:

  1. In a mixing bowl, beat together butter, sugar, egg, almond and vanilla extract until light and fluffy.
  2. Gradually add flour, baking powder and salt, mix until combined.
  3. Split dough into two parts and wrap in plastic wrap, refrigerate for 1 hour or overnight.
  4. Working with one dough at a time, roll about a tablespoonful of dough into finger shape for each cookie.
  5. Squeeze red decorator gel onto nail bed (only the edge) (see picture 1), press one almond firmly into the nail bed to give the appearance of a long fingernail (picture 2).
  6. Use your fingers to squeeze cookie near the tip and again near the center of each to give the impression of knuckles. Make an indentation with a toothpick or a knife where the knuckles are to help give a more finger-like appearance (picture 3).
  7. Line baking sheet with parchment paper, arrange the shaped cookies on the baking sheet and place the whole pan into freezer for 30 minutes.
  8. Preheat oven to 325F degree, bake finger cookies for 20-25 minutes or until pale golden.
  9. Let cool and lightly dust the knuckles with cocoa powder (picture 4).
Witch Fingers collages

Notes:

Make sure to freeze the shaped fingers for at least 30 minutes before baking.

Witch FIngers
Related articles

French Macarons


Macaron

Macarons

When thinking of macarons, you probably think of Ladurée as they are one of the top premier sellers of macaron in France.  They offer dozens of flavors and almost every tourist will stop there to have their first macaron.  These delicate almond-meringue cookies are not cheap, Bottega Louie in LA downtown sell theirs for $2.50 per tiny piece.

These French sandwich cookies are made entirely of almond powder, egg whites, and sugar.   The most difficult part is achieving the right consistency and presentation of the macaron shells.  The technique for making macarons is a little tricky as there are so many factors at play – the amounts of ingredients, the mixing of the batter, the length of resting time, the oven tempearture, the baking time, etc.  All of these things can cause problems.  The first few times I made them, no feet were developed at the bottom.  Although the flavor was still good, I failed.  I tried many online recipes before I found one that worked for me.  Some have more sugar which will make the shells very glossy but the sweetness is too overpowering.  I did a lot of reading online and practiced to understand the chemistry behind it.  “Not So Humble Pie” blog is a great troubleshooting guide and has a lot of useful tips,  I recommend everyone read it before starting the baking process.

Ingredients:

100g
35g
200g
120g
1 tsp
gel food coloring
Egg whites (about 3 eggs)
Caster sugar
Icing sugar
Almond meal
Cream of Tartar (optional)
Optional

Directions:

  1. Line baking sheets with parchment paper or silicone liners.  Prepare a piping bag with a round tip.  You can place the bag into a measuring cup and cuff the bag’s opening over the top, this makes the bag easy to fill hands-free.
  2. Sift almond meal and powdered sugar together to remove any clumps, sift twice if possible.  Set aside.  (picture 1)
  3. Weigh out the egg whites into a large stainless mixing bowl.
  4. Begin beating the eggs on low speed.  Once the egg whites are very foamy, begin sprinkling in the sugar as you beat.   Increase the speed to medium, you can add in cream of tartar to stabilize the meringue if necessary, and beat the meringue to stiff glossy peaks.  Add the food coloring (It takes 2-4 drops of gel) and mix.  (Pictures 2 and 3).
  5. Add about 1/4 of the almond/sugar mixture and fold in until no streaks remain. Continue to add the almond mixture in quarters, folding until you reach the proper batter.   It should take roughly 50 folds until the mixture is smooth and a very viscous liquid, not runny. Over-mixing the batter, your macarons will be flat and have no foot, under-mixing the batter, they will not be smooth on top.  (Pictures 4 and 5)
  6. Pour the batter into your prepared piping bag.  (Picture 6)
  7. Place a tiny drop of batter at each corner of the baking sheet to secure the parchment paper.  (Picture 7)
  8. Pipe rows of batter (dollops a little bigger than a quarter) onto the baking sheets, giving them space to spread.
  9. Tap the pan on the counter several times to bring up any air bubbles (this prevents cracking).
  10. If you want to sprinkle nuts on top, do it now so that they will stick to the top of the shells.  (Picture 9)
  11. Allow the cookies to rest on a level surface for 30-60 minutes.  Until they are no longer tacky to a light touch.
  12. While the cookies are resting, you can preheat your oven to 300F.
  13. Bake the cookies for 16-20 minutes.

macaron

Parchment produces taller compact feet, the Silpat baked cookies’ feet tend to be shorter and a bit ruffled.  The cookie from the following picture was baked on parchment paper.

Macaron

The bottom of the shell should be flat and easy to come off the parchment paper, it shouldn’t be sticky.

Macaron bottom

The delicate shell had a crunch outside but yet was moist so it melted in your mouth.

Macarons

Notes:

  • If you’re using stainless steel container to beat the egg whites, feel free to add a pinch of salt, 1/4 teaspoon cream of tartar or couple drops of lemon juice to help strengthen the egg whites.
  • Only use gel coloring.
  • If your oven is a fan-forced (convection) oven, do not turn on the fan.  Each oven is different, I placed an oven rack in the upper 3rd as the heat was too strong at the bottom or middle rack.  You will need to know how your oven works and adjust the rack position.

My favorite macaron filling is the Raspberry Swiss Meringue Buttercream (recipe here), you can choose any fillings you want and a lot of them can be found on Martha Stewart‘s website.

Basic Swiss Meringue Filling

6 large egg whites 1 1/2 cups sugar 1 teaspoon pure vanilla extract

  • Place whites and sugar in a heatproof mixer bowl set over a pan of simmering water. Whisk until sugar dissolves and mixture registers 160 degrees on a candy thermometer. Remove from heat, and whisk on high speed until mixture is cool and stiff peaks form, about 6 minutes. Beat in vanilla. Use immediately.

Basic Swiss Meringue Buttercream Filling

Basic Swiss Meringue + 1 1/4 pounds (5 sticks) unsalted butter, softened

Chocolate Ganache Filling

1/2 cup heavy cream
3 1/2 ounces dark chocolate, finely chopped (preferably 70 percent cacao)
1/2 ounce (1 tablespoon) unsalted butter, softened

  • Bring cream to a boil in a saucepan over medium-high heat. Pour cream over chocolate in a heatproof bowl. Let stand for 2 minutes. Add butter, then whisk mixture until smooth. Let cool, stirring often. Use immediately.

Fondant Sugar Cookies


Fondant Sugar Cookies

I made these Fondant cookies for my daughter’s birthday party at school.  Although it took a long time to roll out the fondant and make the angry birds and hello kitty faces, the feedback is rewarding.  For the marshmallow fondant recipe, please refer to my Fondant Cake with Strawberry Filling post.

Ingredients for Sugar Cookies:

1 cupButter, softened
1 cupSugar
1Large egg
2 ¼  cupAll-purpose flour
¾ cupUnsweetened cocoa
¼ teaspoonSalt

Directions:

  1. Preheat oven to 350°F.  Beat butter and sugar at medium speed with an electric mixer until fluffy.  Add egg, beat until blended.
  2. Combine flour, cocoa, and salt, gradually add to butter mixture, beating just until blended, don’t over mix it.
  3. Divide dough into 2 equal portions.  Cover and chill for 10 minutes or longer.
  4. Place 1 portion of dough on a lightly floured surface, and roll to 1/8-inch thickness.  Cut with a 3 to 4 inch round cookie cutter.  Place cookies on lightly greased baking sheets.
  5. Bake at 350°F for 12 to 15 minutes or until edges are lightly browned.  Cool cookies on wire racks.  Decorate baked cookies after they are completely cool.

Vanilla Sugar Cookies:  Skip unsweetened cocoa.  Increase flour to 3 cups. Beat in 1 teaspoon of vanilla extract with butter in Step 1.

Related articles