Furikake Chex Mix


Chex Mix
Furikake Chex Mix

Here I am, writing my blog again.  I have already been working remotely for 2 weeks  due to the Coronavirus outbreak.  State announced the “Safer-At-Home” order on March 19, so all of us are now home 24/7.  As of today, USA has 331,234 confirmed cases, this number is rising rapidly.  Besides purchasing necessities at the markets, cleaning, cooking or baking is a good way to kill time.

This Hawaiian-style chex mix is incredibly addictive, it is very crunchy with a combination of sweet and savory taste.  It is perfect to have for parties, gatherings and even for just the family!  Get your youngsters to bake together and have some family quality time!

Ingredients:

2 cupsRice Chex
2 cupsCorn Chex
2 cupsWheat Chex*
2 cupsPretzel
1.5 cupsGardetto’s Garlic Rye chips
170gButter
¼ cupHoney
½ cupBrown sugar
1 TbspSoy sauce
1 TbspWorcestershire sauce
1 bottle (about 2oz)Furikake seaweed

* The Chex mix could be any combination of rice/corn/wheat.  Wheat is more flat and hard in texture.

IMG_7638

Method:

  1. Preheat oven to 250 °F.
  2. Mix dry ingredients like Chex mix, pretzels and garlic rye chips together in a very large bowl.  (Picture 1)
  3. Melt butter in a pot, add in sugar, honey, soy sauce and worcestershire sauce until everything is combined.  (Pictures 2 – 6)
  4. Pour hot sauce mixture into the dry mix and mix well.  (Pictures 7-8)
  5. Add in Furikake seaweed .  (Picture 9)
  6. Line a large baking sheet with alumni foil and drizzle a little oil.  This will prevent the chex from sticking to the pan.  (Picture 10)
  7. Evenly spread the chex mix on to the baking sheet.  (Picture 11)
  8. Bake for 1 hour and 15 mins, turn Chex mix every 20 mins (Picture 12)
Hawaiian Chex Mix

You can store the Chex mix in an air tight container.

Chex Mix in the jar

Egg Waffle / Bubble Waffle / Egg Puff / Gai Daan Jai (雞蛋仔)


Egg Waffles - 3

Since I mentioned in my Boot Jai Go post that one of the most popular Hong Kong street vendor’s snacks is egg waffle, I must introduce and record a recipe on my blog.  According to Wikipedia, egg waffles were ranked No.1 in a 100 most popular Hong Kong street snack listing.  There are many English names (bubble waffle, egg puff, eggettes, just to name a few), but its Cantonese name is Gai Daan Jai (meaning little eggs).  One story says the enterprising post-war generation created the egg-shaped mould to make up for an eggless batter as eggs became a luxury in China.  Grocery stores would take the cracked eggs and sell the perfect eggs to customers.  Throwing away the cracked eggs would be a waste of money, so they turned the eggs into batter and sold them as waffles.  After making the egg waffles with the semi-spherical cell pans (pan base is deeper and the cover is shallower), they look like small eggs.  I guess this is how it got its name “little eggs”.

Ingredients:  (makes 5)

210gAll purpose flour
10gBaking powder
15gCustard powder
42gTapioca starch
3Eggs
210gGranulated Sugar
42gLow fat milk
210mlVery cold water
42gVegetable oil
3 drops (slightly less than ¼ tsp)Vanilla extract

Directions:

  1. Measure all ingredients, set aside.  (picture 1)
  2. Pour all ingredients into a blender (except vegetable oil and vanilla extract), blend until well mixed.  (picture 2)
  3. Add in vanilla extract and oil and blend until combined.  (pictures 3 and 4)
  4. Strain the batter through a sieve.  (picture 5)
  5. Warm up each side of the mould and brush a thin layer of oil on each side. (picture 6)
  6. Pour the egg batter onto the mould with a ladle and close the mould.  Hold the handles firm to keep two sides tight.   I turned the fire to medium high.  (picture 7)
  7. After 1-2 minutes, flip the pan and cook for 1-2 minutes.  You can slightly open the pan to check if the the waffle is slight brown.  (picture 8)
  8. Remove the egg waffle from the mould with a fork and place it on a cooling rack.  (picture 9)
Egg Waffles Steps

It should be served hot or warm (cold is not as good). The waffles are crispy on the outside, soft and chewy on the inside.Egg Waffles - 2

This egg waffle mould/pan makes waffles over the stove.  For first time use, clean the pan thoroughly. The first 2 waffles should be discarded.  There are some fancy electricity-powered makers that make perfect egg waffles and you don’t need to pay too much attention to the cooking process or need any skill.   However, one owner of the waffle shop said “If the skill isn’t there, it doesn’t matter how good your ingredients are.”  IMG_9924

Note:  Some recipes say the batter should be refrigerated for at least an hour in order to make a perfect egg waffle.  To skip this step, I substituted room temperature water with icy-cold water.  The result is the same.

Yummy!Egg Waffles - 4

Linzer Cookies


Linzer Cookies

I was asked to make cookies for the Valentine’s day party for my son’s class.  I though about linzer cookies as they are so pretty.  As you may know, the main ingredients for linzer cookies are butter, flour, ground nuts and jam.  Nowadays, a lot of people are allergic to nuts and I did not want to take the risk, especially when I bake for little kids.  I made two batches, one with ground nuts, one with no nuts (basic butter cookies).  Below is the traditional linzer cookies recipe which was adapted from Joy of Baking.  Please go to my Halloween Witch Fingers Cookies post for the butter cookie recipe.  Happy Valentine’s Day everyone!

Ingredients:

2 Sticks (1 cup)
260g (2 cups)
150g
150g (1 cup)
¼ tsp
½ tsp
1 Tbsp
1 tsp
2
½ cup
¼ – ½ cup
Unsalted butter, softened
All purpose flour
Granulated sugar
Whole almonds (blanched)
Ground cinnamon
Salt
Lemon zest (from one small lemon)
Vanilla extract
Egg yolks
Strawberry jam
Powdered sugar (for dusting)

How to Blanch Almonds:

  1. Bring a small pot of water to a boil (good enough to cover your almonds).
  2. Place your raw almonds into the boiling water and boil them for just ONE minute.  To avoid almonds from getting soft, one minute is sufficient.  (picture 1)
  3. Drain the almonds in a colander and rinse them with cold running water immediately.  Pad dry the almonds with a paper towel.  Skins will be slightly wrinkled.(picture 2)
  4. Use your fingers to gently squeeze each almond out from the skin.  (picture 3)  Let almonds dry completely and discard the skins. (picture 4)
  5. To ground the almonds, preheat oven to 350 ◦F.  Place the almonds on a baking sheet and bake about 8-10 minutes, or until lightly browned. Place almonds in a food processor after they are cooled, along with 50 g of granulated sugar (save the remaining 100g sugar for making cookie dough).  (When sugar is added, the mixture tends to loosen a bit, it won’t be too pasty). (picture 5)  Process almonds until finely ground.  (picture 6)

blanch almonds

Directions:

Making cookie dough:

  1. In a separate bowl, combine the flour, cinnamon, salt, and lemon zest.  Set aside.  (Picture 1)
  2. Beat in a mixing bowl the butter and remaining 100g sugar until light and fluffy. Beat in the vanilla extract and egg yolks. (Pictures 2-3)
  3. Add in ground almonds and then the flour mixture. (Picture 4)
  4. Divide the dough, form 2-3 balls and cover each ball with plastic wrap, and refrigerate until firm (30-60 minutes, or overnight). (Picture 5)
  5. Preheat oven to 350 ◦F.   Line two baking sheets with parchment paper.
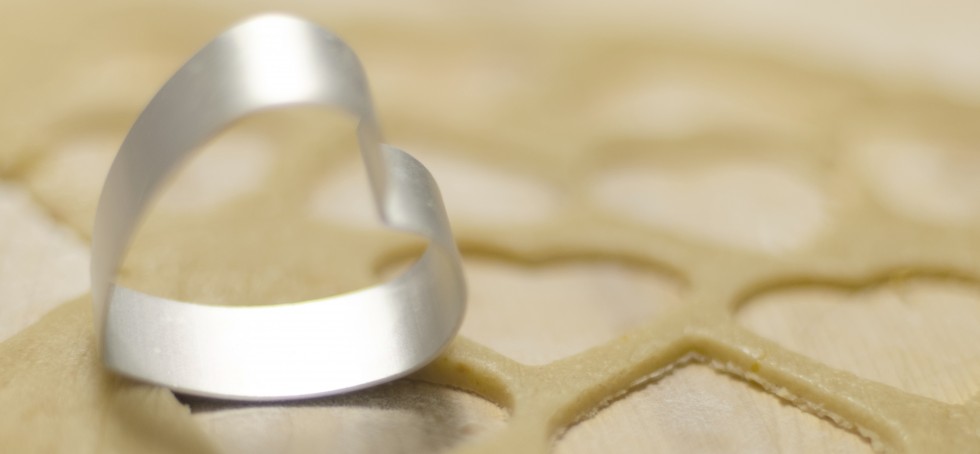
  6. Remove one ball of dough from the refrigerator.  On a lightly floured surface roll out the dough until it is about 1/8 inch thick (you can make it thicker, but not any thinner). Using a cookie cutter of any shape to cut out the cookies. Place the cookies on the prepared baking sheet.  (Picture 6)
  7. Use a smaller cookie cutter to cut out the centers of half of the cookies on the baking sheet.  Reroll any scraps and cut out the remaining cookies.  Repeat with the second ball of dough.   (Picture 7)
  8. Bake the cookies for about 12 minutes or until lightly browned around the edges. Remove from oven and place on a wire rack to cool.

Assemble Cookies:

  1. Place the cut out cookies on a baking sheet and lightly dust the tops with powdered sugar.  (Picture 8)
  2. Spread a thin layer of jam on the bottom surface of the full cookie (top of cookie will face out).  Place the cut-out cookie on top and gently sandwich them together.  (Picture 9)

Linzer Cookies

Notes:

  • Place the baking sheets with the unbaked cookies in the freezer for about 10 minutes to chill the dough. This will prevent the cookies from spreading and losing their shape when baked.
  • The filled cookies will soften when stored.  If you want the cookies to stay crisp, assemble the day of serving. The assembled cookies can be stored in the refrigerator, in an airtight container, for several days.

Mooncakes


Mooncakes

Mooncakes

MID AUTUMN FESTIVAL is also know as Moon Festival because at that time of the year the moon is at its roundest and brightest.  Mid Autumn Festival falls on the 15th day of the eighth month in the Chinese calendar.  It is the second biggest festival after The Lunar New Year in China.  During this Festival, people give family, friends and colleagues mooncakes.  The treats are traditionally filled with an egg yolk embraced by lotus seed, red bean or five varieties of nuts and seeds.  My favorite one is the lotus paste.   The stories behind mooncakes are quite interesting too —- besides the legend of “Chang’E Flying to the Moon 嫦娥奔月”, the most well-known one is “Wu Gang Chopping Laurel Tree on the moon”.

I was a little late making mooncakes this year.  I was supposed to make them two days before the festival as the mooncakes normally need to rest for 2 days to get the best texture.   These cakes are high in calories, sugar and preservatives, so I decided to make them myself to have a healthier version.  Although it was quit a lot of work to make the lotus paste (took almost an hour to stir the paste in the pan), using the mooncake press/mold was quite fun.  The paste should be made one day ahead of time and keept in the fridge.

I gathered several mooncake recipes together and tested them out to make my own.  Lotus paste recipe coutesy of Amanda.   The golden syrup recipe coutesy of Christine Ho.

HOW TO MAKE LOTUS PASTE:

Ingredients:

200g
120g
100ml
1 Tbsp
1 Tbsp
1/8 tsp
Lotus Seeds
Sugar
Grape Seed Oil/Olive Oil
Honey
Condense Milk
Salt

Directions:

  1. Soak Lotus Seeds in water for 30 mins.
  2. Make sure to remove the green bitter tasting germ inside the seeds (if any) and discard any seeds in dark brown color, drain water.  Pour new water into a pot to cover all lotus seeds and bring to a boil, turn down fire and simmer until tender.  (picture 1)
  3. Discard water but save ½ cup.  Transfer lotus seeds into a food processor, add ½ cup of the water from the pot and grind into a smooth paste.  Pass through a fine sieve if you want the finest texture.  (picture 2)
  4. Heat up a non-stick pan, melt half the sugar until it turns brown in color. (picture 3)
  5. Add in blended lotus seeds, remaining sugar, salt and 1/2 of oil.  After the paste soaks up all the oil, add the remaining oil.  Stirring all the time until the lotus seed paste gets thickened.  (picture 4)
  6. Stir in honey and condense milk. (picture 5)
  7. Continue stirring till paste leaves the side of the pan.  (picture 6)
  8. Keep in the fridge overnight before using it.

Lotus paste

homemade lotus paste

HOW TO MAKE MOONCAKES:

Ingredients:

100g       All purpose flour
70g         Golden Syrup
2ml         Alkaline water
25ml       Grape seed oil

Filings:

500g       Lotus Paste (see recipe above)
6             Salted Egg Yolks
1 Tbsp   Rose-flavoured cooking wine (玫瑰露酒)
1             Egg (for egg wash)

Directions:

(I’m using a 63g mold and the dough/filling ratio is 3:7, you can also work with the 2:8 ratio)

  1. Mix salted egg yolks with wine.  Wipe dry the yolks with kitchen paper after a few minutes.  Cut each into two halves. Set aside.
  2. Place golden syrup in a bowl. Add in alkaline water, stir to combine. Add in oil and mix well.
  3. Add flour in to the syrup mixture and combine well. Gently knead the dough till smooth (takes 1~2 mins). Shape it into a round ball and wrap with cling wrap.  Leave it in the fridge to rest for at least 2 hours or overnight.
  4. Before making mooncakes, bring the dough to room temperature for 30 mins.  Divide dough into 12 equal portions, each weighs 19g (based on a 63g mold and the dough/filling ratio 3:7).  Roll each portion into a ball shape.  Divide lotus paste into 12 equal portions as well, each weighs 39g, the salted egg yolks are roughly 5g each half.  (Picture 1)
  5. Preheat oven to 350F.  Prepare the egg wash by whisking the egg, sift through a fine sieve.
  6. Take a lotus paste ball and poke a hole in the middle with your finger. Place egg yolk inside.  (Picture 2).
  7. Flatten each dough into a small disc with a rolling pin.  (Picture 3)
  8. Wrap it around the filling and shape it into a ball. (Pictures 4 and 5)
  9. Lightly dust the wrapped dough with some flour.  Place it in the mooncake mold.  (Picture 6) and press the mooncake out (Picture 7).  Place mooncake on a baking tray line with parchment paper. (Picture 8)
  10. Spray some water on the mooncakes. (Note: this step prevents the mooncake from cracking during baking.)
  11. Bake in the preheated oven for 10 mins.  Remove from oven and leave to cool for 15mins (this step helps stabilizing the pattern on top).
  12. After 15 minutes, brush the top with very little egg wash (too much egg wash, the pattern will disappear after baking).  Return to oven and continue to bake for another 6 mins. (Picture 9)
  13. Remove from oven and cool for 10 minutes, brush the 2nd layer of egg wash (very little egg wash) and return to oven and continue to bake for another 6 mins or until golden brown.  Since every oven works differently, please check and make sure the mooncakes are not over browned).
  14. Leave mooncakes to cool completely and store in air tight containers. Wait for 2 days before serving, the skin will become soft and shiny, called “回油” in Chinese.

how to make mooncakes

It is best to enjoy these with a cup of hot Chinese tea!

Mooncakes

Cheddar Cheese Crisps


Cheese Crisps

These cheese crisps are great as an alternative when you are craving chips.  I always bought the cheddar crisps at the farmer’s market for my little kids or for parties/playdates since they are so popular, but are quite pricey.

If you search online, you will notice parmesan cheese or any other hard cheeses will turn out crunchy while cheddar is more chewy (this is not what you want).   After doing a little experiment myself, I finally got the trick!  I’m sharing the method as to how to make the cheddar cheese crisps today – It’s all about the baking time!

Ingredient:

1          8oz medium cheddar cheese block (grated)

Directions:

  • Preheat oven to 300 degrees ◦F.
  • Place little lumps of  grated cheese about 1 inch apart on a parchment-lined baking sheet (make sure you use parchment paper).

Cheese Crisps

  • Bake at 300 degrees ◦F for 10-15 minutes, cheese will start bubbling, remove from oven and let cool for 10 minutes.
  • Return the cheese to oven and bake for 10 minutes, remove from oven and let cool for 10 minutes.  Use a spatula to flip the cheese,
  • Return the cheese to oven and bake for another 10 minutes.  Cool on a rack.
  • They can be stored in an airtight container for up to 2 weeks.

Cheese Crisps

Note:

  1. I adjusted the temperature to 300 ◦F (instead of 350 ◦F which is what most other recipes listed).  High temperature will brown the edges while the middle part is still chewy.  For other hard cheeses, you can probably stick with 350 ◦F  and just bake in the oven without removing and returning the cheese from/back to the oven.
  2. Since each oven is different, if the cheese crisps are not hard enough after baking, you can bake it for another 5 minutes.
  3. These can be spiced up with any spice you want before baking.
  4. Medium cheddar has a better flavor, sharp cheddar may be a little too strong.
  5. When placing little lumps of the grated cheese on the pan, make sure it’s not too thick.  Try to spread a thin layer so that the middle part won’t take too long to get crispy.