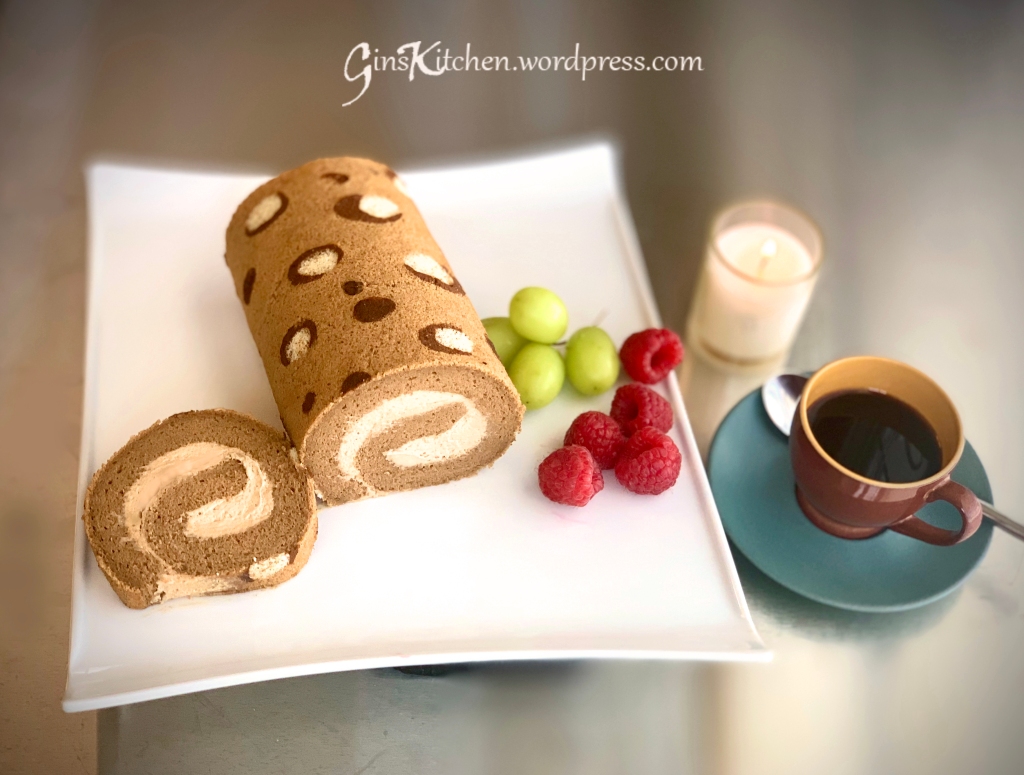
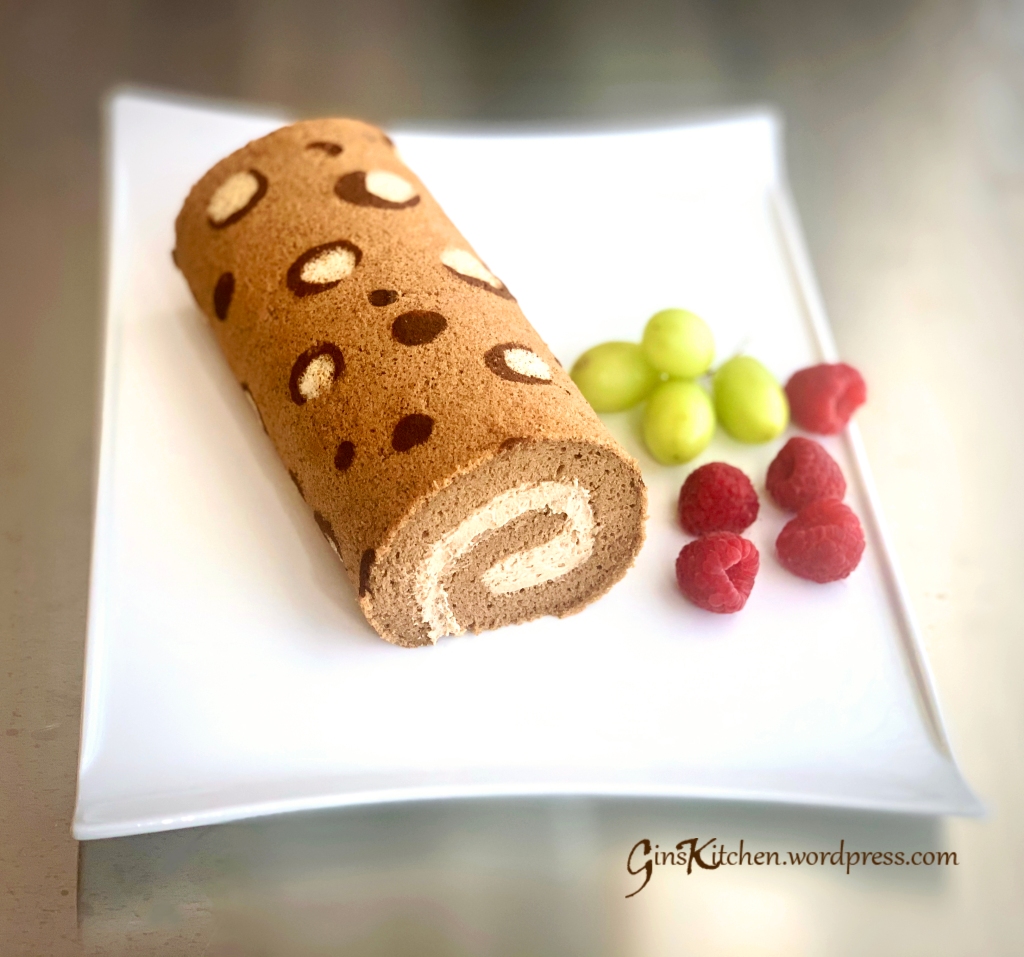
Polka Dot Mocha Swiss Roll Cake


Patterned roll cakes have been on my to-bake list for the longest time. Today, I’m posting this mocha roll cake with a brown polka dot design. This was made following the same basic Swiss roll cake recipe, but instead I added instant coffee for the mocha flavor. As for the patterns, I opted for cocoa powder for the natural coloring. You may need to use food coloring for some of them, as it depends on what flavor your cakes are and what color you want your patterns to be. I have tested different methods of adding patterns but failed several times to get a good result. I personally prefer freezing the patterns over pre-baking the patterns.

Ingredients for the circle pattern paste:

10gUnsalted butter (softened)
10gPowdered sugar
10gCake flour
10gEgg white
1 TbspCocoa powder

Ingredients for the roll cake:

Ingredients A
80gEgg Yolk
1gSalt
35gSugar
Ingredients B
45gOil
40gMilk
Ingredients C
72gCake flour
2 Tbsp (4g)Instant Coffee
2 TbspHot water
Ingredients D
120gEgg white
55gSugar

Cream filling:
1 CupHeavy whipping cream
1 TbspPowdered sugar
1 TbspInstant black coffee
1 TbspVanilla instant pudding

Directions for making the pattern:

  1. You can draw your own pattern template or download one online. Line a 9×13-inch baking sheet with parchment paper and place the pattern sheet beneath it.
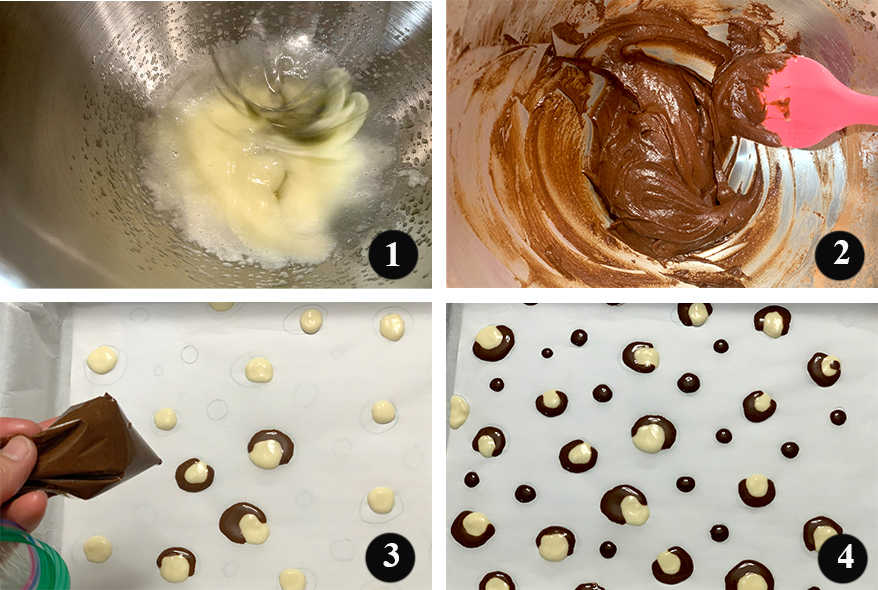
  2. In a bowl, mix egg white, sugar, butter and flour until you get a smooth paste (DO NOT add cocoa powder yet). In a separate bowl, take out half of the mixture (one half for the white circles and one half for the brown circles) and slowly add in cocoa powder (add little by little until you get the color you want). (Pictures 1 & 2)
  3. Fill the Ziploc bag with the mixture and seal the top. Use scissors to snip off one corner of the bag – creating a tiny hole makes it easier to trace the patterns. (Picture 3)
  4. Once all patterns are done, place the whole baking sheet in the freezer. (Picture 4)
Directions for making the roll cake:

  1. Preheat oven to 340°F.
  2. Separate the egg yolks and egg whites into two bowls.
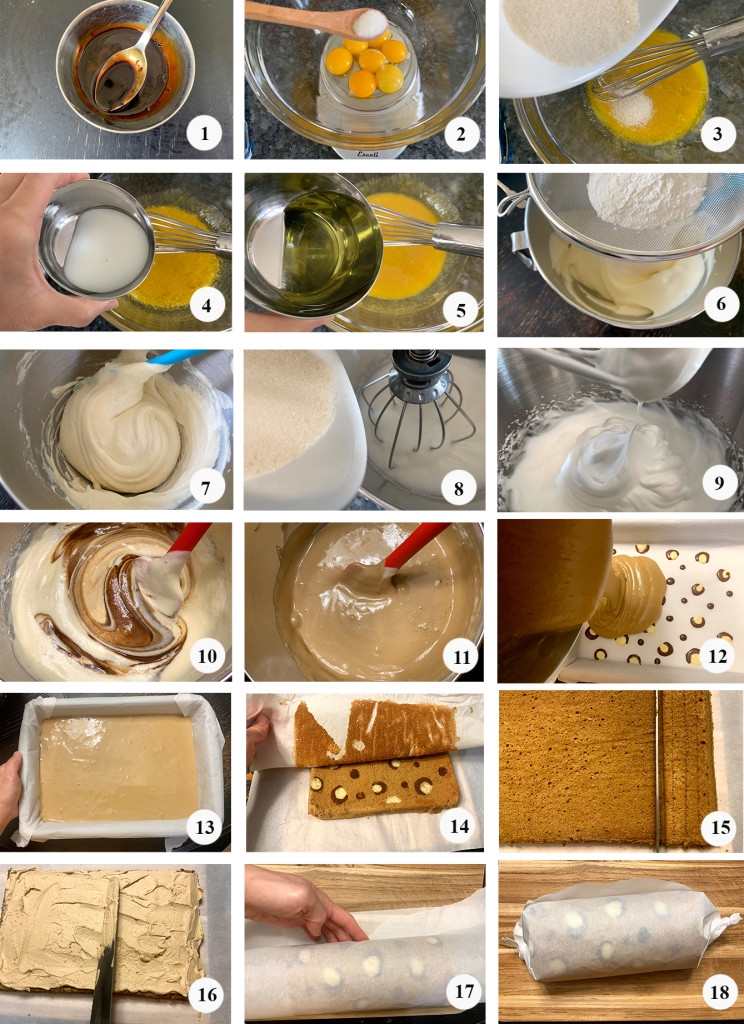
  3. Dissolve instant black coffee in hot water, set aside and let it cool. (Picture 1)
  4. In a large bowl, add salt to egg yolks and mix well.  Add in 35g of sugar, beat until well combined.  (Pictures 2 & 3)
  5. Add oil and milk to the egg yolk mixture and beat until the mixture is pale.  (Pictures 4 & 5)
  6. Sift the flour into the egg mixture and gently fold to combine.  (Pictures 6 and 7)
  7. In a mixing bowl, beat egg whites until foamy, gradually add sugar and beat until soft peaks form.  (Pictures 8 and 9)
  8. Add in black coffee liquid to the egg whites and fold to combine. (Picture 10)
  9. Pour the egg yolk mixture into the egg whites and gently fold to combine with a spatula.  (Picture 11)
  10. Pour the batter into the prepared pan.  Spread the batter evenly and tap the pan several times.  This will remove any air bubbles inside the batter.  (Pictures 12 & 13)
  11. Bake for about 13 minutes, remove the cake from the pan as soon as it is ready.  Allow it to cool for about 10 mins.  Put a piece of parchment paper on top of the cake (you may want to lightly spray the parchment paper with oil to prevent the outer layer from sticking), and flip the pan over so that the pattern is on top.  Peel away the original parchment paper from the bottom of the cake. Trim the top and bottom edges.  Hold the knife at a 30 degree angle and trim the right and left edges. (Picture 14)
  12. Using a knife to score 2 vertical lines along the cake from the right edge, careful not to cut all the way into the cake. (Picture 15)
  13. Spread an even layer of whipped cream over the cake.  (Picture 16)
  14. Tightly roll the cake from the side you just scored toward the other end. (Picture 17)
  15. Secure the roll by taping or twisting the parchment paper at both ends.  Refrigerate for 1 hour before serving.  (Picture 18)
Directions for making the filling:

  1. Dissolve instant black coffee powder in 1 tsp. of hot water, set aside and let cool.
  2. Whip the heavy whipping cream on medium speed until it is smooth and firm, add powdered sugar and whip for another 1-2 minutes.
  3. To make the cream firmer, add vanilla instant pudding and whip for 1-2 minutes.
  4. Add in coffee and whip for another minute.
Baked Pork Tenderloin


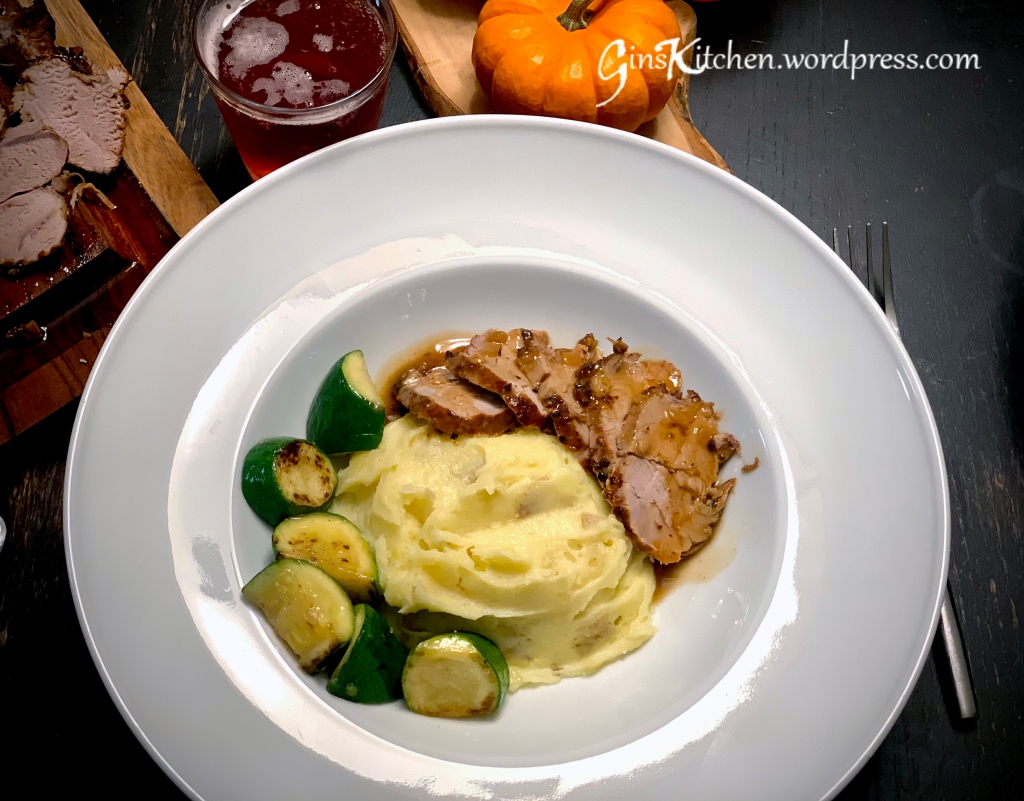
I got this recipe from my cousin who made a tri-tip roast for our family New Year’s Eve dinner. Ever since, the tri-tip roast has been a requested dish for our annual New Year’s gathering. I have discovered that the same recipe can be used for making pork tenderloin and the flavor is still amazing. The only adjustment is to reduce the cooking time.

Ingredients:

2 poundsPork Tenderloin (about 2-3 pieces)
1/2 CupFresh squeezed lemon juice
1/2 CupCooking oil (grape seed oil)
1/4 CupBrown sugar
1/4 CupLight soy sauce
1-2 TbspBlack pepper
1/4 CupGarlic salt
1/4 CupChopped garlic
1/4 CupChopped dried onions

Ingredients for gravy:

1 CanChicken broth
2 tspCornstarch
2 TbspWater
1 TbspWhite wine
To tasteSalt

Directions:

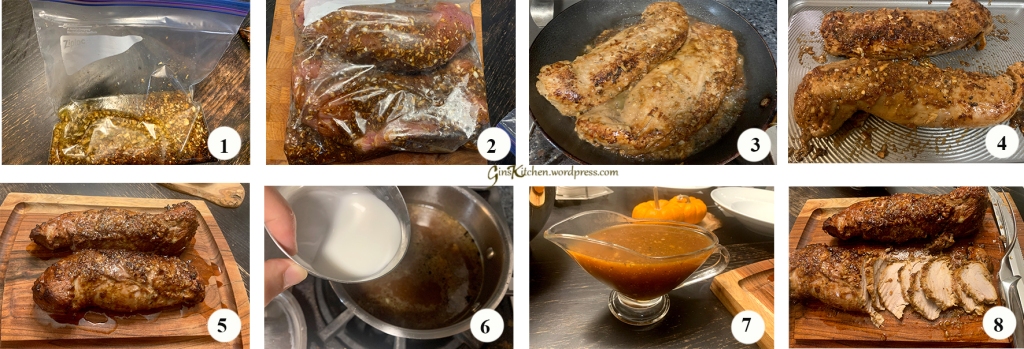
  1. Mix all ingredients in a mixing bowl, transfer the mixture to a 1-gallon ziploc bag. (Picture 1)
  2. Place the pork tenderloin in the bag and toss the bag to make sure the meat is evenly coated with the marinade, refrigerate overnight. (Picture 2)
  3. Preheat oven to 350°F.
  4. In a large skillet, drizzle a little cooking oil and brown the pork tenderloin on both sides. (Picture 3)
  5. Transfer the meat to a baking sheet and bake in the oven until the thermometer reads 160°F. (The federal agency says it is lowering the recommended safe cooking temperature for whole cuts of pork from 160°F to 145°F. This is your preference). Let it sit for 3-5 minutes before cutting.  (Pictures 4-5)
  6. While the meat is resting, heat up a cup of chicken broth. Scrape the brown pieces from the baking sheet and add into the chicken broth, then add in white wine. Combine cornstarch and water in a small bowl, then stir until smooth. Stir cornstarch mixture into hot broth to thicken the gravy. Add salt to taste. (Pictures 6 & 7)
  7. Slice pork tenderloin and pour gravy on top to serve.

Galbi / Kalbi (Korean BBQ Ribs)


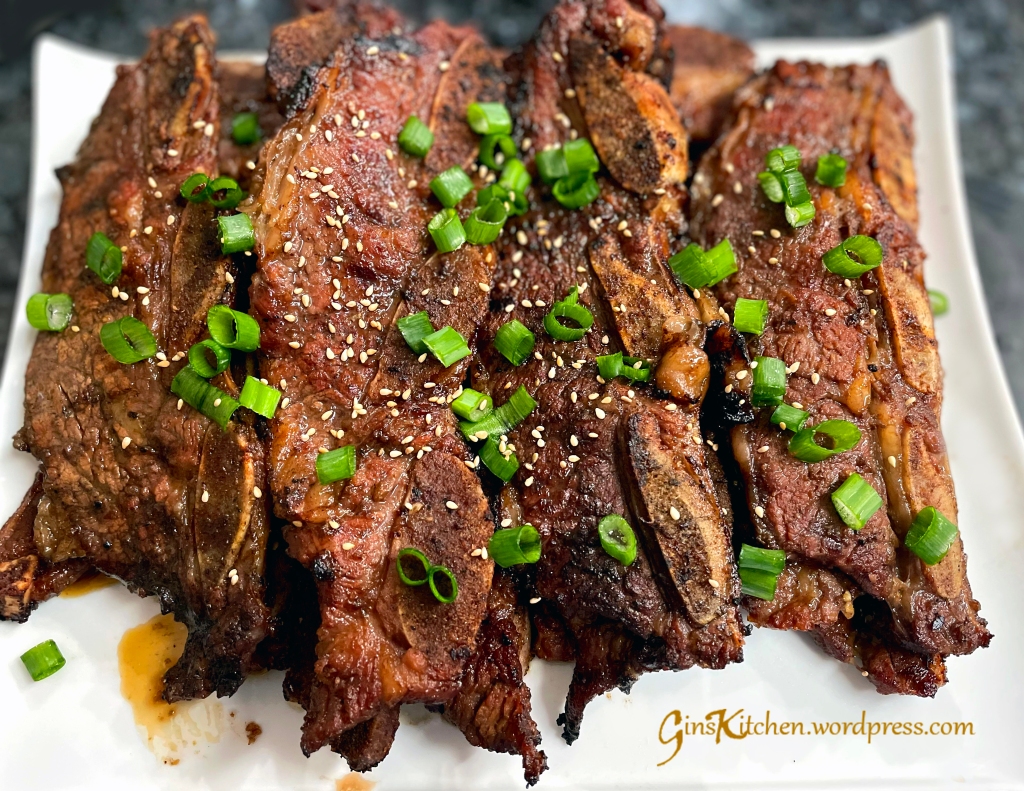
As mentioned in my previous post, Galbi (also called Kalbi) is my family’s favorite Korean dish. Our go-to Korean restaurant is A Ri Rang Tofu House in San Gabriel, CA. They serve delicious dishes, amazing tofu soup as well as their free side dishes (banchan) which can be refilled upon request.

Since inflation in 2022 has gone up a lot, restaurants have to cover the cost by increasing the price or reducing the portion of the dish. The Galbi combination – meat + soup is $33 (used to be $10 cheaper) plus tip for dinner. This is the main reason why I had to learn to cook it myself.

Ingredients:

18 / approx 8 poundsBeef short ribs
1 1/2 cupLight soy sauce
1 1/4 CupBrown sugar
1 CupWater
1 Asian Pear (Ya Li) (blend)
1 1/2Onion (blend)
2 headsGarlic (blend)
6 TbspSesame oil
1.5 TbspGround pepper
1.5 TbspFreshly grated ginger

Directions:

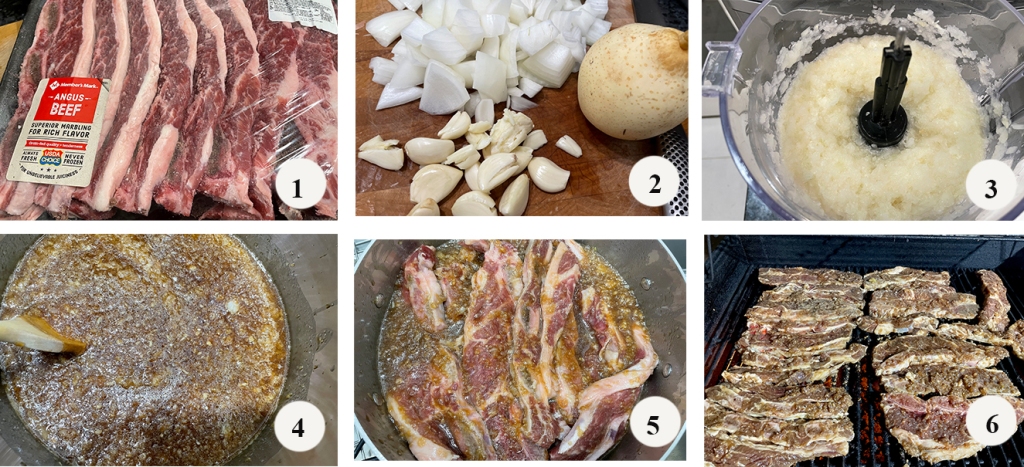
  1. Please refer to picture 1 for the beef ribs, you can find them at the market. Rinse ribs under running water to wash off any bone bits that may exist. Pat dry and set aside.
  2. Peel and core the pear, chop into pieces. Peel the garlic and chop onion, puree all 3 ingredients in a blender until smooth. (Pictures 2-3)
  3. In a large mixing bowl, combine all ingredients, mix until all combined. (Picture 4)
  4. Add beef ribs into the mixing bowl, mix everything so each piece is evenly coated. Marinate overnight. (Picture 5)
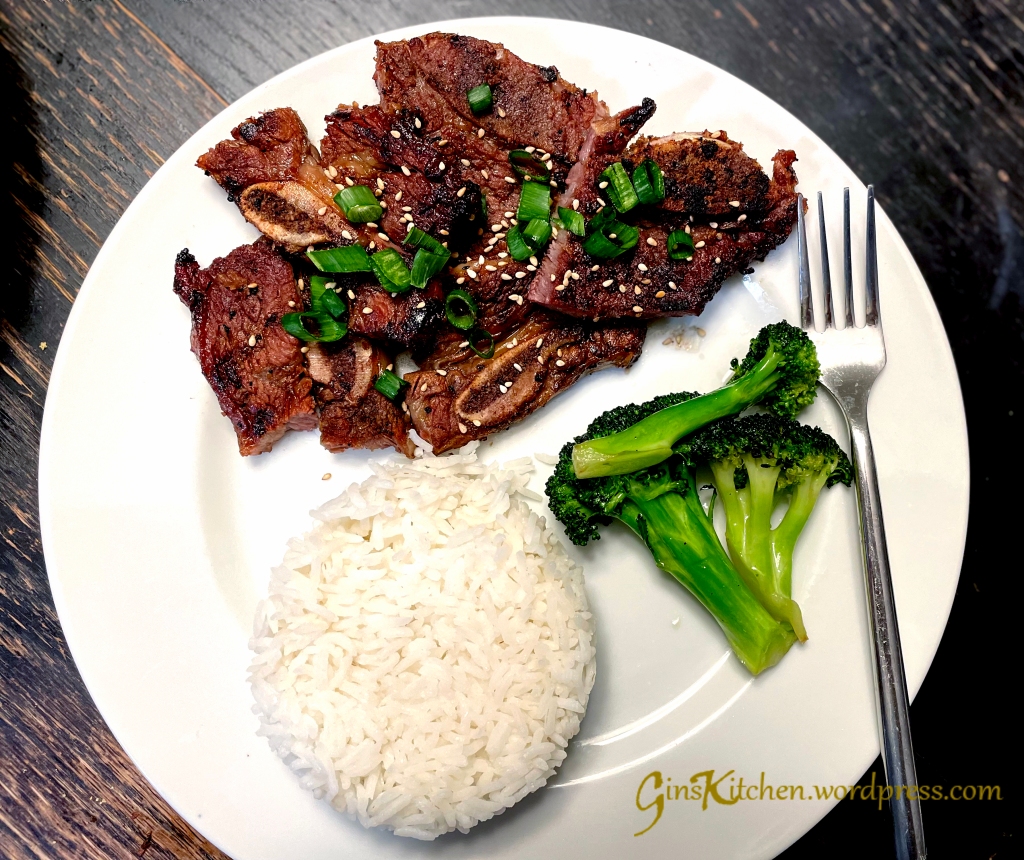
  5. Remove beef ribs from marinade and wipe off excess. Place directly over the hot side of the grill. Cook, turning occasionally, until beef is cooked and lightly charred on both sides, 6 to 8 minutes total (3 to 4 minutes per side). Transfer to a serving platter and allow to rest for 5 minutes before serving. (Picture 6)
  6. Sprinkle toasted sesame and fresh green onion for garnish.

Korean Spicy Chicken


I bet a lot of people became a good cook when the coronavirus pandemic hit. The pandemic had us stuck at home and many restaurants were closed. Having the opportunity to stay at home allowed us to discover more recipes that eventually led to more learning and experience. It’s important to have different cuisine daily as it can increase our appetite.

Of all the types of food I cook—Italian, Persian, Mexican, American, and Asian foods— I discovered my family really liked Korean cuisine. Their favorite is the beef shortribs (Galbi) (recipe here) and spicy tofu soup. Anyhow, I came across this spicy chicken recipe from rasamalaysia.com, it’s a good addition to my Korean recipe book.

Ingredients:

2 poundsBoneless and skinless chicken thighs
4 TbspCooking oil
3 TbspGochujang (Korean chili paste)
2 tspGochugaru (Korean red chili powder)
2 TbspSesame oil
4 TbspSoy sauce
3 TbspSugar
1 thumb sizeFresh ginger, peeled and minced
6 clovesGarlic, minced
To tasteSalt

Instructions:

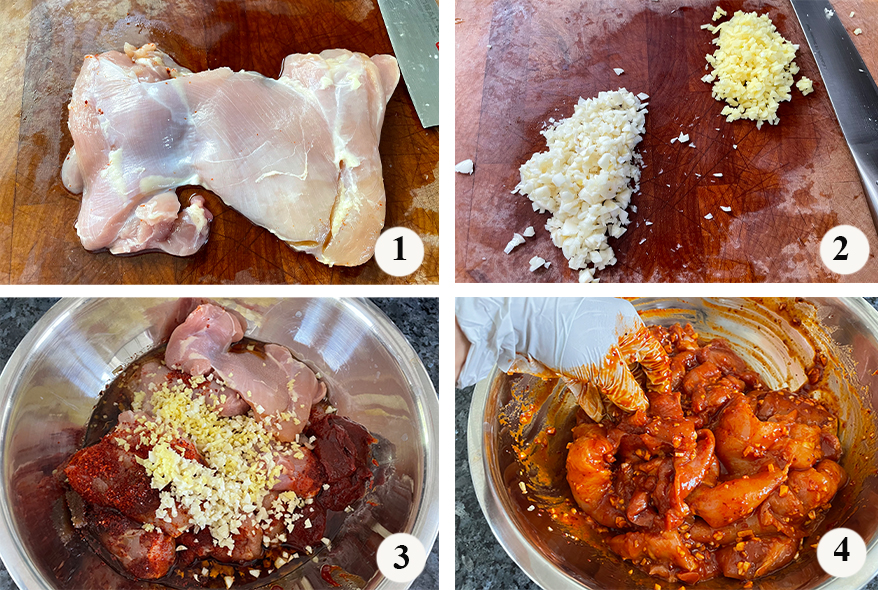
  1. Wash chicken thighs and pat dry, trim off all the fat. (Picture 1)
  2. Mince garlic and ginger, set aside. (Picture 2)
  3. Combine all the ingredients in a large bowl, mix well until combined. Marinate the chicken for 2 hours or overnight. (Pictures 3 & 4)
  4. Put chicken thighs on the grill and grill until slightly charred. You can also pan fry the chicken on a skillet.
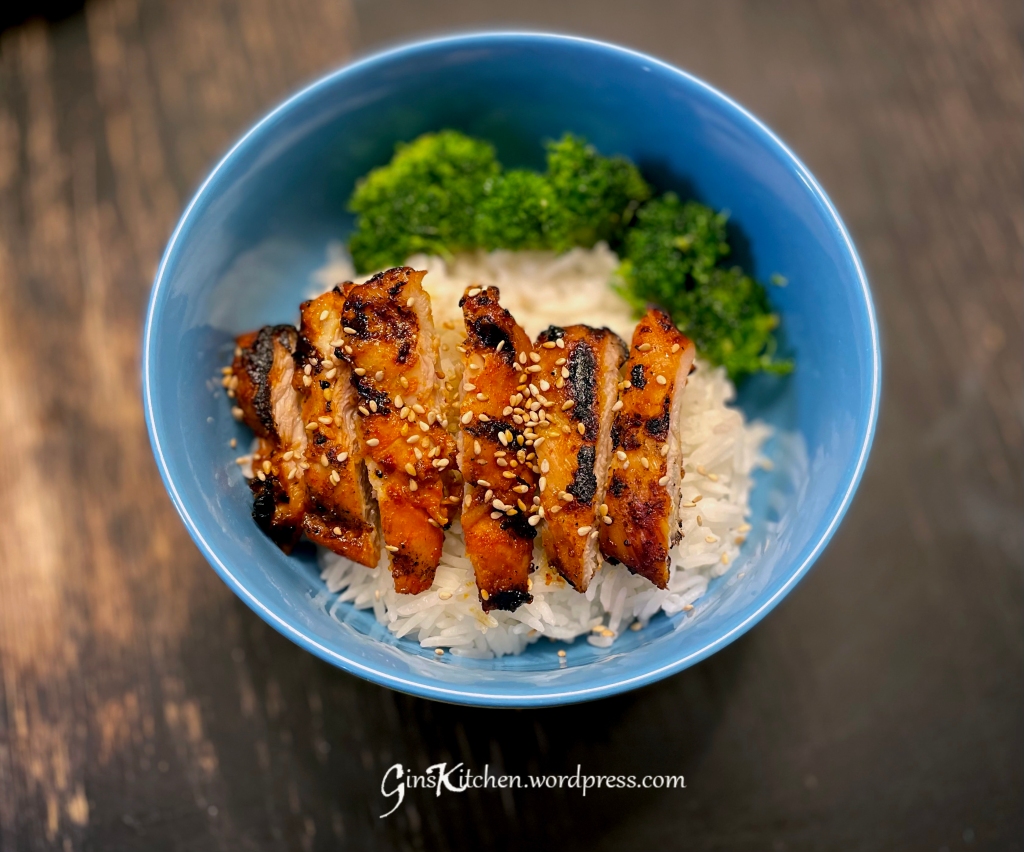
  5. Cut chicken thighs into strips, sprinkle some toasted sesame on top for garnish, serve with steamed rice.

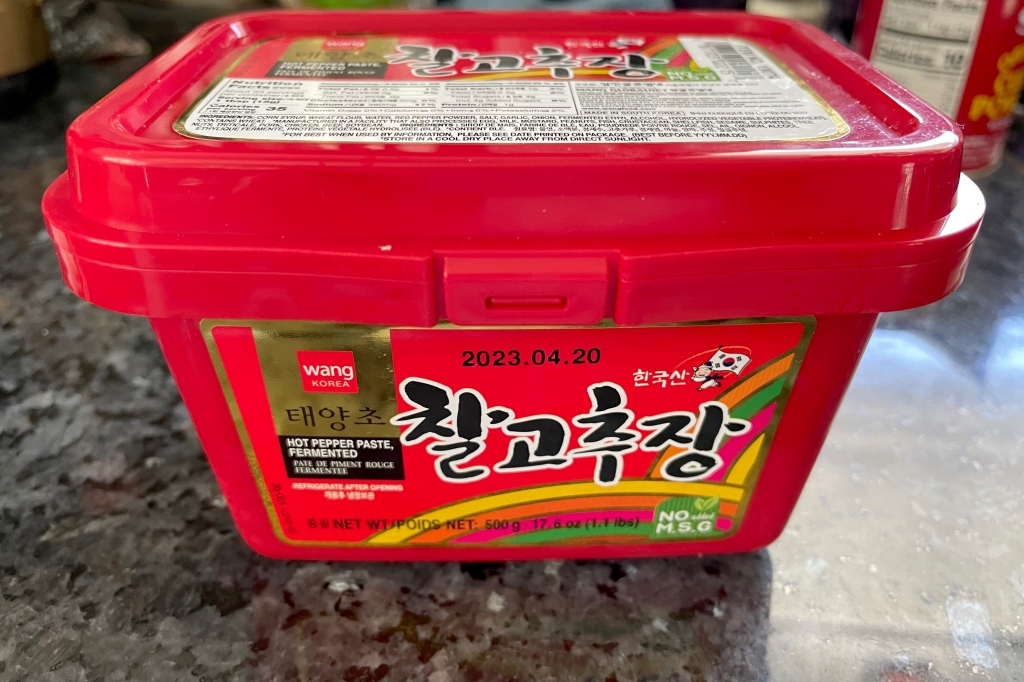
Below is a picture of the Gochujang (Korean fermented chili paste):

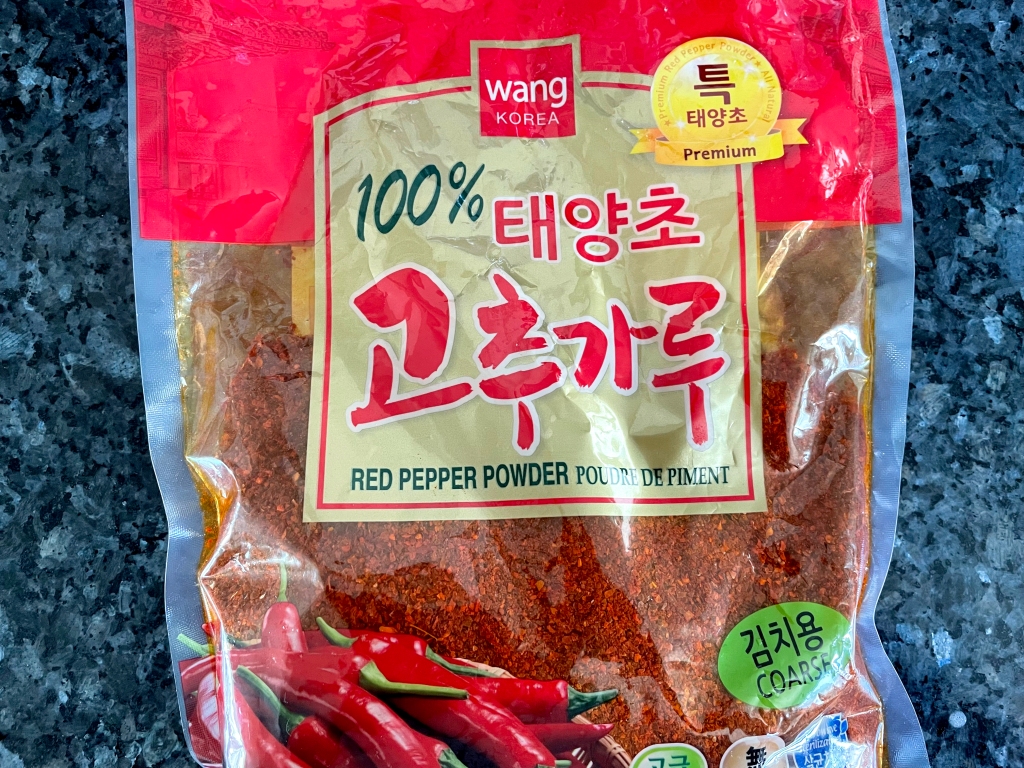
And below is a picture of Gochugaru (chili powder):

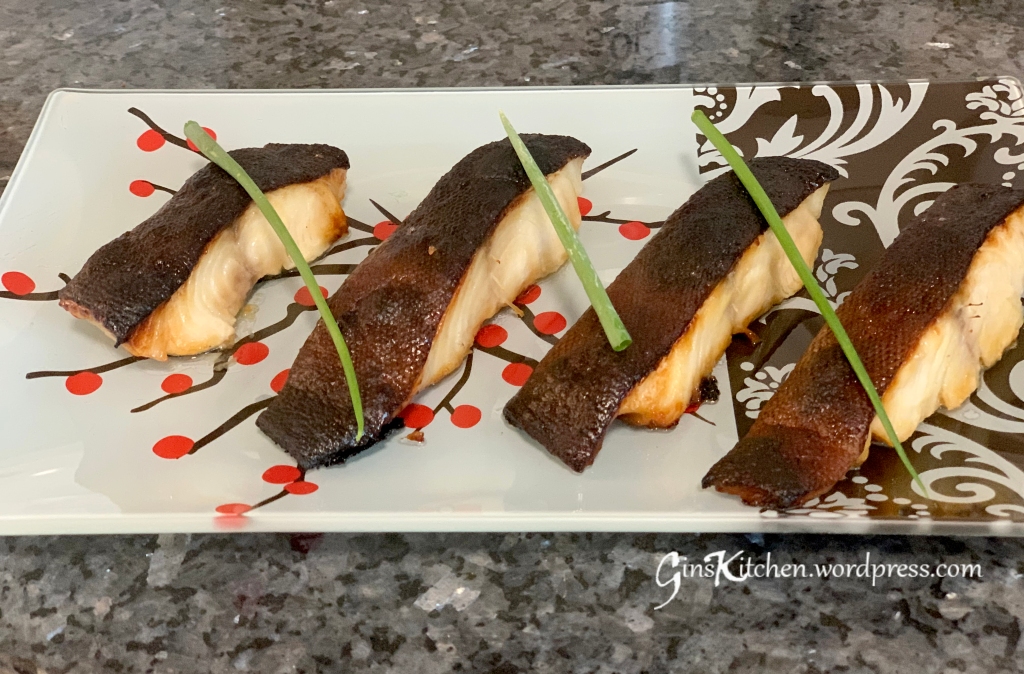
Black Cod with Miso Marinade


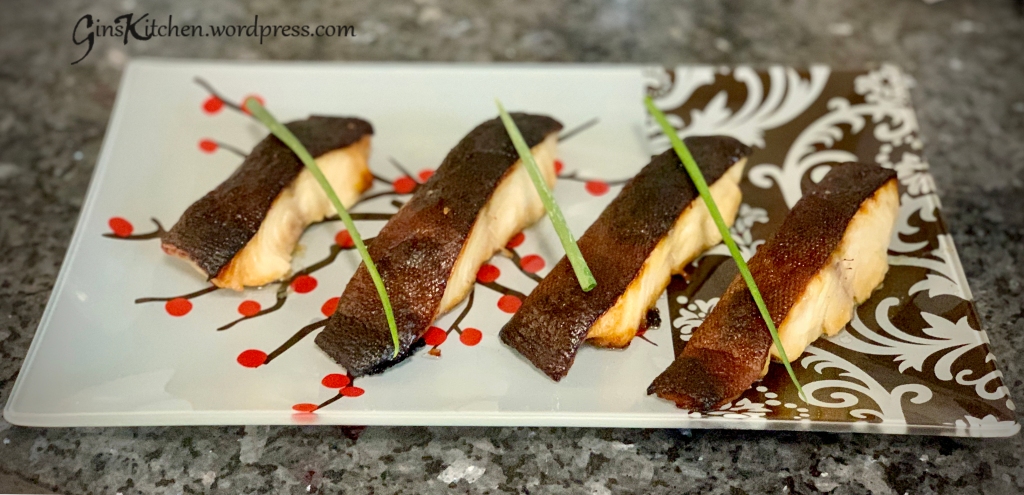
Black Cod, also known as Sablefish, is one of my favorite types of fish.  It also has another name “Butterfish” because of its a soft, flaky texture and buttery rich flavor, similar to Chilean sea bass.  Many people substitute Black Cod for Chilean sea bass due to its affordable price.

There are many ways to cook black cod—simply marinade with salt & pepper, garlic salt, soy sauce, lemon pepper, etc.—but the most popular and delicious marinade is miso.  Whichever way you prepare the fish, the buttery flavor from the black cod just makes the flavor so unique.

Ingredients:

Step 1:

8 fillets (1.5″ wide)Black Cod
3 tspSea salt
4 TbspSake

Step 2:

1/2 cupWhite miso
6 TbspMirin
4 TbspSake

Directions:

  1. This fish needs to be marinated for at least 2 days to get the best flavor.
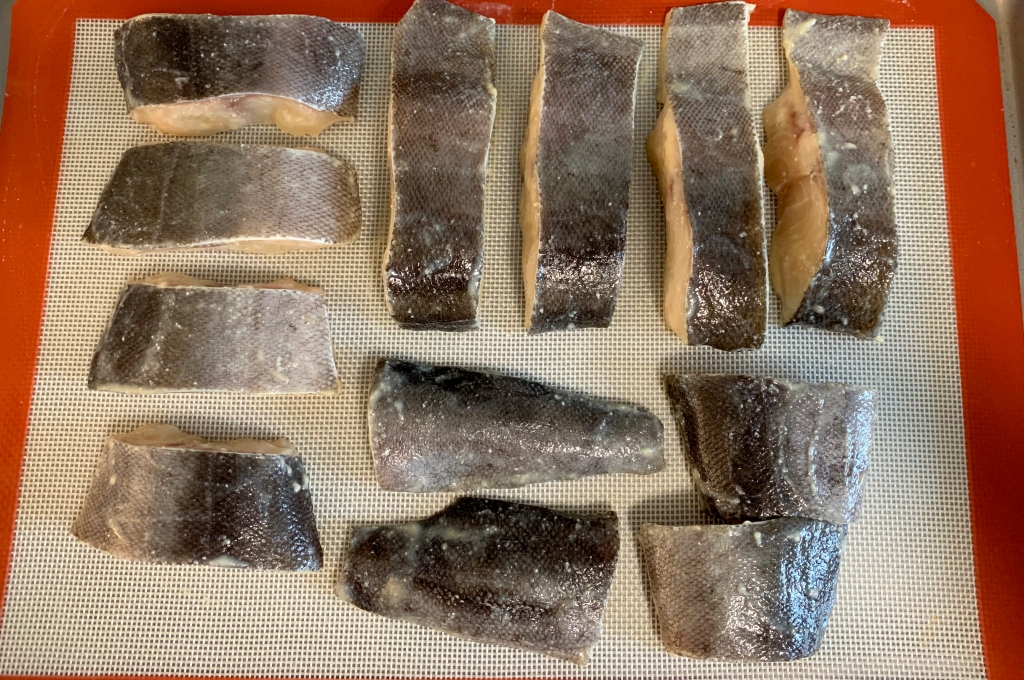
  2. To get rid of the fishy smell, sprinkle salt over the fish and set aside for 30 minutes. 
  3. Pour 4 Tbsp sake over fish to rinse off the salt and pat dry with paper towel.  Rinsing under tap water is not recommended.  
  4. In a container, combine white miso, mirin and sake and mix well.  
  5. Put fish fillets into the bowl and get a nice coat of marinade. 
  6. Place fish in a large glass container and pour excess marinade in.  Cover the lid and refrigerate for 2 days.
  7. Preheat oven to 400F.  Remove the marinade off the fish with your fingers.  Too much marinade will burn the fish easily.
  8. Line the baking sheet with parchment paper and place fish fillets skin side up.
  9. Bake the fish until the edges are browned (about 25 mins).

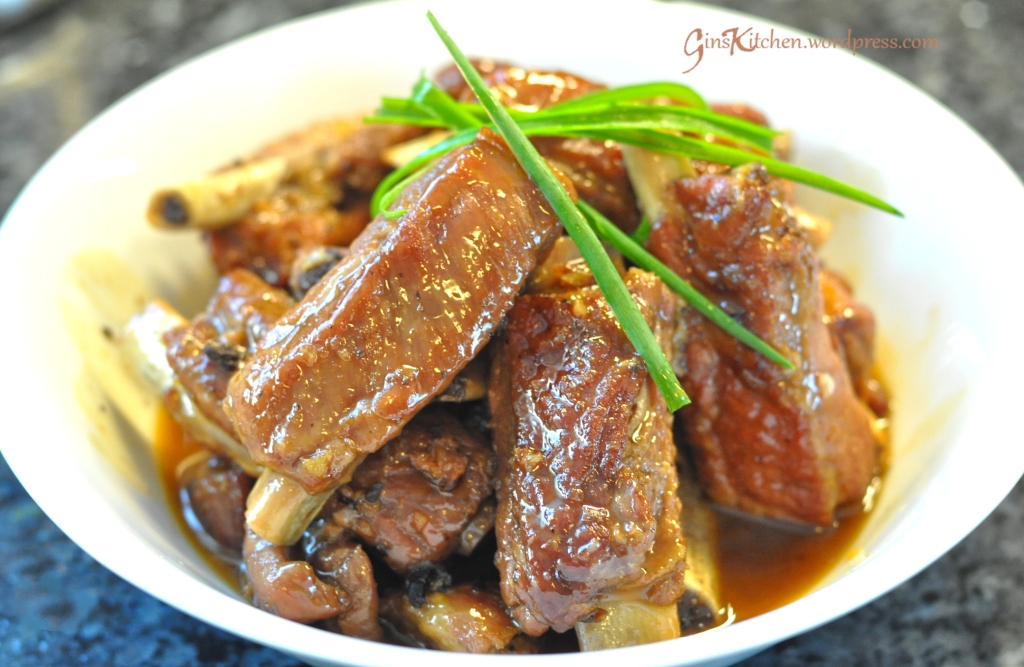
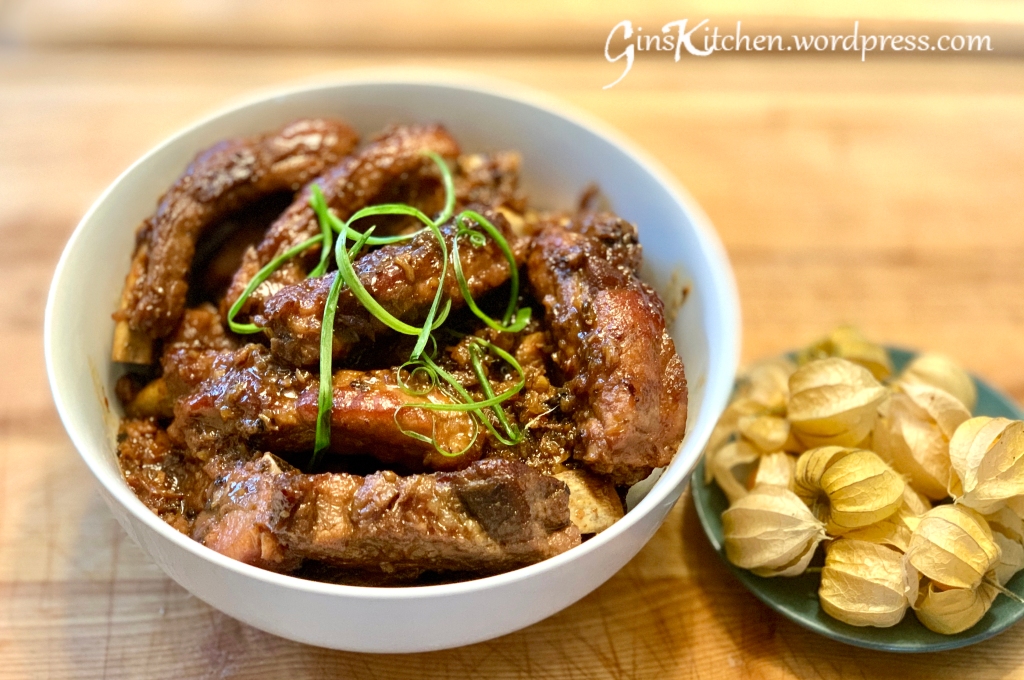
Orange Sauce Pork Spareribs 橙汁肉排


This recipe is from Christine Ho’s cookbook (Christine’s recipe here). It is so delicious that I didn’t alter any ingredients, so this recipe must be saved here for my children. For all pork lovers, this is a must try dish.

Ingredients:

700gPork spare ribs
1 tspMinced fresh ginger
1 tspFinely chopped garlic
2 tspCooking wine
to tasteSalt
to tastePepper

Ingredients of sauce:

1 cupFreshly squeezed orange juice, sifted
1 cupChicken broth
2 TbspLight soy sauce
2 TbspBrown sugar
1/2 tspOrange zest

Directions:

  1. Rinse pork ribs and wipe dry with kitchen papers. Season with salt and pepper.
  2. Add all ingredients for the sauce in a pot and bring it to a boil over medium fire.
  3. Brown pork ribs on a frying pan/wok until both sides are golden. Push pork ribs to one side of the pan, then add in ginger and garlic, cook until fragrant. Pour in cooking wine and stir to combine all ingredients. (Pictures 1-3)
  4. Transfer the pork ribs to the pot with the sauce, reduce heat, cover and simmer for 2 hours or until sauce becomes thickened. Serve hot with steamed rice.

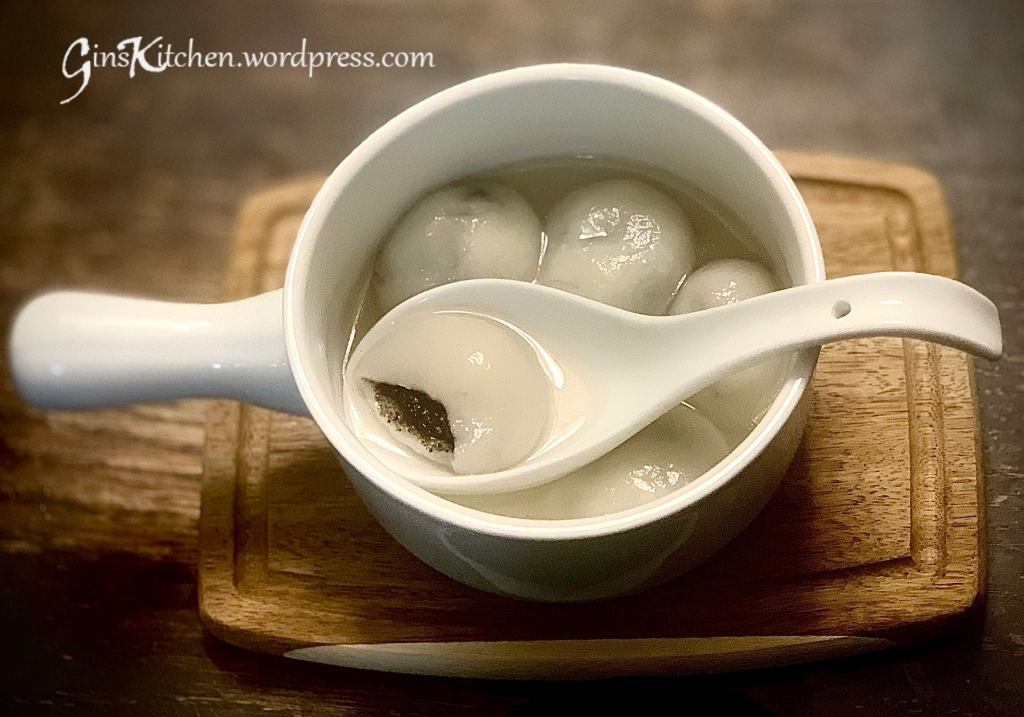
Black Sesame Balls 芝麻湯圓(Dessert)


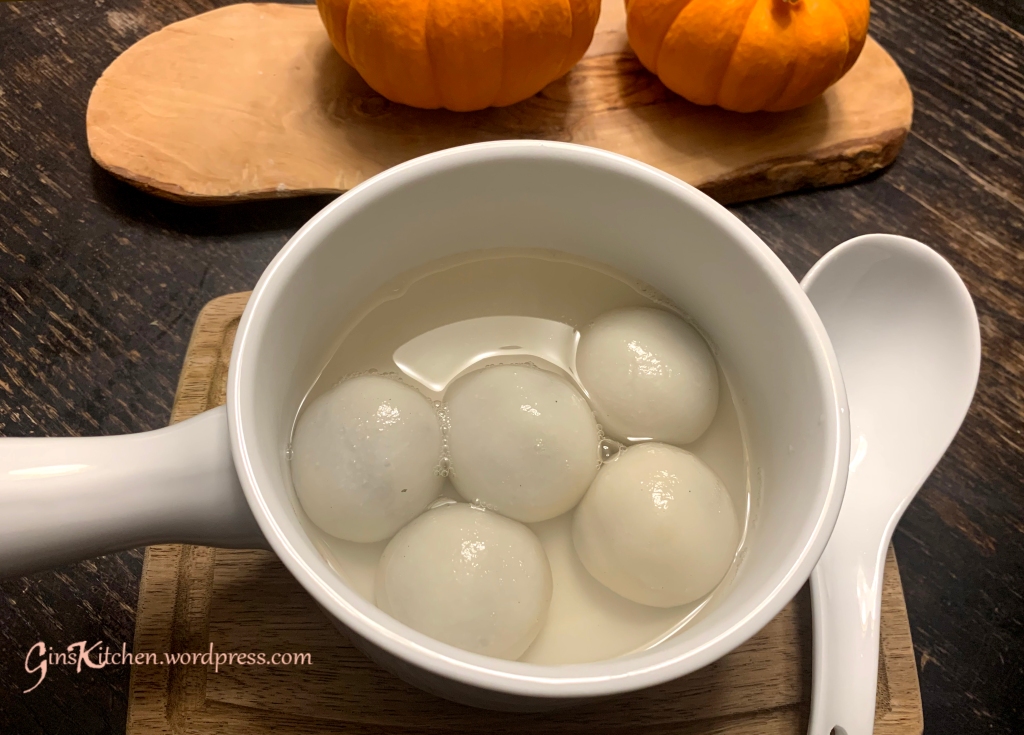
Winter Solstice is one of the most important festivals of the year for Chinese people. One traditional food that must be served is the glutinous rice balls (“Tang Yuan”). These rice balls symbolize family reunion, so family members usually would get together and have a nice dinner on this day. It’s also served during the Lunar New Year.

I personally like both savory and sweet rice balls, but my family prefers the sweet ones. These Tang Yuan can be found in the frozen section at the Asian supermarkets. We used to get those but found out they were made with lard. Why not make your own with healthier ingredients?!

Ingredients for filling:

65gGranulated Sugar
110gRoasted black sesame powder
60gMelted unsalted butter
30gWater

Ingredients for dough:

250g Glutinous rice flour
140gBoiling water
70gRoom temperature water

Ingredients for syrup base:

800 mlWater
200gRock sugar (adjust the amount to your taste)

Directions – making the filling:

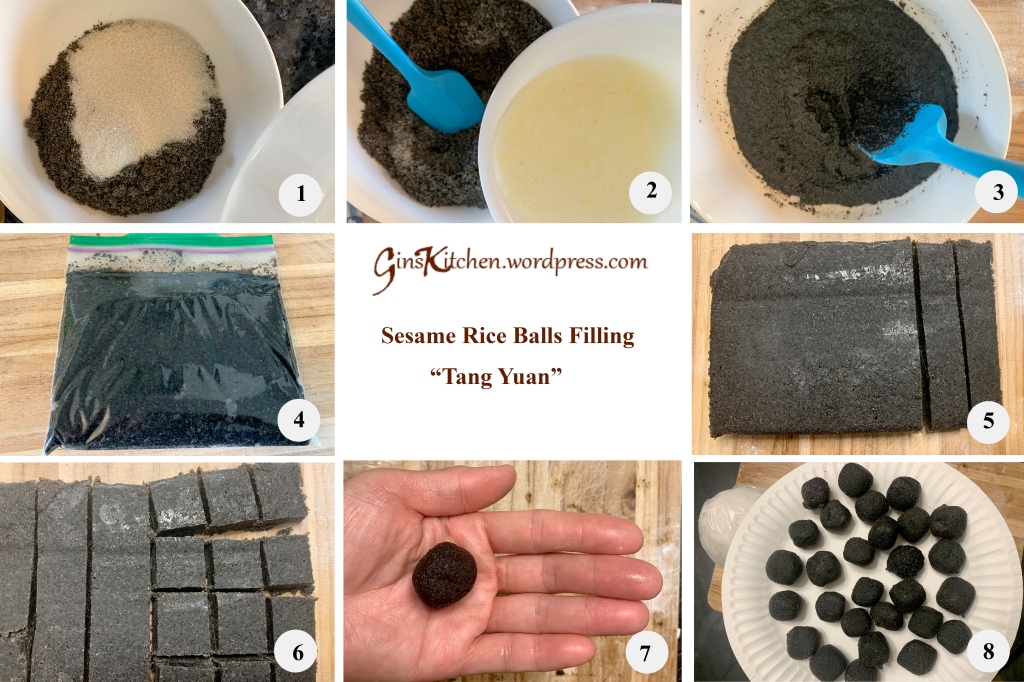
  1. Combine black sesame powder and sugar in a bowl, add in melted butter and water, mix well. (Pictures 1-3)
  2. Put the sesame mixture into a sandwich size ziploc bag, pat it flat and put in the freezer until hardened. (Picture 4)
  3. When filling is firm, lay the sesame filling on a chopping board and cut into approximately 1cm x 1cm cubes. You can make 27-30 cubes. (Picture 5 & 6)
  4. Roll each cube into a ball in your palms. (Picture 7)
  5. Once you got all the balls ready, put them back in the freezer until you finish preparing the dough. The purpose of cooling the balls is to harden the filling mixture for easy handling later. (Picture 8)

Directions – making dough:

  1. While the filling is cooling, make the dough.
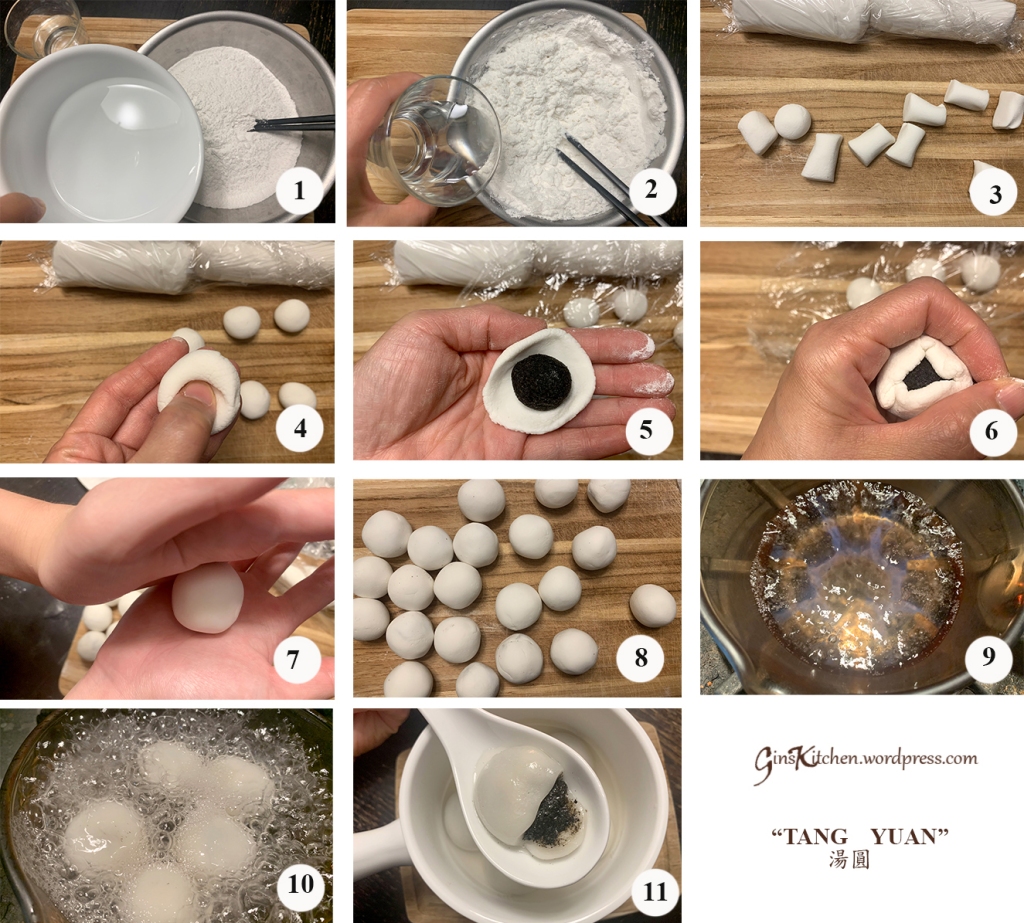
  2. Measure out 250g of glutinous flour in a mixing bowl. Bring 140g of water to a boil, slowly add into the mixing bowl with flour and stir immediately. Then add in room temperature water and knead the dough until combined, about 2 minutes. The dough should be smooth and slightly tacky to the touch, but not sticky. Cover the dough and let it rest at room temperature for 30 minutes. (Pictures 1 & 2)
  3. Divide the dough into 3 equal pieces. Roll out each dough and cut into small pieces (about 27-30 pieces in total), this should match the number of filling pieces. Keep the dough pieces covered with a plastic wrap while assembling to prevent the dough from getting dry. (Picture 3)
  4. Take each dough and use your thumb to press into the ball and create a small concave bowl (Picture 4)
  5. Add the chilled sesame filling to the center and close the dough over the filling. (Pictures 5 & 6)
  6. Roll the ball around in your palms until it’s smooth and round. (Picture 7)
  7. Repeat Steps 3-5 until you have made all the sesame balls. (Picture 8)
  8. While assembling the sesame balls, bring a medium pot of water and rock sugar to a boil. And add in sesame balls and stir to prevent them from sticking. When the sesame balls float to the top, cook for 2 more minutes and they are ready to eat. (Pictures 9-11)

Note: Uncooked sesame balls can be frozen separately on a baking sheet until firm, then grouped and sealed in a freezer bag. Do not defrost frozen sesame balls before cooking them, just add the frozen balls to the boiling water and cook them for 5 minutes.

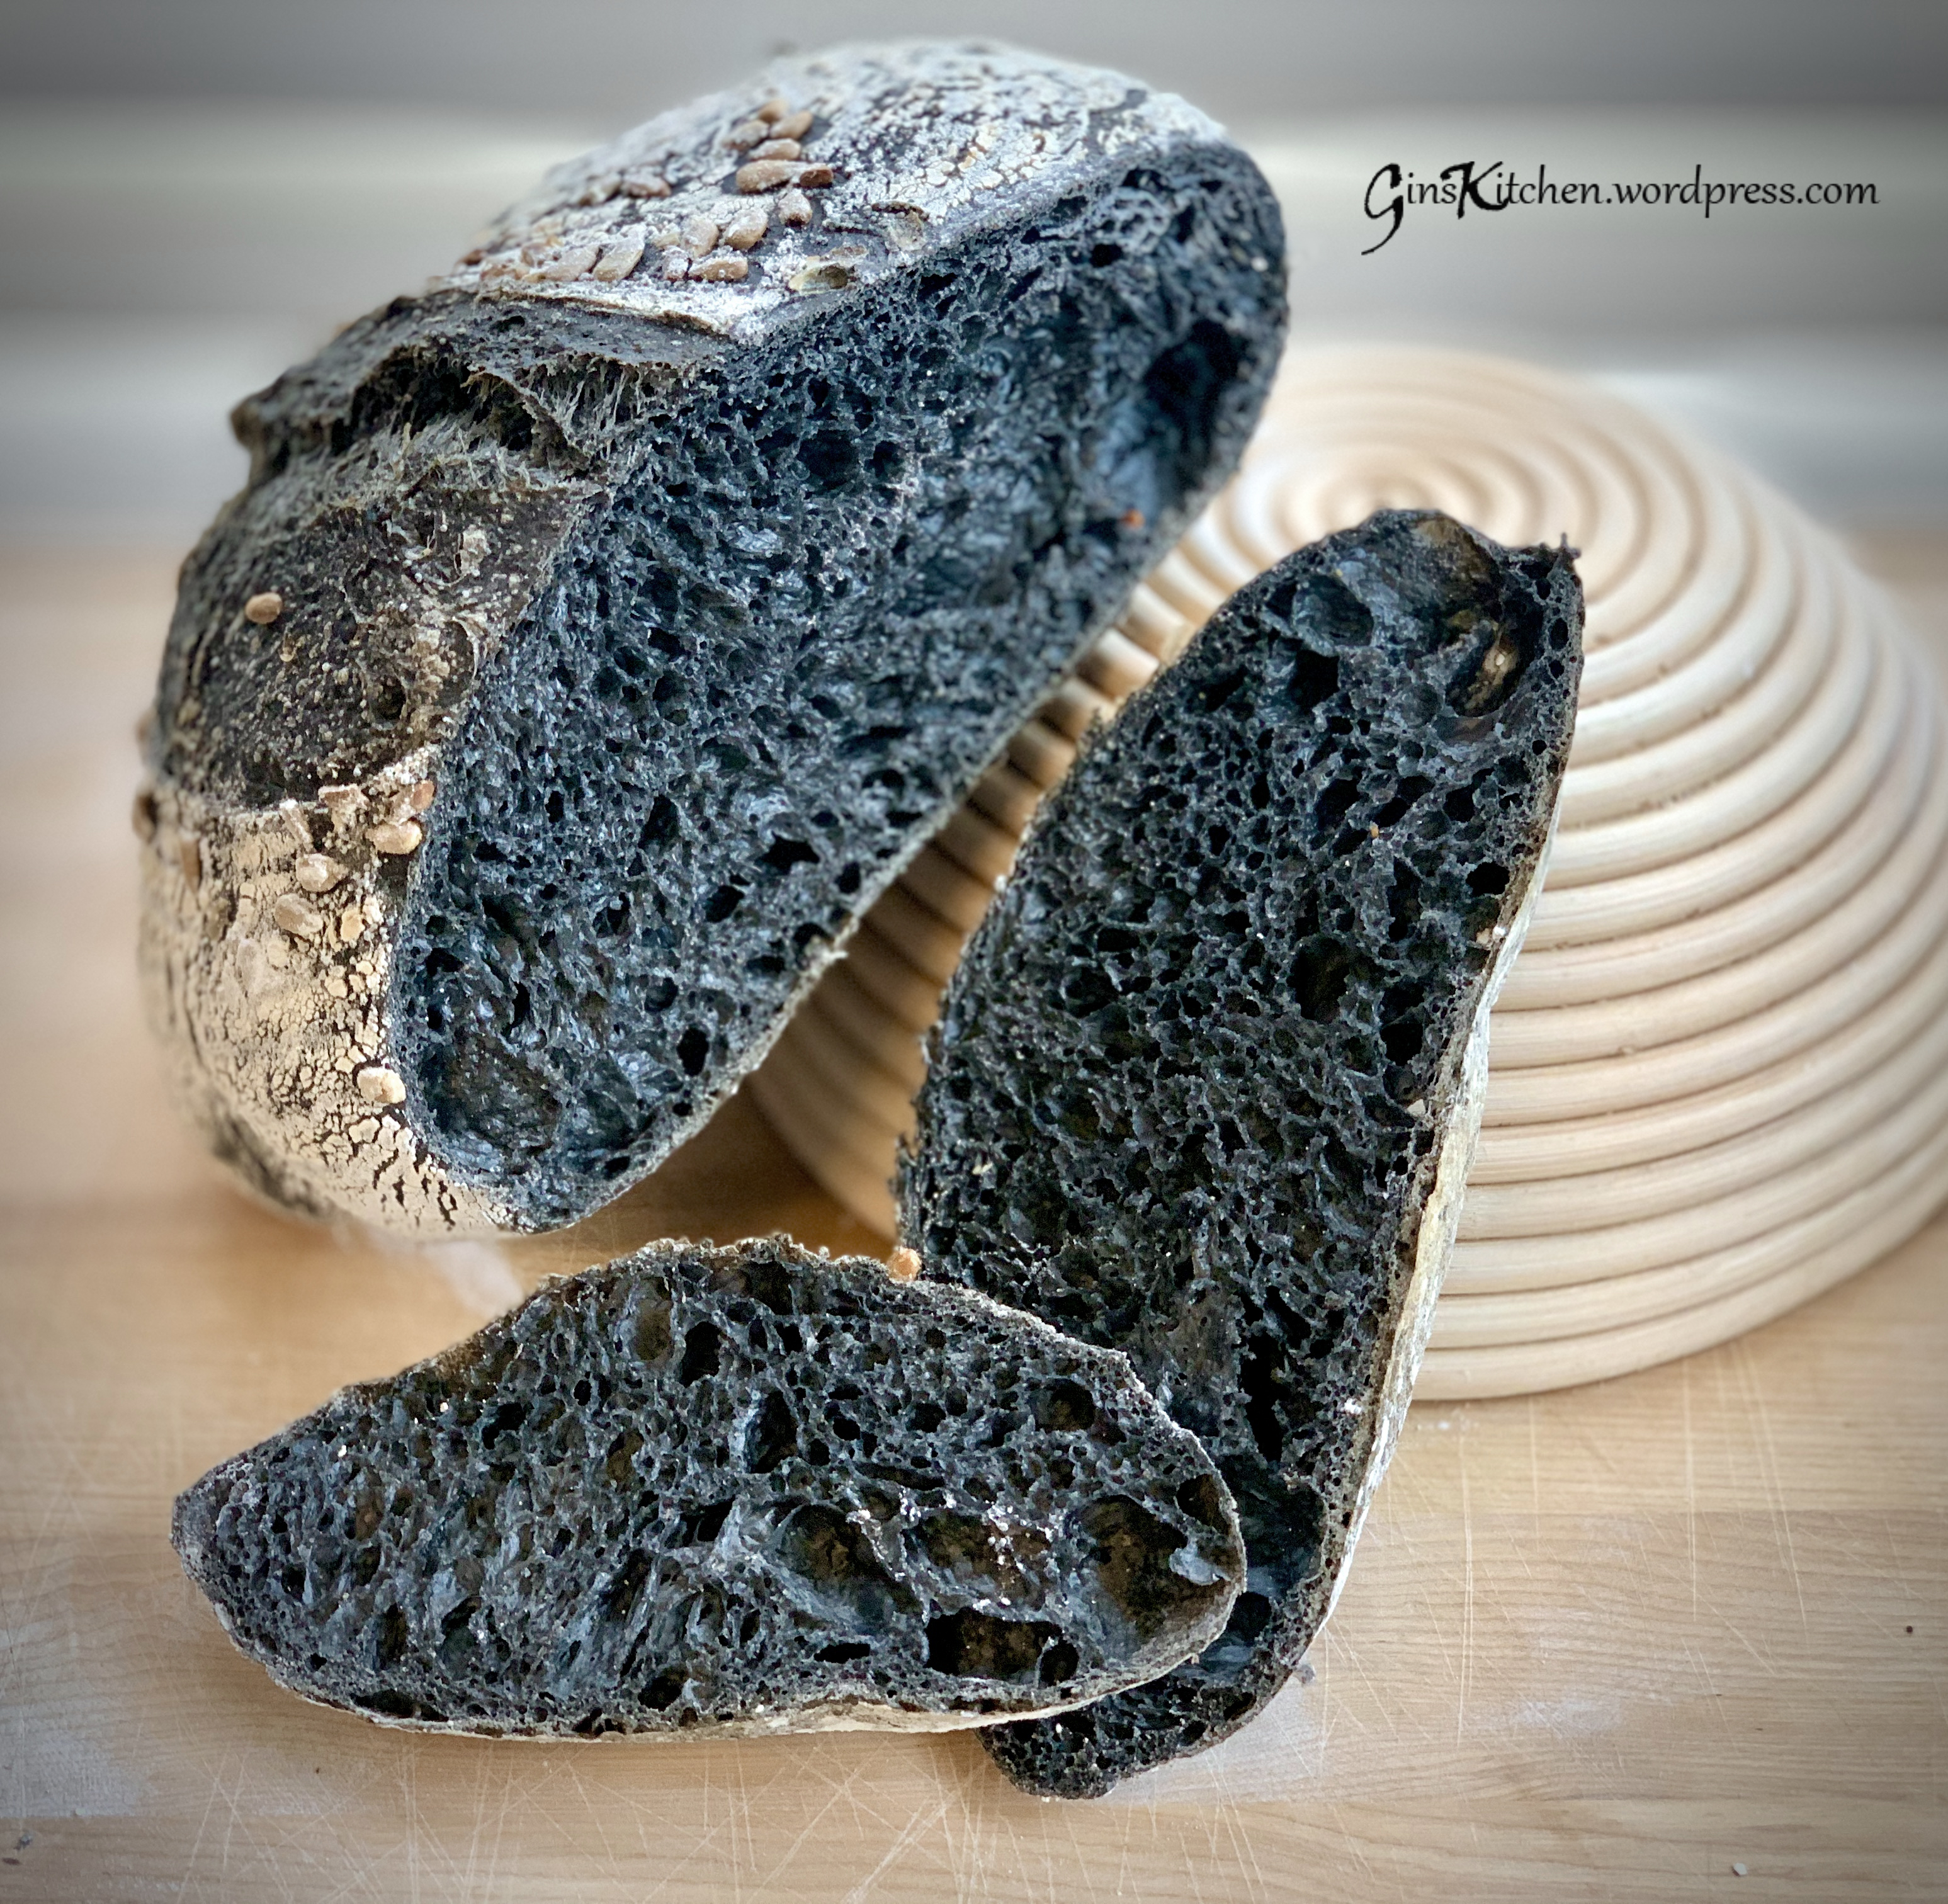
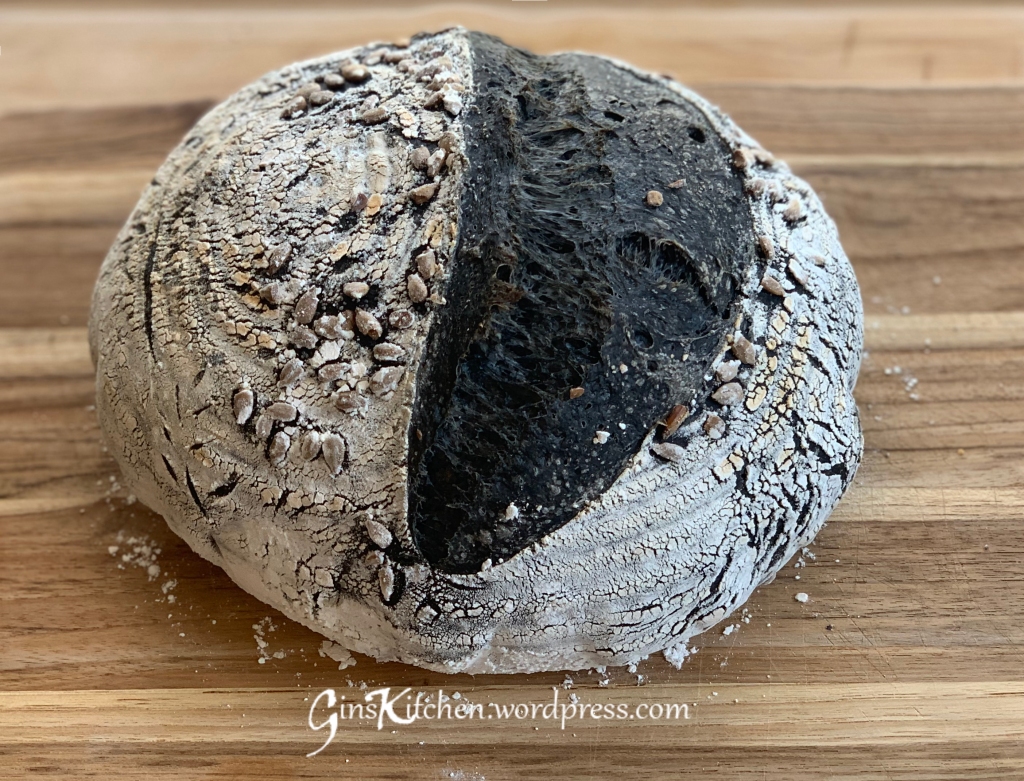
Activated Charcoal Sourdough Bread with Poppy Seeds


Charcoal sourdough

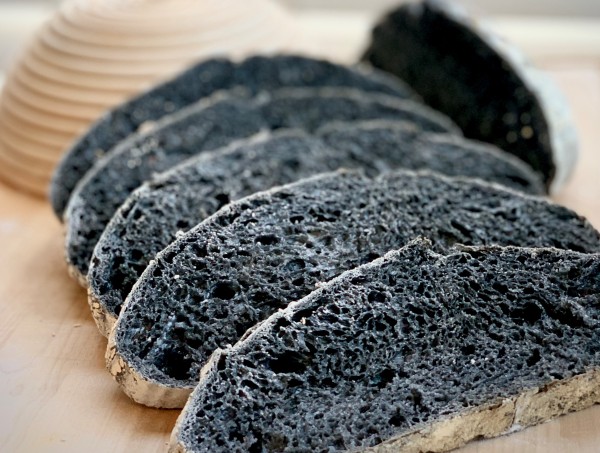
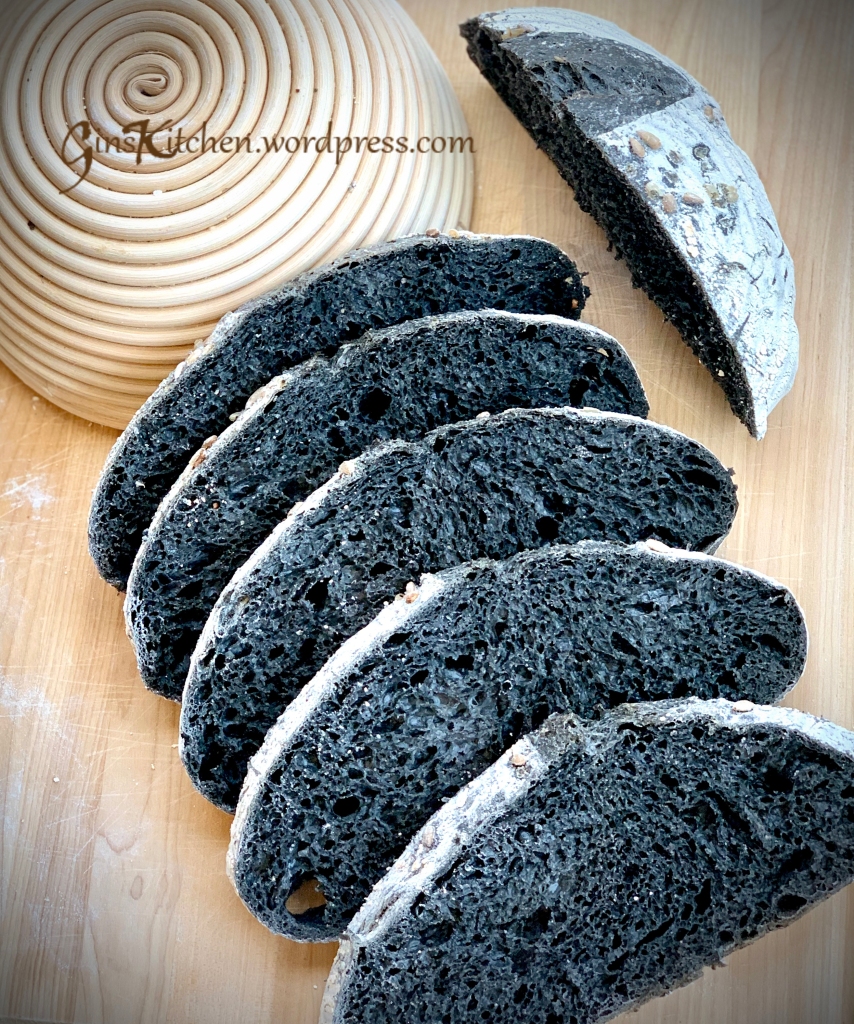
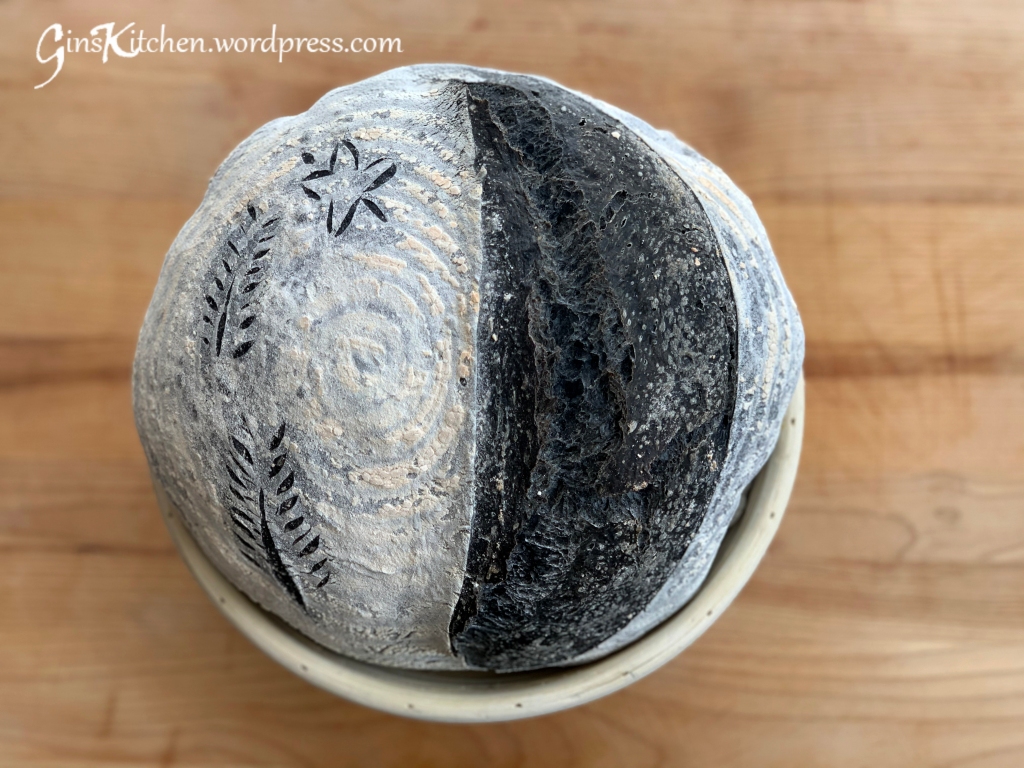
It’s 105°F in Southern California today, the outdoor air is so suffocating and unbearable.  This, however, gave me a chance to stay indoors and pick up where I left off on my blog – It’s been a long time since I last saved a recipe here.   This charcoal sourdough is one of my kids’ favorites among all other flavors.  It’s not because of its taste (charcoal doesn’t bring much taste to the bread at all), but its texture – it’s soft and chewy, perfect to dip in vinegar and olive oil or to spread butter on.

Ingredients (Hydration is about 72%)

Step 1 – Prep for the dough:

400gBread Flour
30gDark Rye Flour
20gSpelt Flour
1gActivated Charcoal Powder
2 TbspCocoa Powder (optional)
320gWater
1 tsppoppy seeds (add in later)

Step 2 – Mix and rest for 30 mins:

10gSalt
90gStarter

Directions:

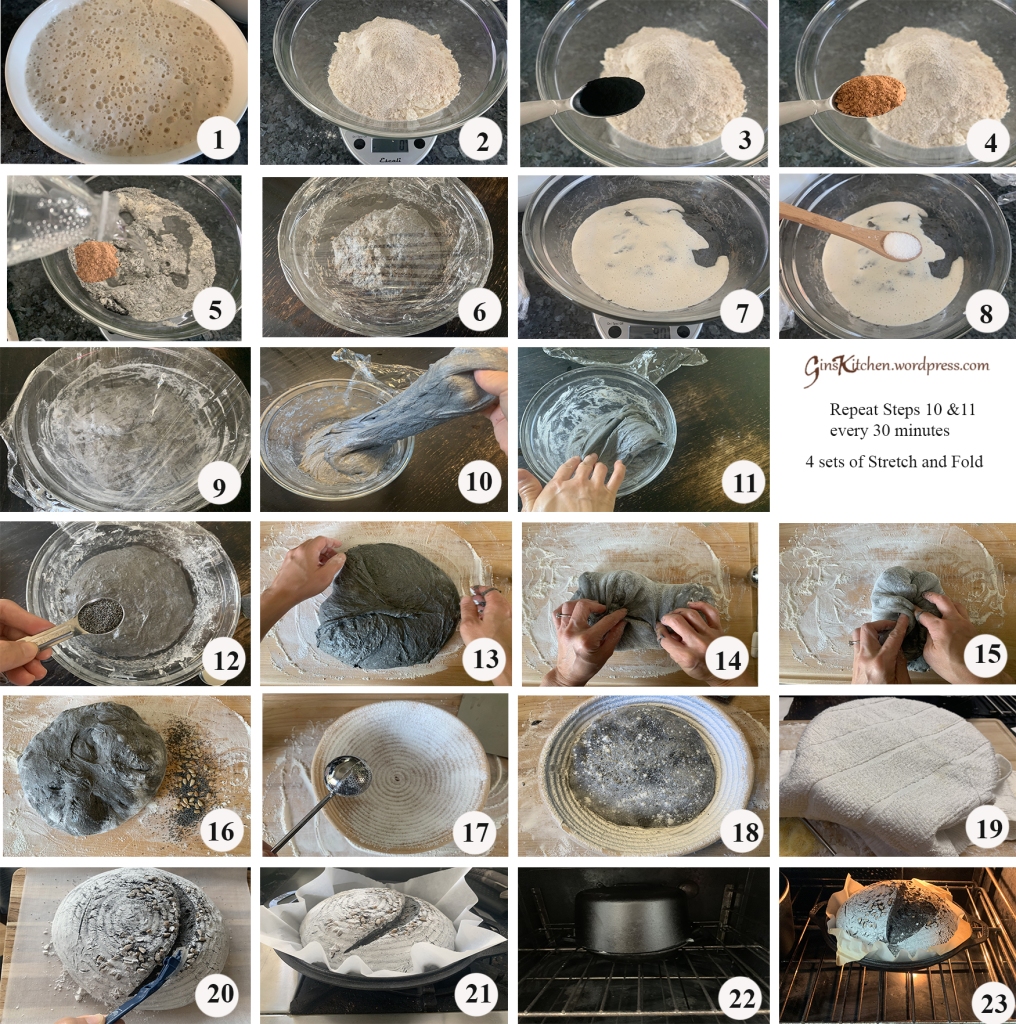
  1. Feed your starter with equal amount of water, flour and starter until it is active and ready to use (you may want to start feeding the starter a few days ahead of time if the starter is stored in the fridge). When starter is ready to use, there will be a lot of bubbles – see picture 1).
  2. In a mixing bowl, combine all flour, charcoal powder, cocoa powder and water.  Cover with a towel or plastic wrap and let it rest in room temperature for 1 hour.  (Pictures 2-6)
  3. After 1 hour, add 90g of starter and 10g of salt.  Use your hand to pinch and fold the dough over and over to get it nice and mixed.  The dough is more wet and sloppy than it was during the first mix.  Cover the dough and set the timer for 30 minutes.  (Pictures 7-9)
  4. Now we are going to stretch and fold the dough – Lift one side of the dough straight up until you meet resistance and fold it across the center.  Turn the bowl 90 degree and perform the stretch-and-folds (the dough is probably very relaxed in the beginning).  Once you have finished all the way around the bowl back to where you started, you have completed one set.  Cover the dough with plastic wrap and set the timer for 30 minutes.  (Pictures 10 & 11)
  5. Repeat Step 4 above three more times. Add in poppy seeds during the last round of stretch and fold. (Picture 12)
  6. After the last set of Stretch-And-Fold, lightly fold the dough a couple of times, cover the dough and let it rest for 1-2 hours instead of 30 mins.
  7. Dust the banneton basket with rice flour. Dust your work surface with flour and fold the dough a couple of times and shape the dough to a ball, carefully transfer the dough to the basket. Cover with a towel and put it in the refrigerator for 5-10 hours/overnight. (Pictures 17-19)

Baking the bread:

  1. During the dough’s last 45 minutes of final proof, preheat the oven and the cast iron pan at 500F (preheating the pan for at least 45 minutes). 
  2. Remove the basket from the fridge.  Put a piece of parchment paper on top of the banneton basket and put a chopping board on top of the parchment paper. Now hold the basket and chopping board tight and flip over the banneton basket. 
  3. You can score the dough either a line or a cross.  (Picture 20)
  4. Remove the cast iron pan from the oven and slide the dough to the pan.  (Picture 21)
  5. Cover the cast iron pan and turn the oven temperature down to 450F and set the timer to bake for 20 minutes. (Picture 22)
  6. After 20 minutes, uncover the pan and continue to bake for another 20 minutes.** (Picture 23)
  7. Let the bread cool down completely on a cooling rack before slicing it.

**Note:  Each oven is different, you may need to adjust the cooking time for longer.