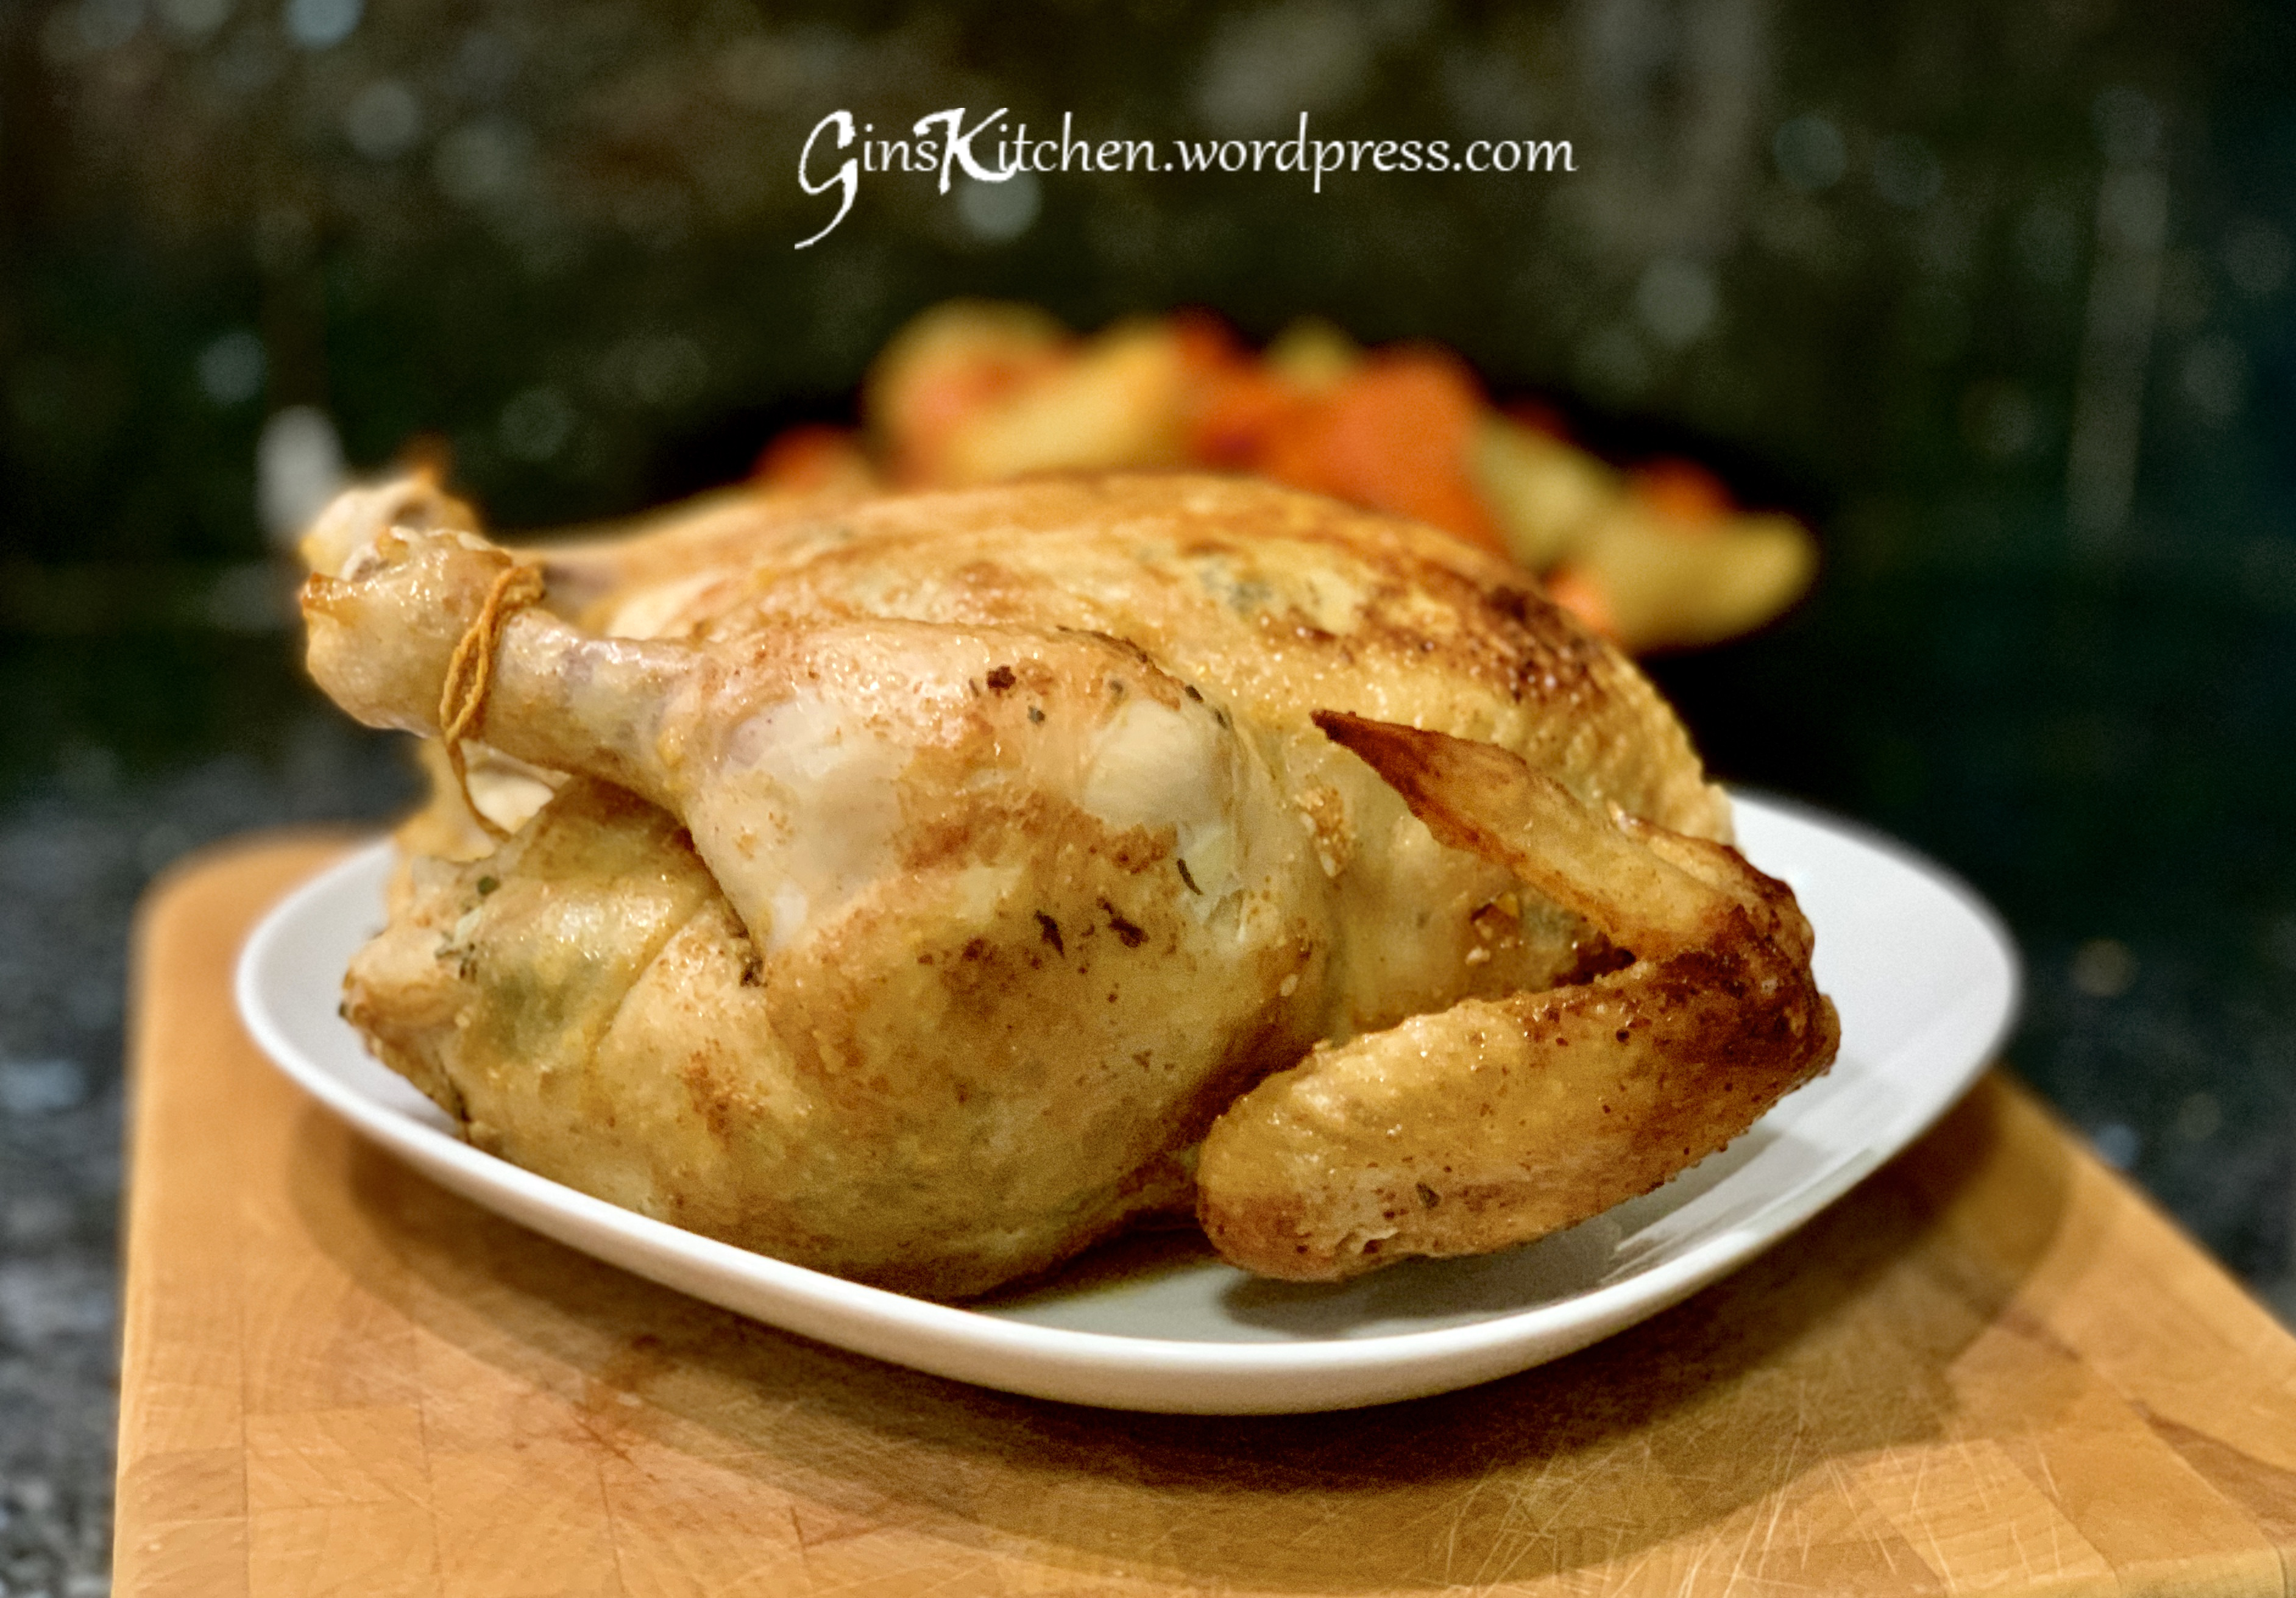
Last summer, I posted a recipe of this chicken cooked in a pressure cooker and promised to post a recipe using a Dutch Oven. Every time I made this chicken, either one wing or a drumstick was already eaten by my family before I took out my camera to shoot a picture for my blog. I have to say this is one of my family’s favorite dishes.
I like to use a Dutch Oven to bake the chicken as it keeps the meat very moist and tender, and it allows me to cook the potatoes and carrots together. Once everything is cooked, I have both a meat and a vegetable dish to serve.
The chicken is best to be marinaded overnight. It may take some time to prep, but the work is easy after you put the pot in the oven. Some people may not like rosemary which can be substituted with other herbs or simply be omitted.
Ingredients:
| 1 (3-4 pounds) | Whole roasting chicken |
| 2 Tbsp | Butter (melted) |
| 2 Tbsp | Lemon zest |
| 2 Tbsp | Rosemary (chopped) |
| 3 Tbsp | Minced Garlic |
| 3 tsp | Salt |
Spices for Chicken Skin:
| 1 tsp | Chili powder |
| 2 tsp | Paprika |
| 2 tsp | Garlic powder |
| 1 tsp | Salt |
Vegetables:
| 1 | White onion (chopped) |
| 5 | Medium size carrots (cut) |
| 1 pound | Red potatoes (cut into cubes) |
| 2/3 tsp | Season salt (or salt and pepper) |
Ingredients for Gravy:
| 2 cup | Low sodium chicken broth |
| 2 Tbsp | Corn starch |
| 2 Tbsp | Cooking wine/water |
| Salt to taste |
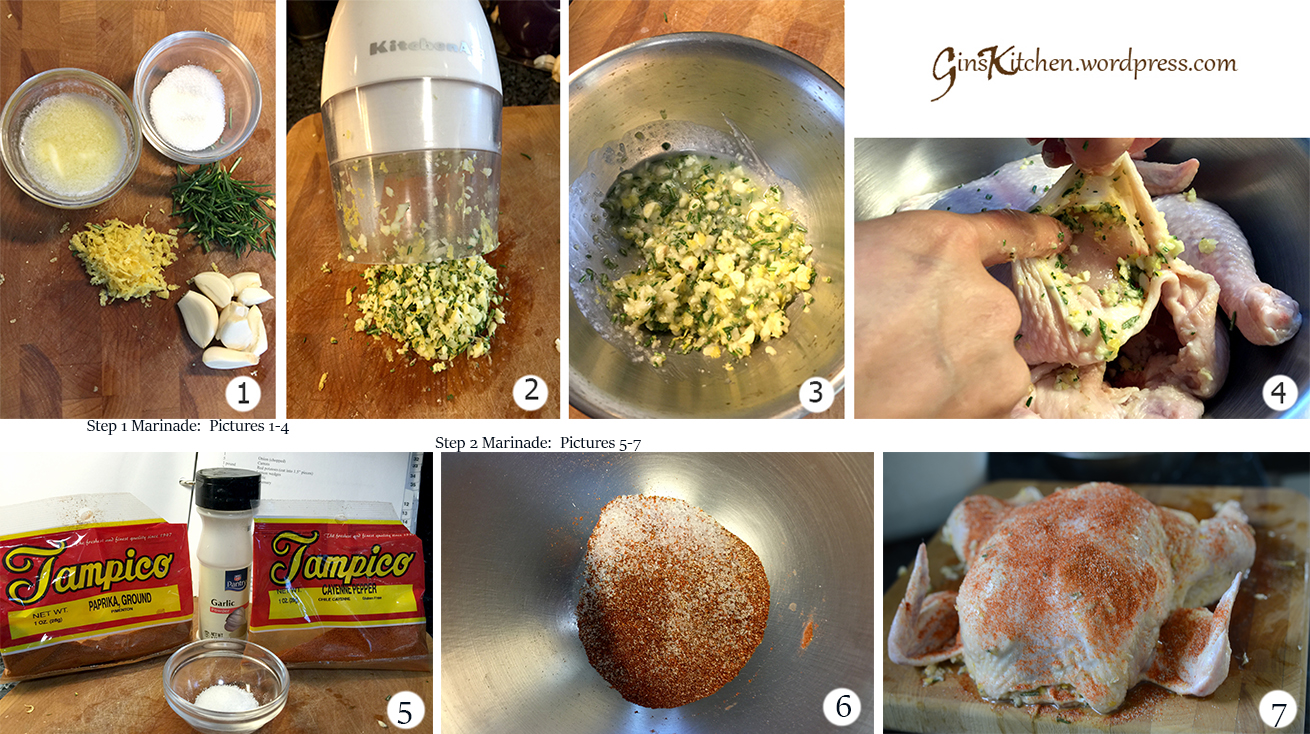
Chicken Marinade:
- Clean the chicken and pat dry.
- Melt butter in a microwave and prepare all herbs. (picture 1)
- Use a chopper to chop garlic, rosemary and lemon zest together. (picture 2)
- Mix butter, salt and herb mixture in a container. (picture 3)
- Rub herb mixture evenly underneath the chicken skin and cavity. (picture 4)
- Cover with cling wrap and put the chicken in the fridge overnight.
- Combine all spices for chicken skin in a bowl. (pictures 5 & 6)
- Remove chicken from the fridge and sprinkle the skin evenly with the spice mixture right before cooking it. (picture 7)
Directions:
- Preheat oven to 350 °F.
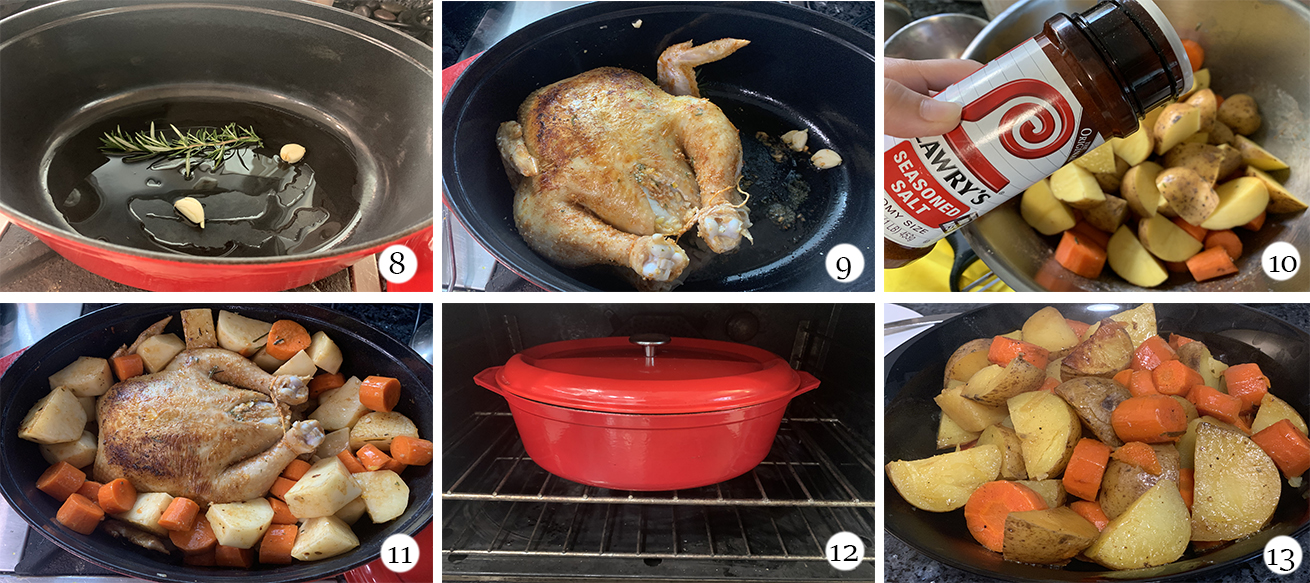
- In a large Dutch oven, heat 3 tablespoons of oil with a sprig of rosemary and 2 garlic cloves. Brown the chicken until all sides are evenly golden brown. (pictures 8 & 9)
- Cut potatoes, carrots and onion into cubes, season with season salt. (picture 10)
- Add potatoes, carrots and onion to the Dutch oven, place them around the chicken. Chicken breast should be facing up before putting it in the oven. (picture 11)
- Cover with lid and transfer the Dutch Oven to the preheated oven. Bake for an hour or until the thermometer registers 165 degrees Fahrenheit when inserted in the thickest part of breast. (picture 12)
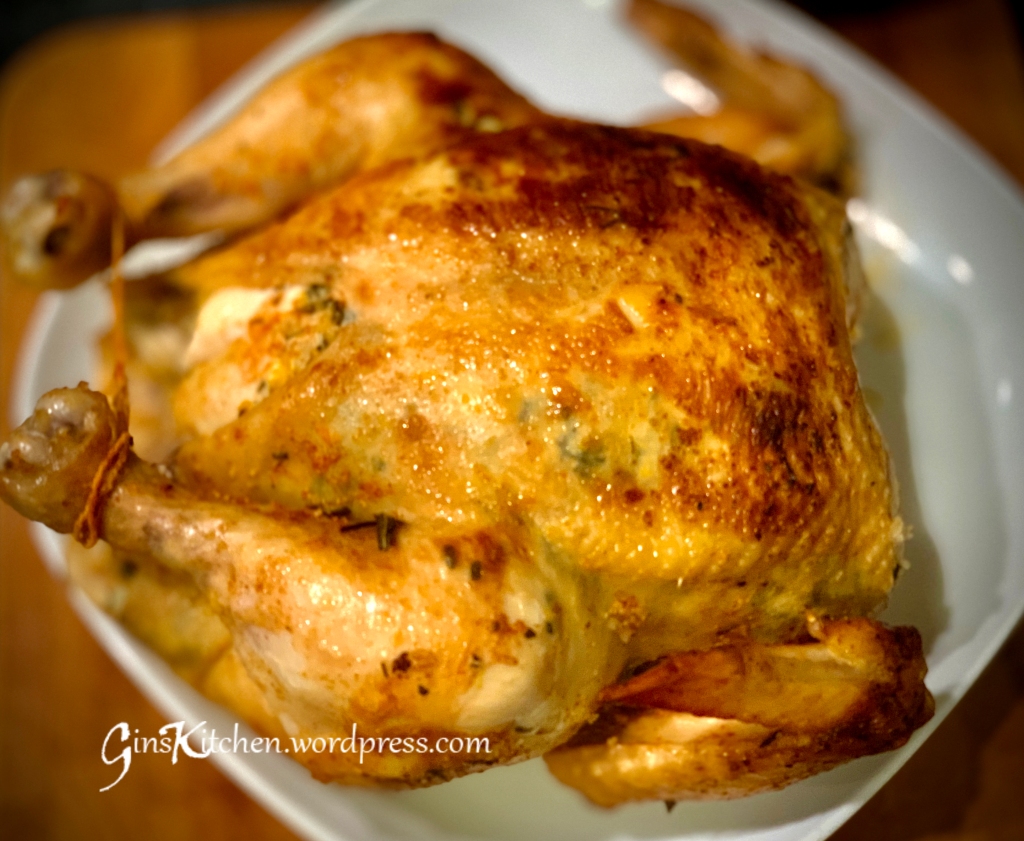
- Transfer the chicken to a serving dish and let it rest for 20 minutes before carving and transfer vegetables from the Dutch Oven to a big container. (picture 13)
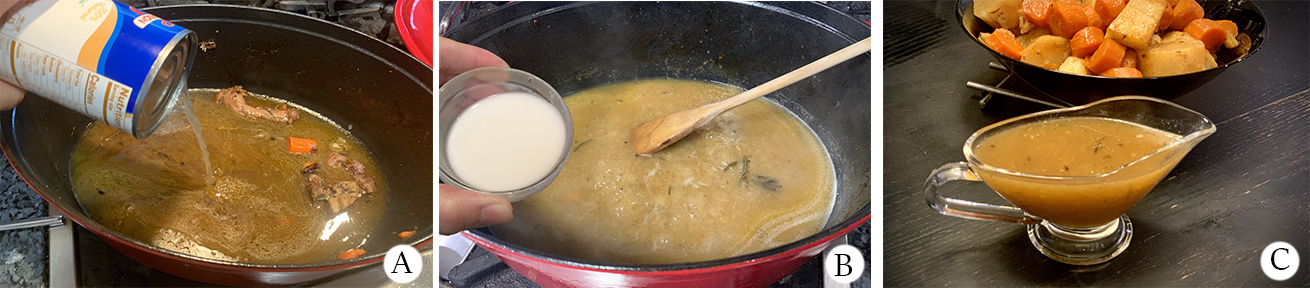
To make gravy:
- Reserve the juice from the Dutch Oven and skim the fat from the top. Place the Dutch Oven on stove top on medium heat. Add 2 cups of chicken broth. (picture A)
- Dissolve 2 tablespoons of cornstarch in 2 tbsp of water/cooking wine. Pour the cornstarch slurry into the pot and use a spoon or whisk to mix (don’t pour in all cornstarch slurry, if gravy is still thin, add more in until it’s slightly thickened.) (picture B)
- Transfer gravy to a sauce boat and serve hot. (picture C)