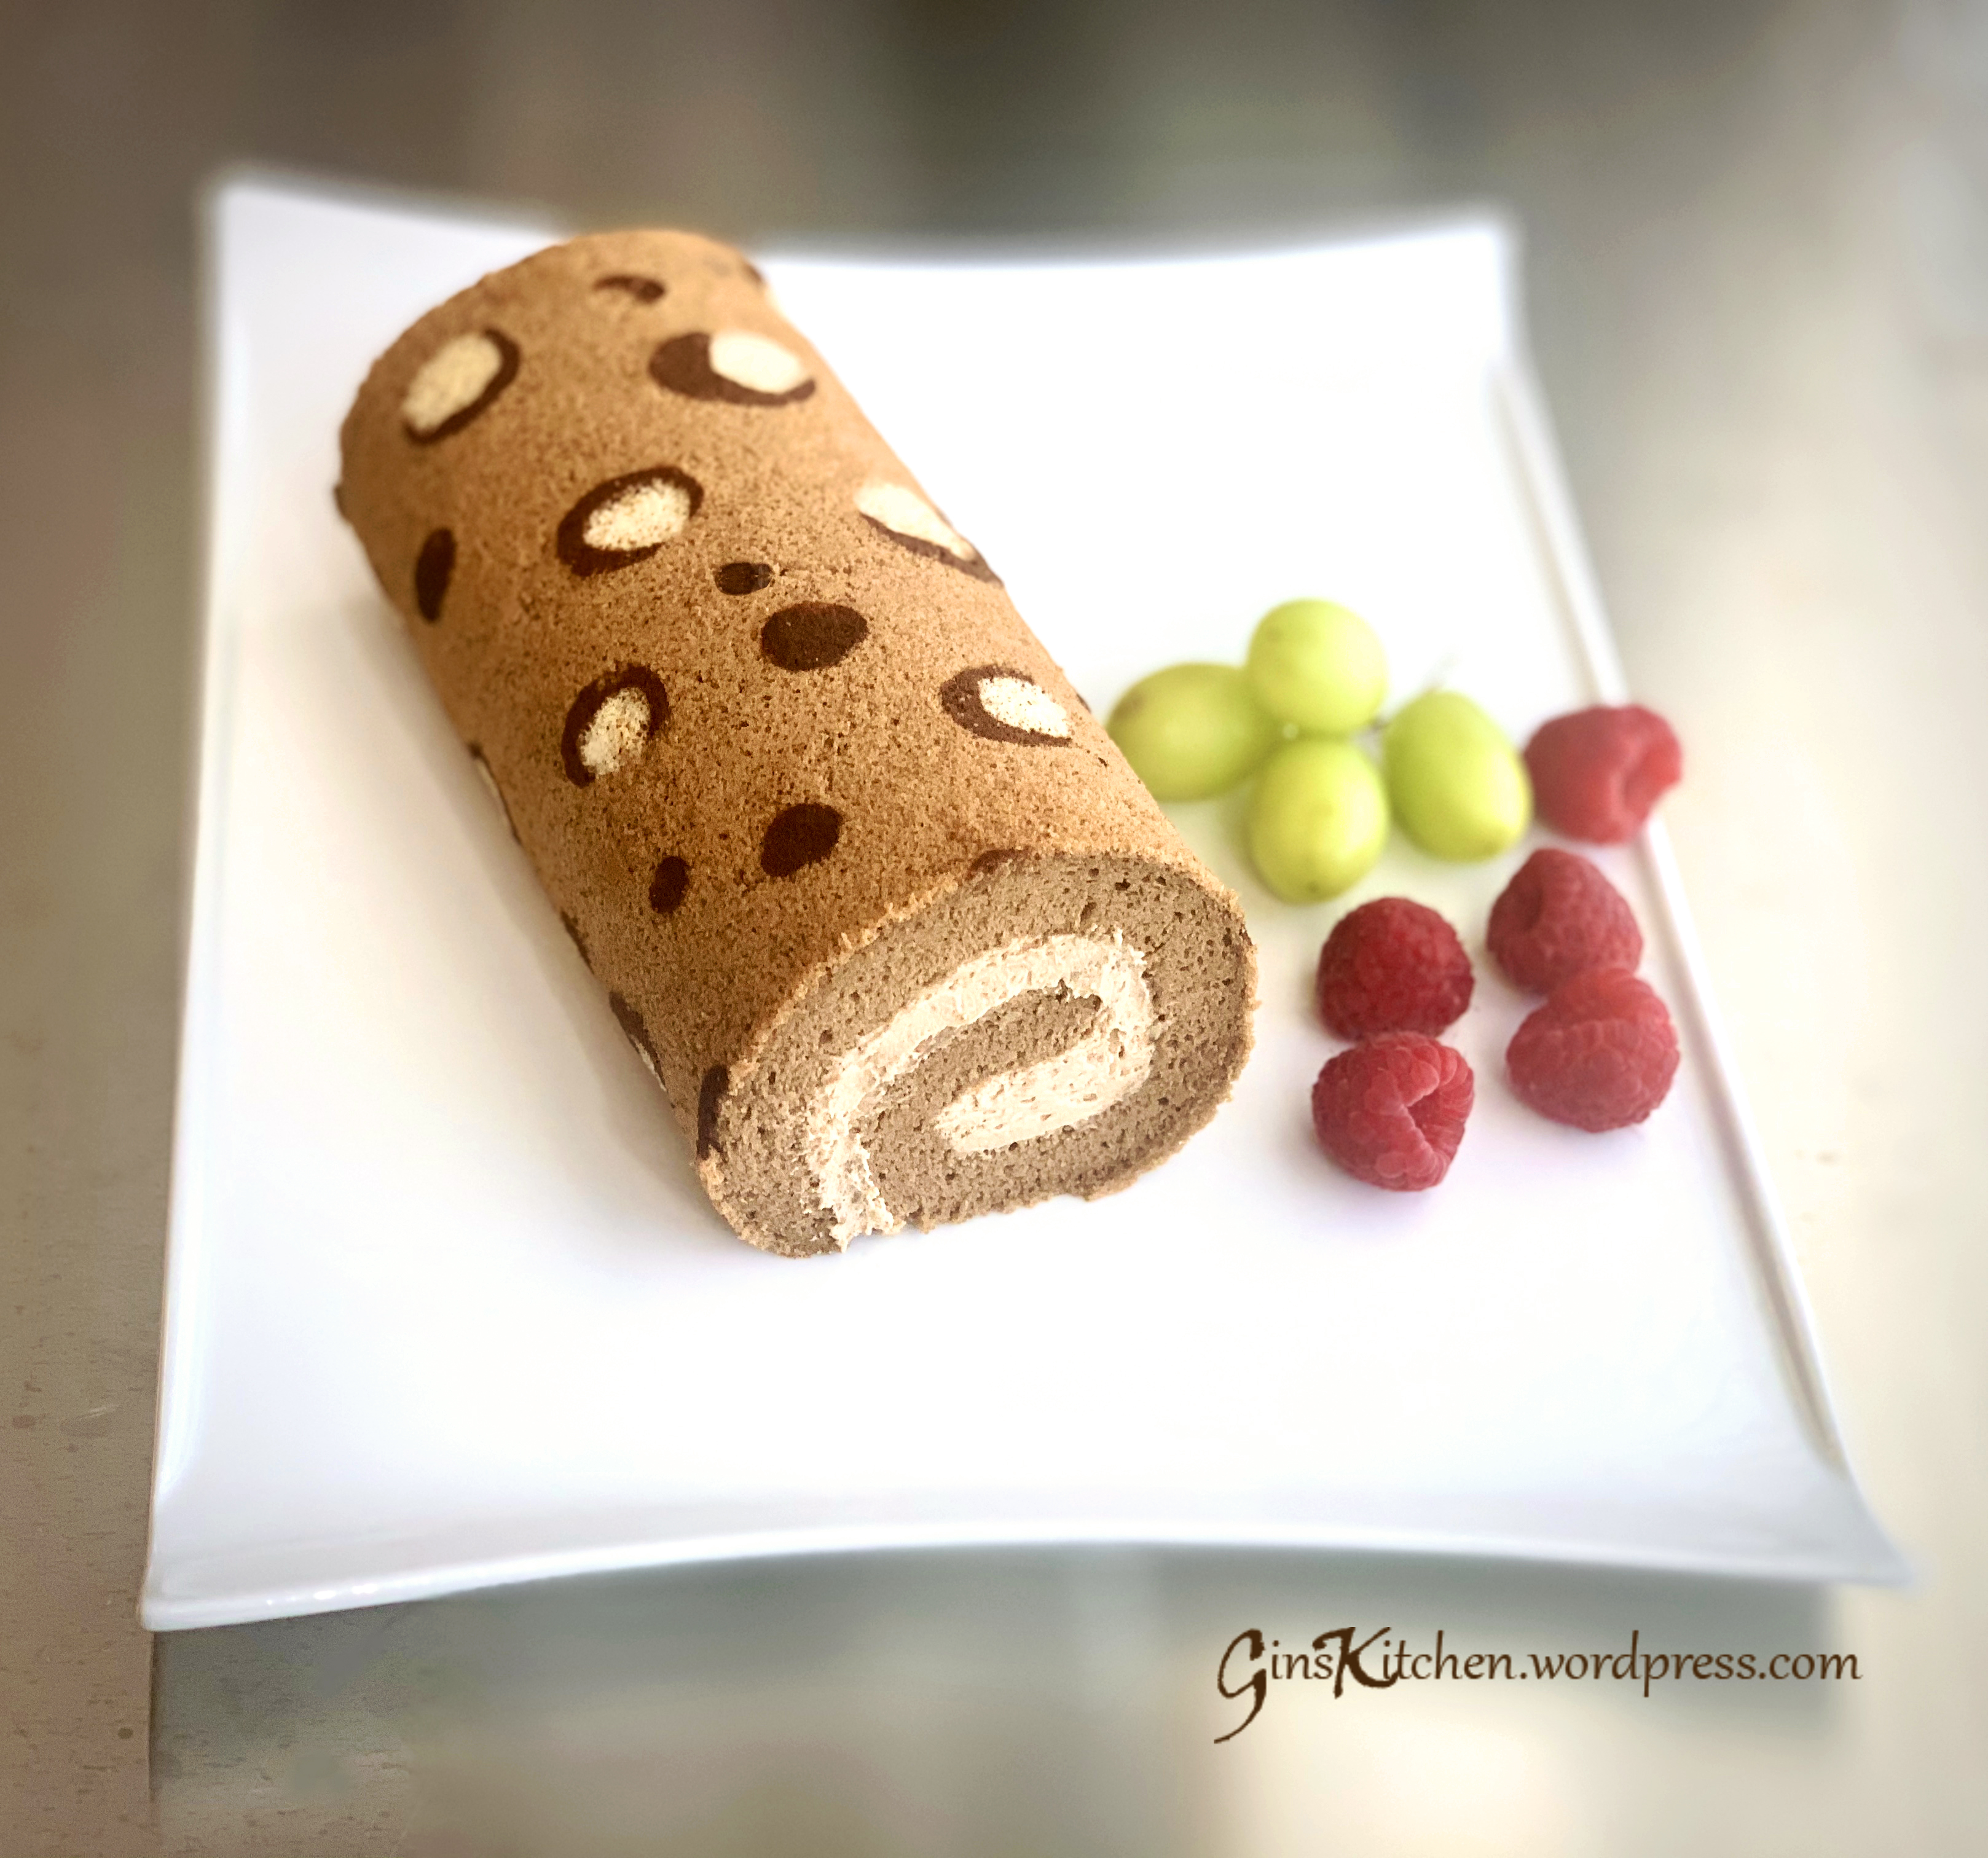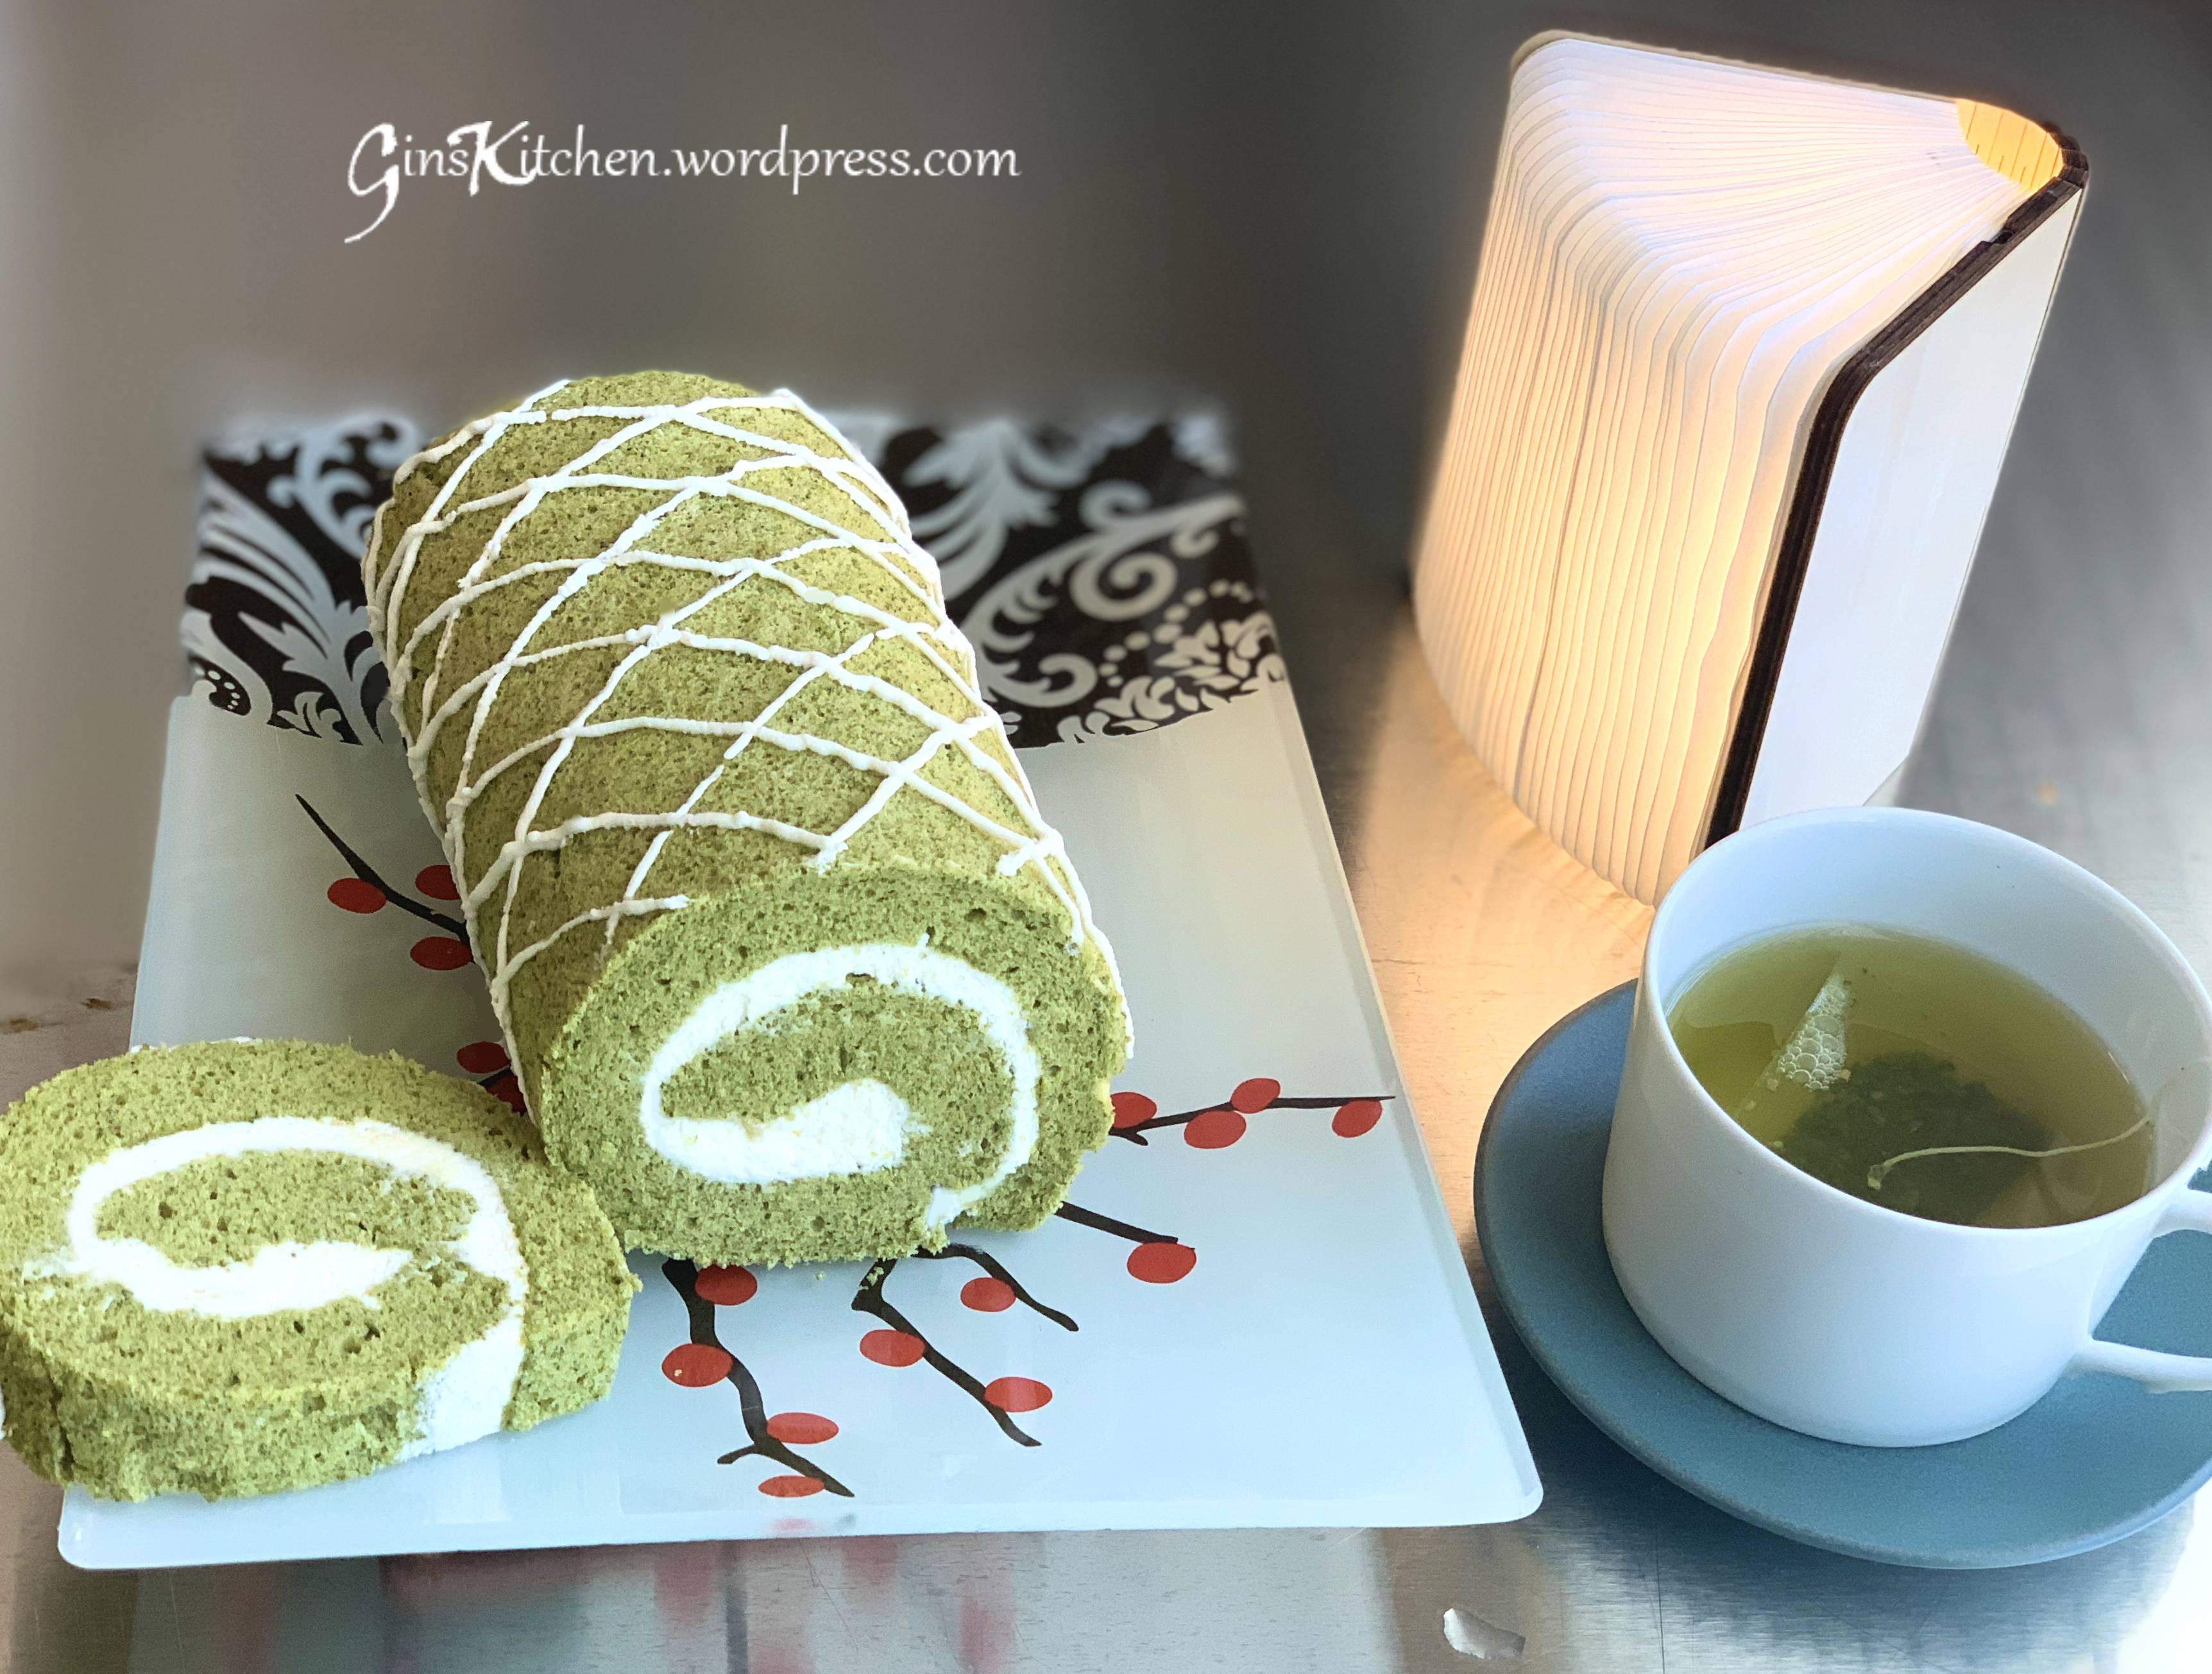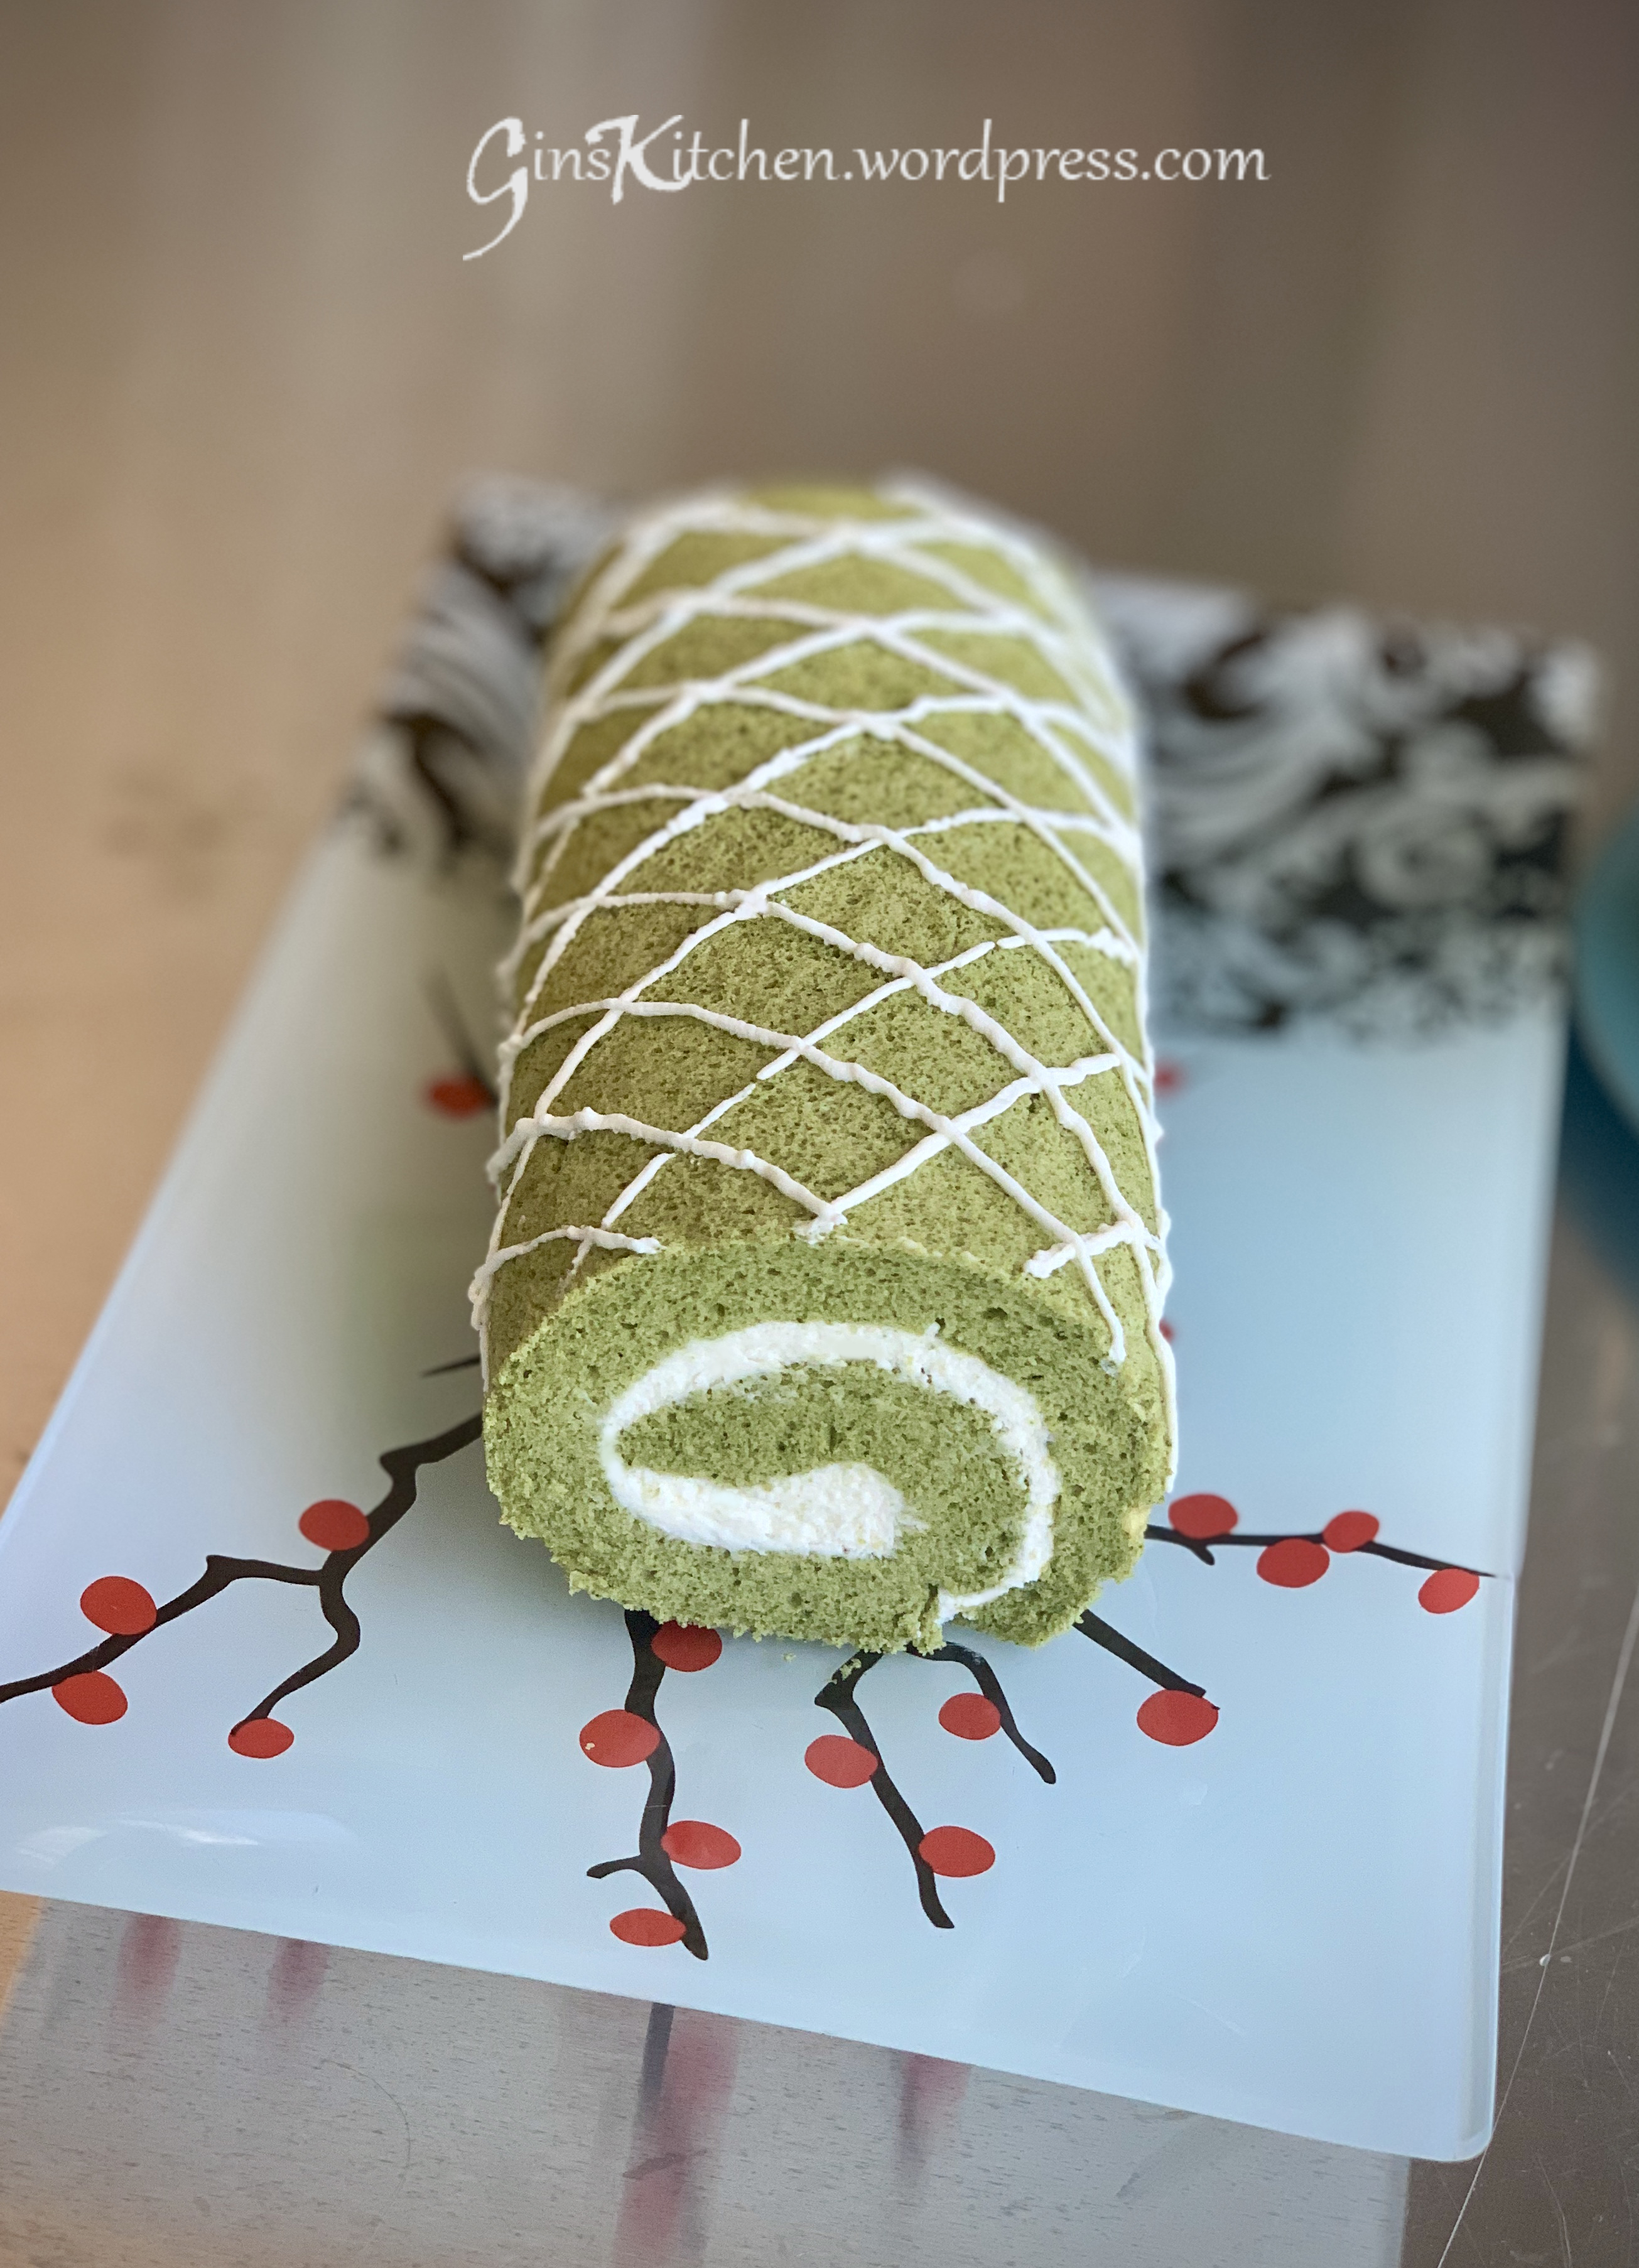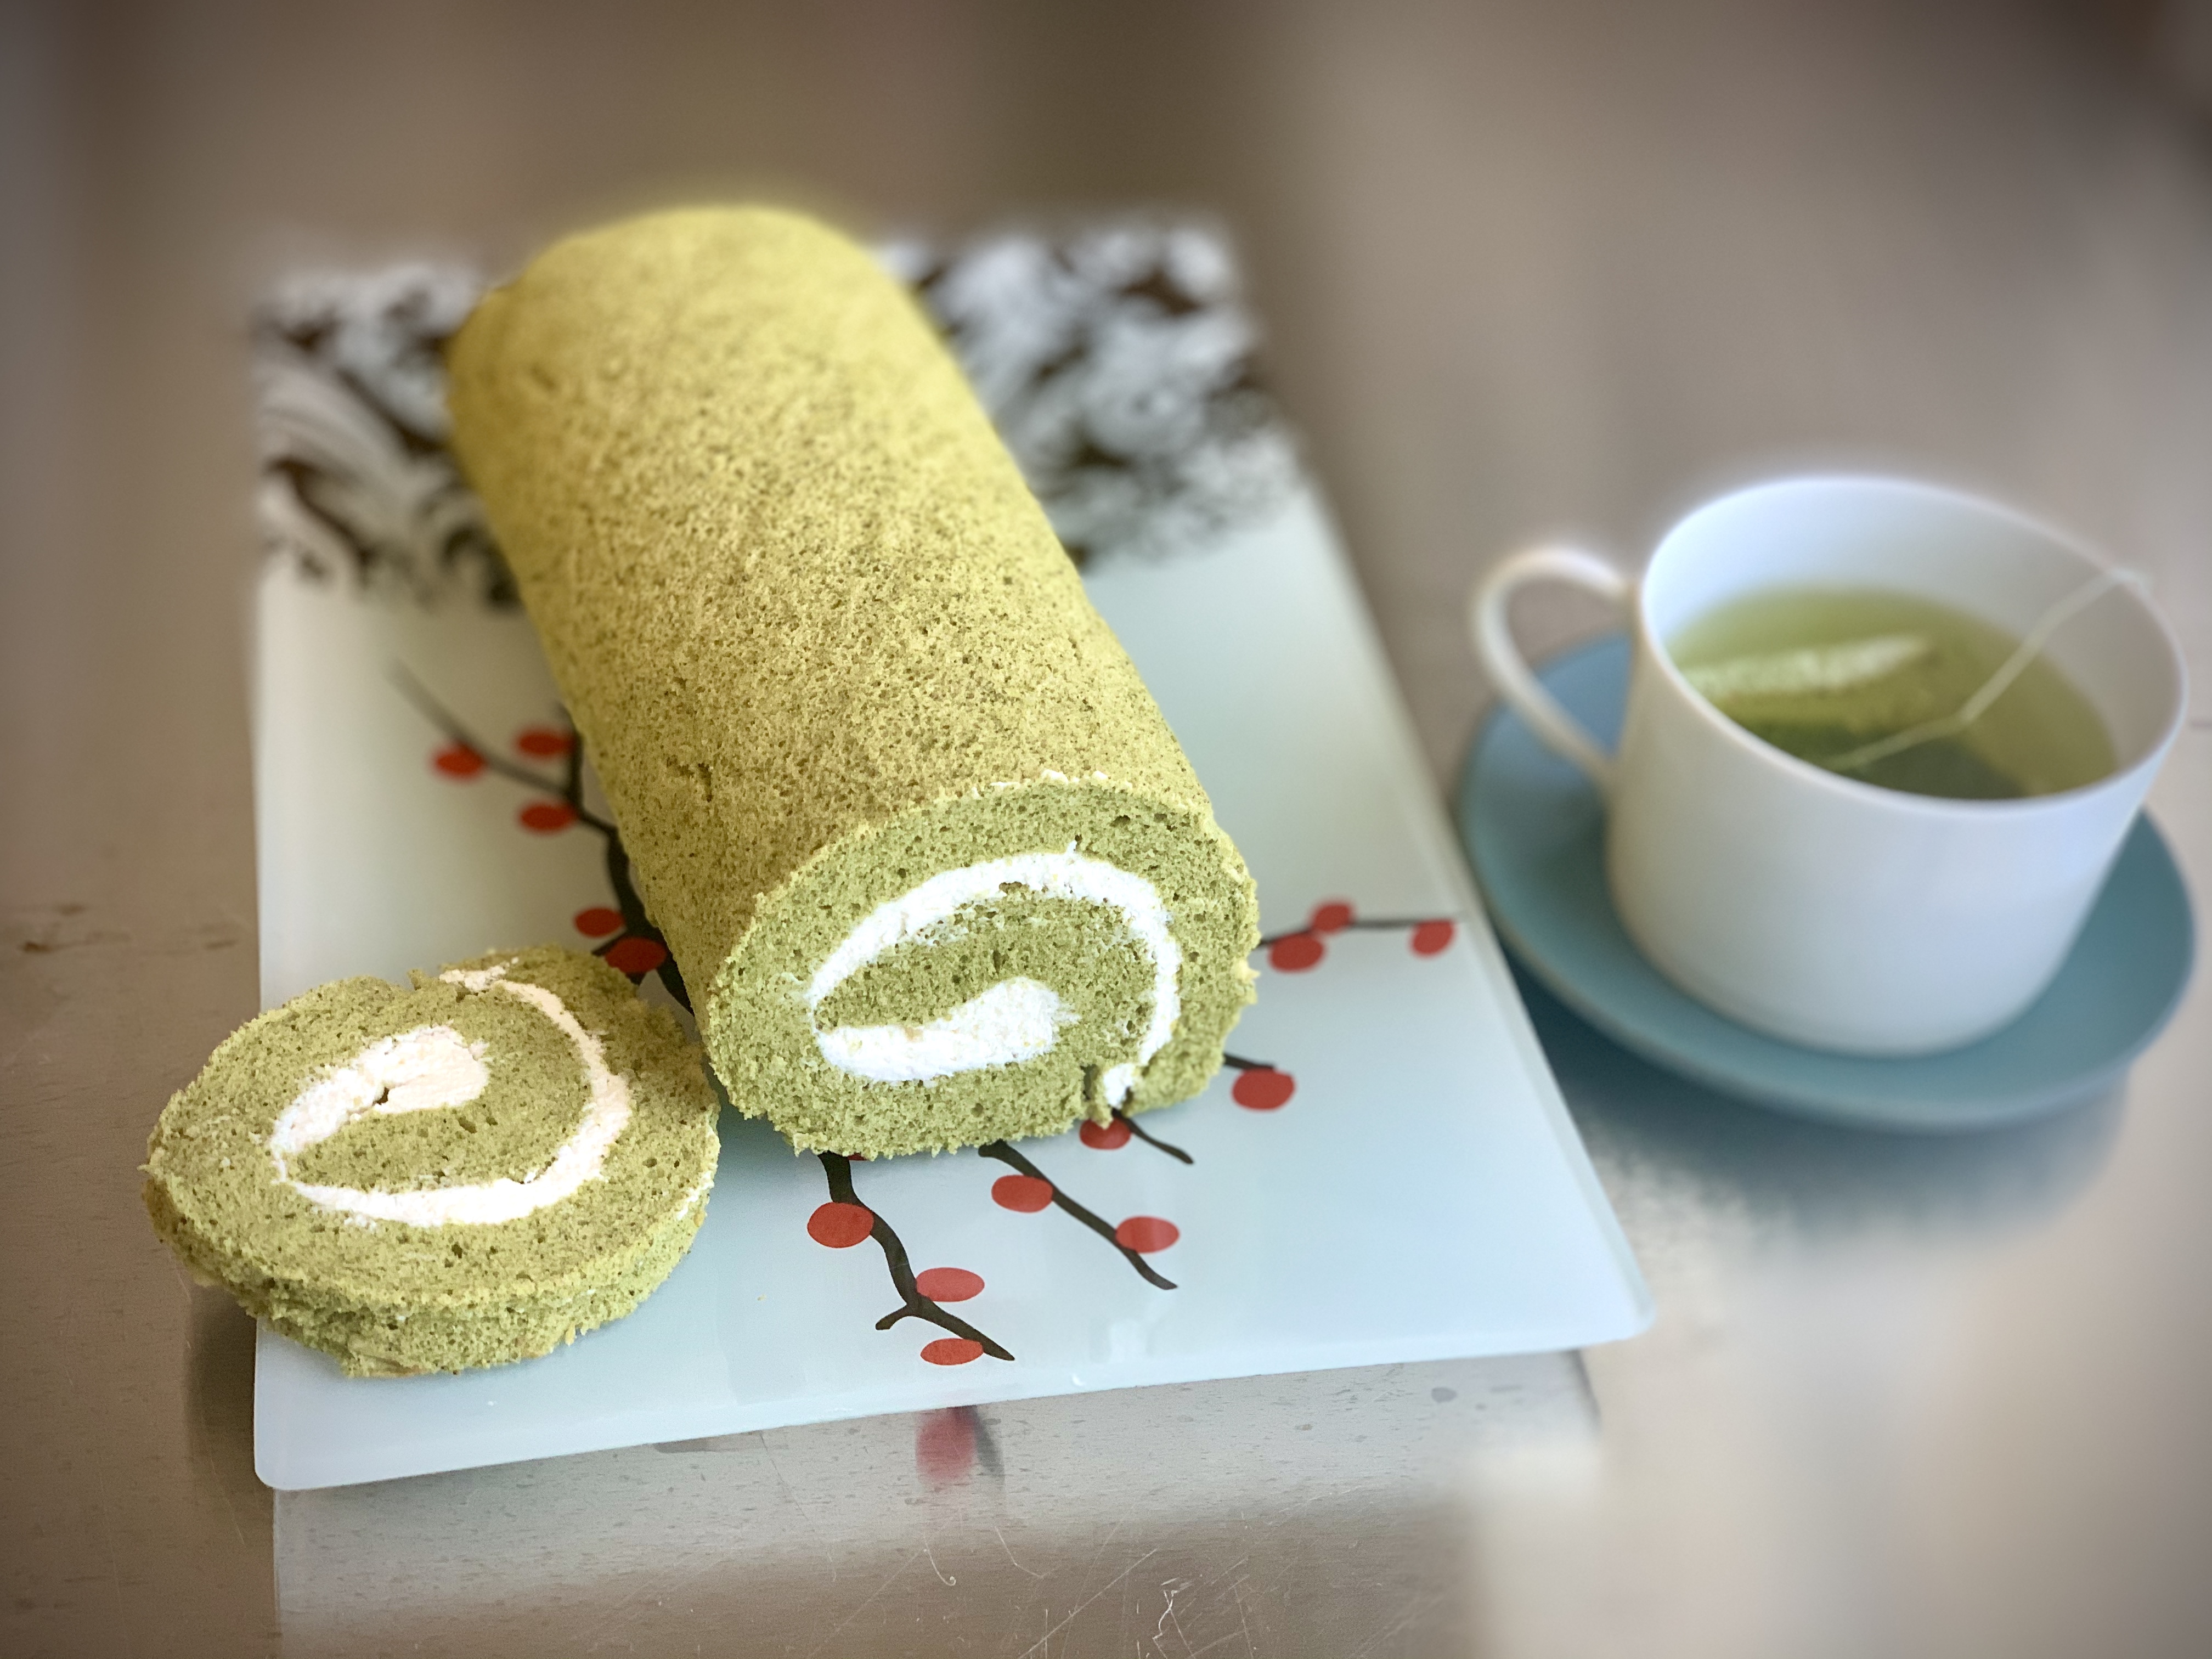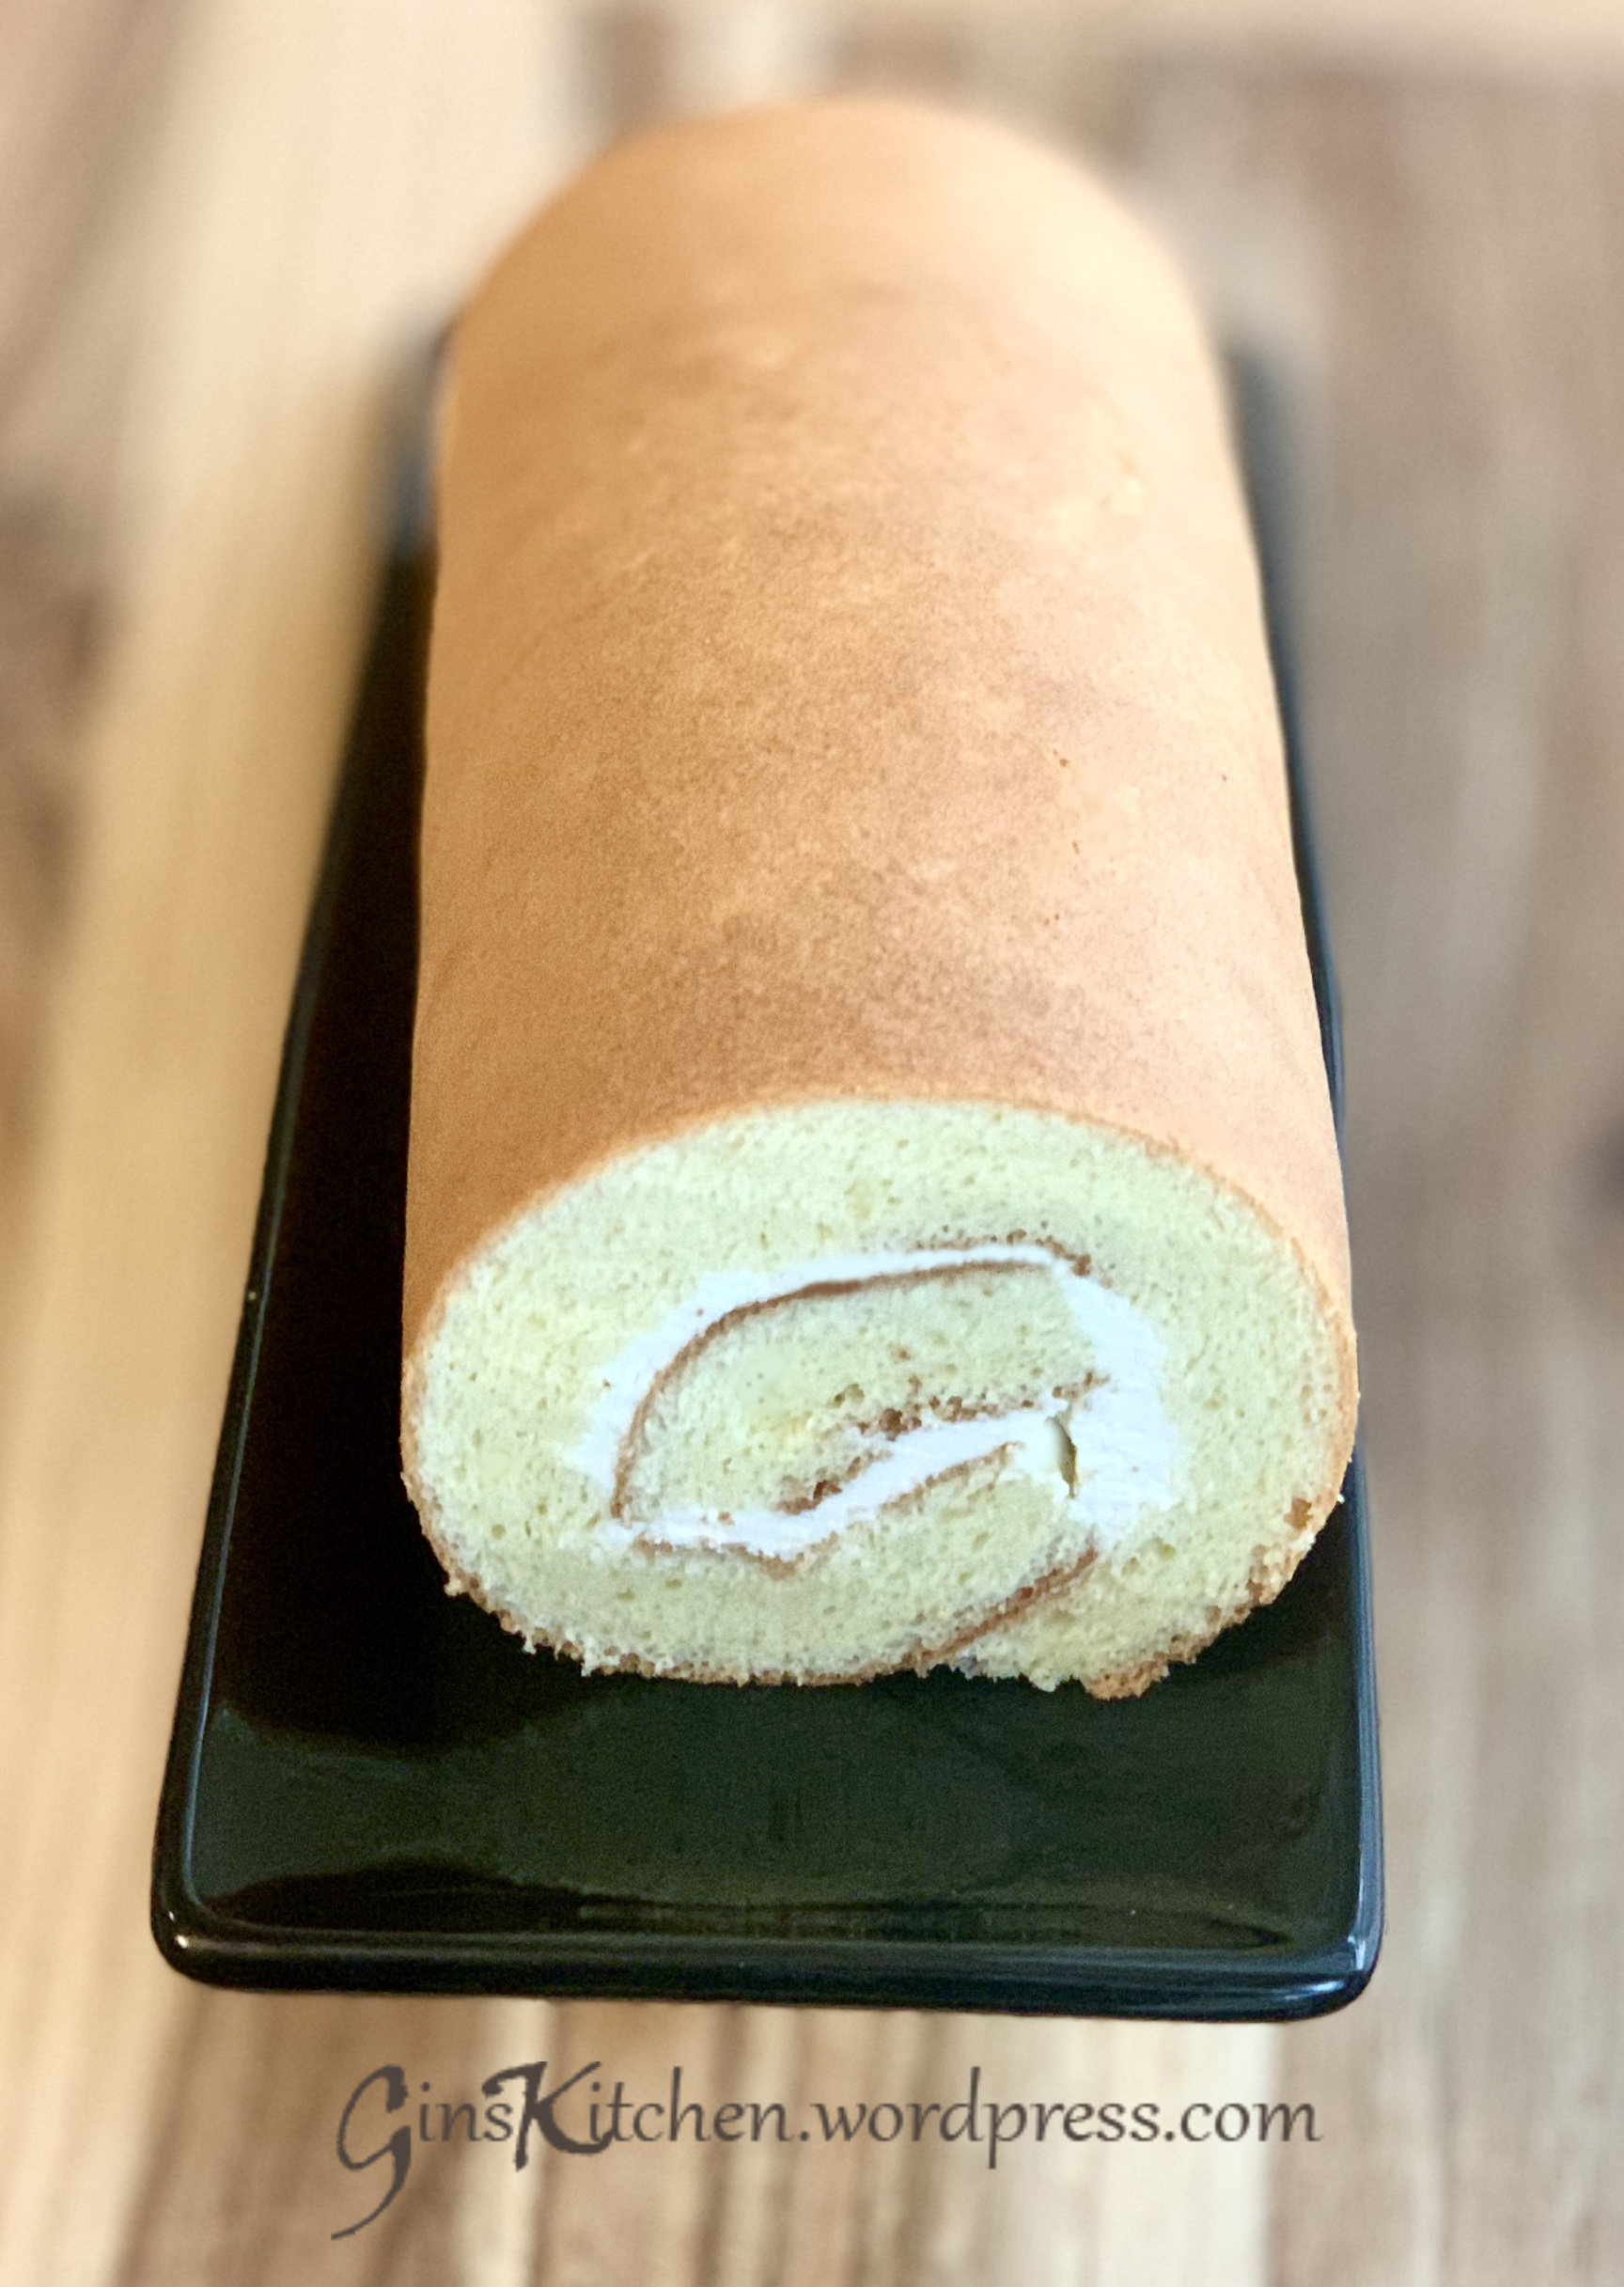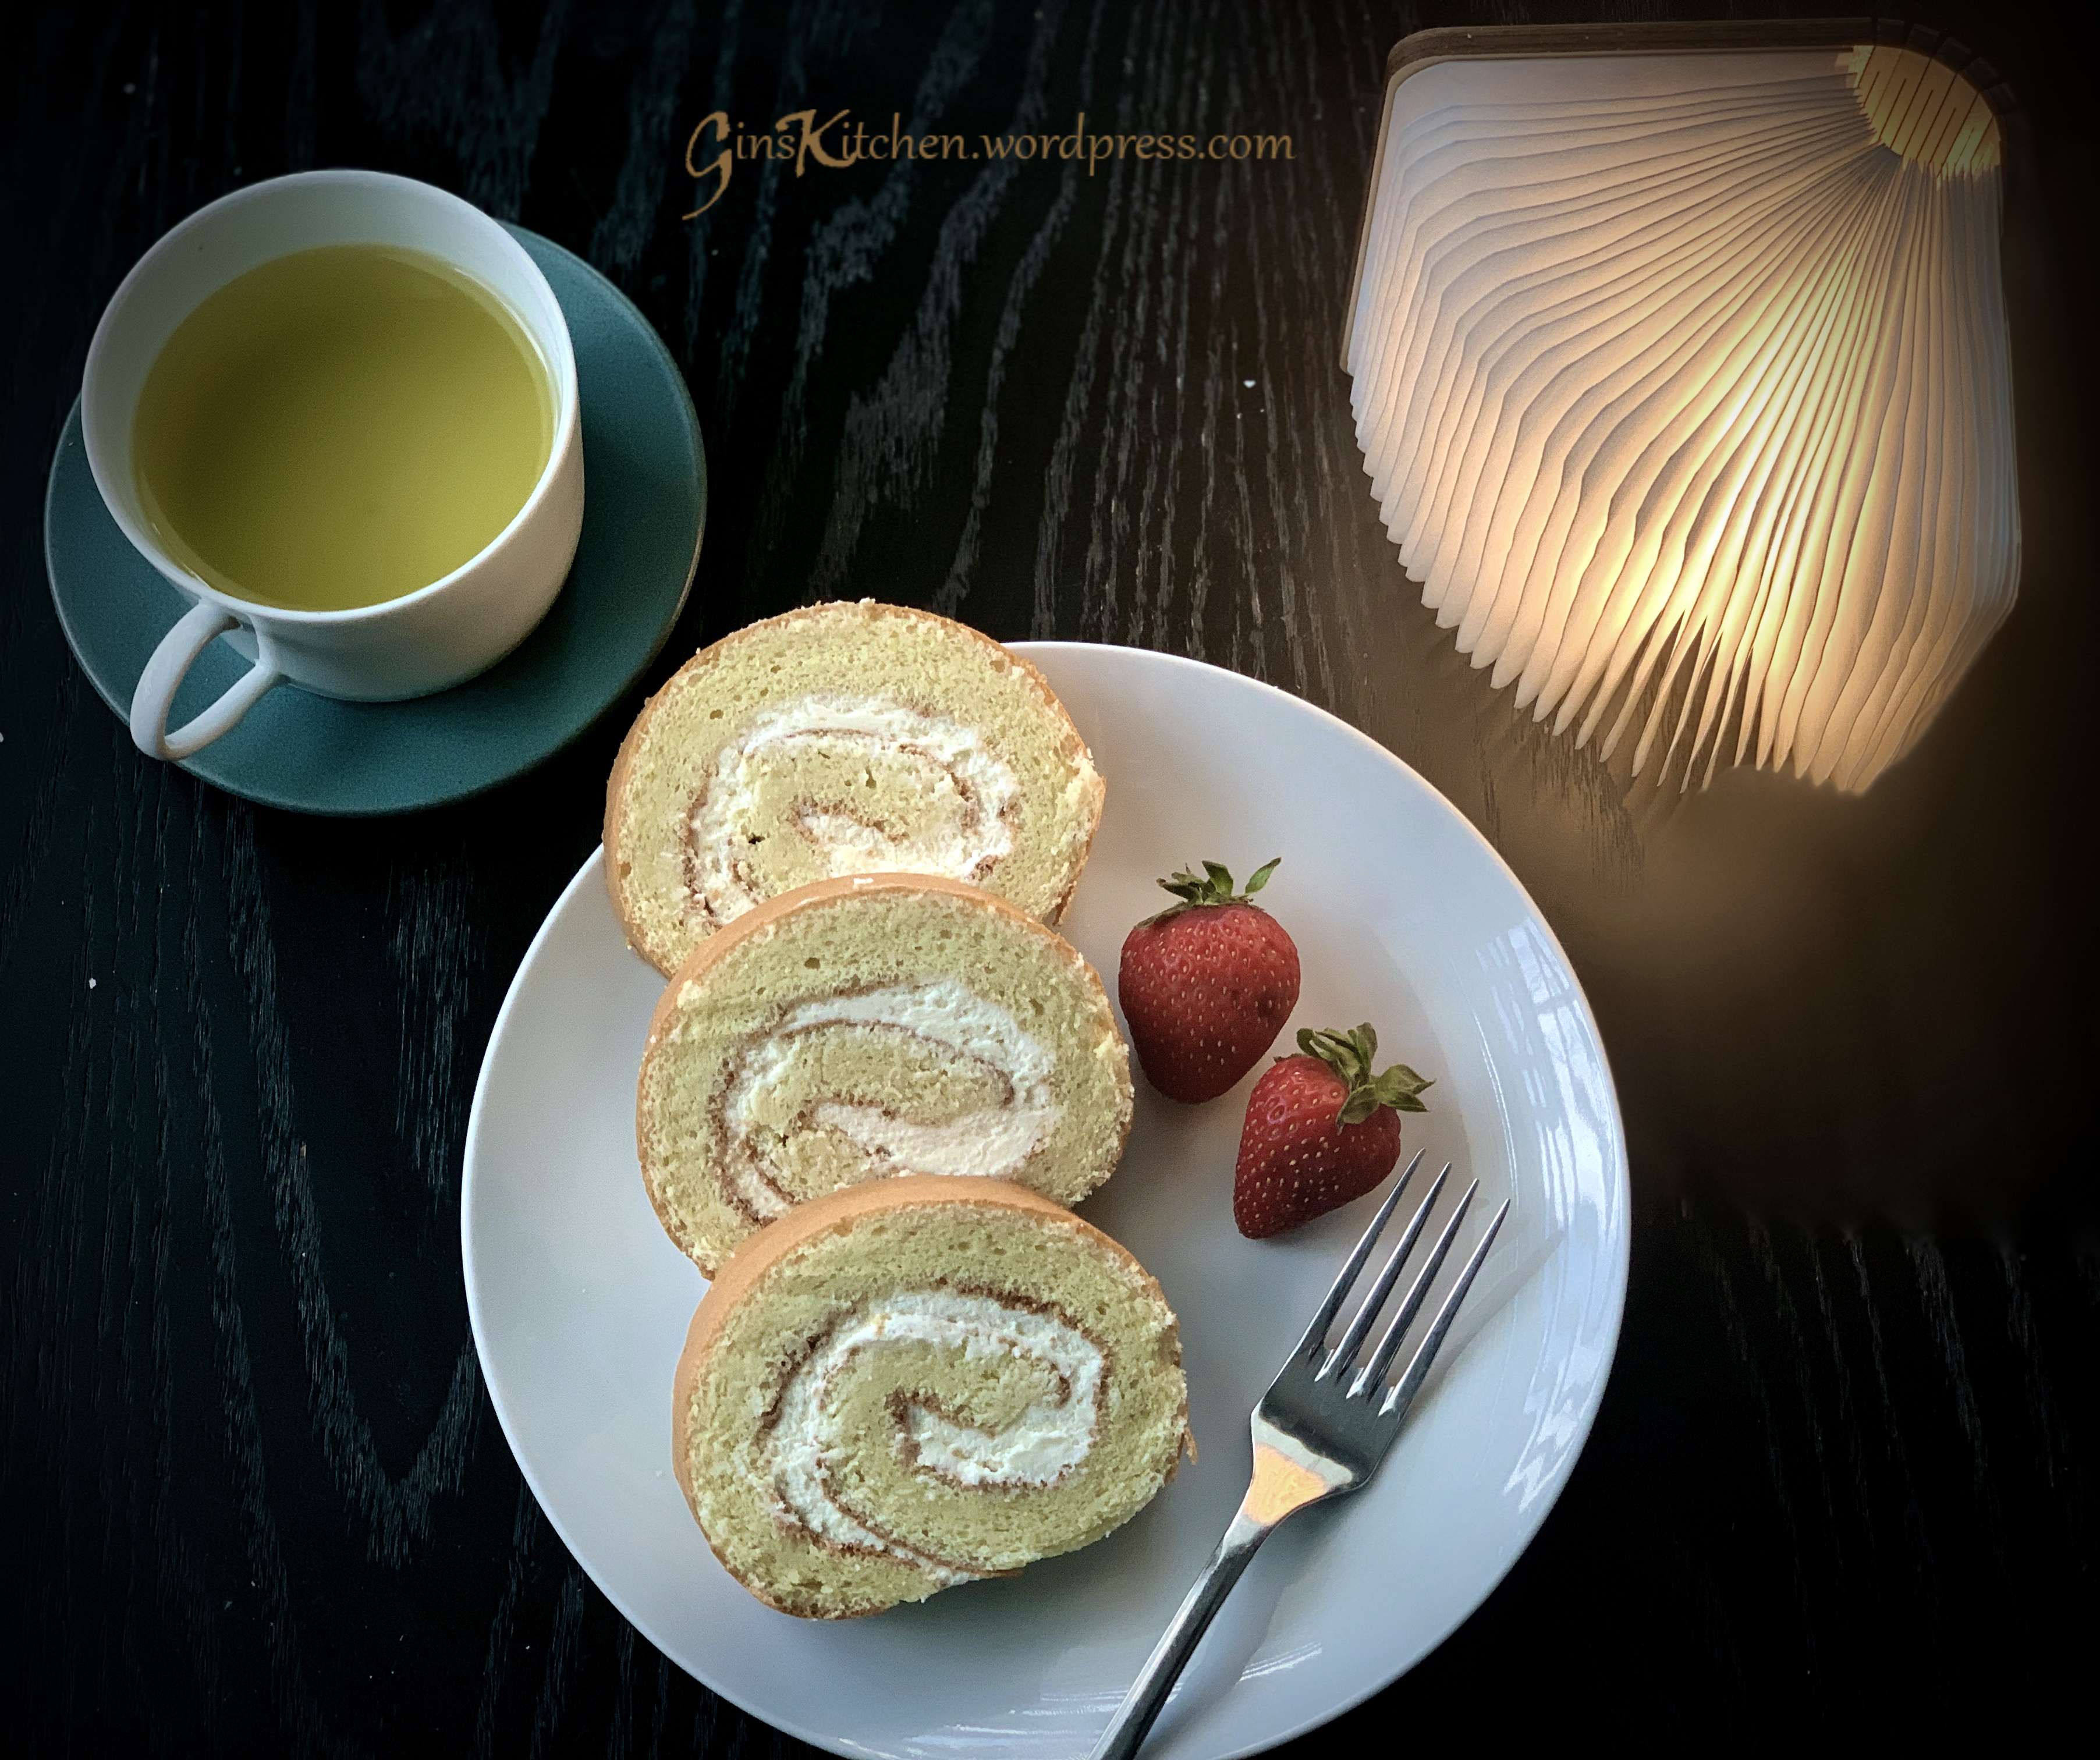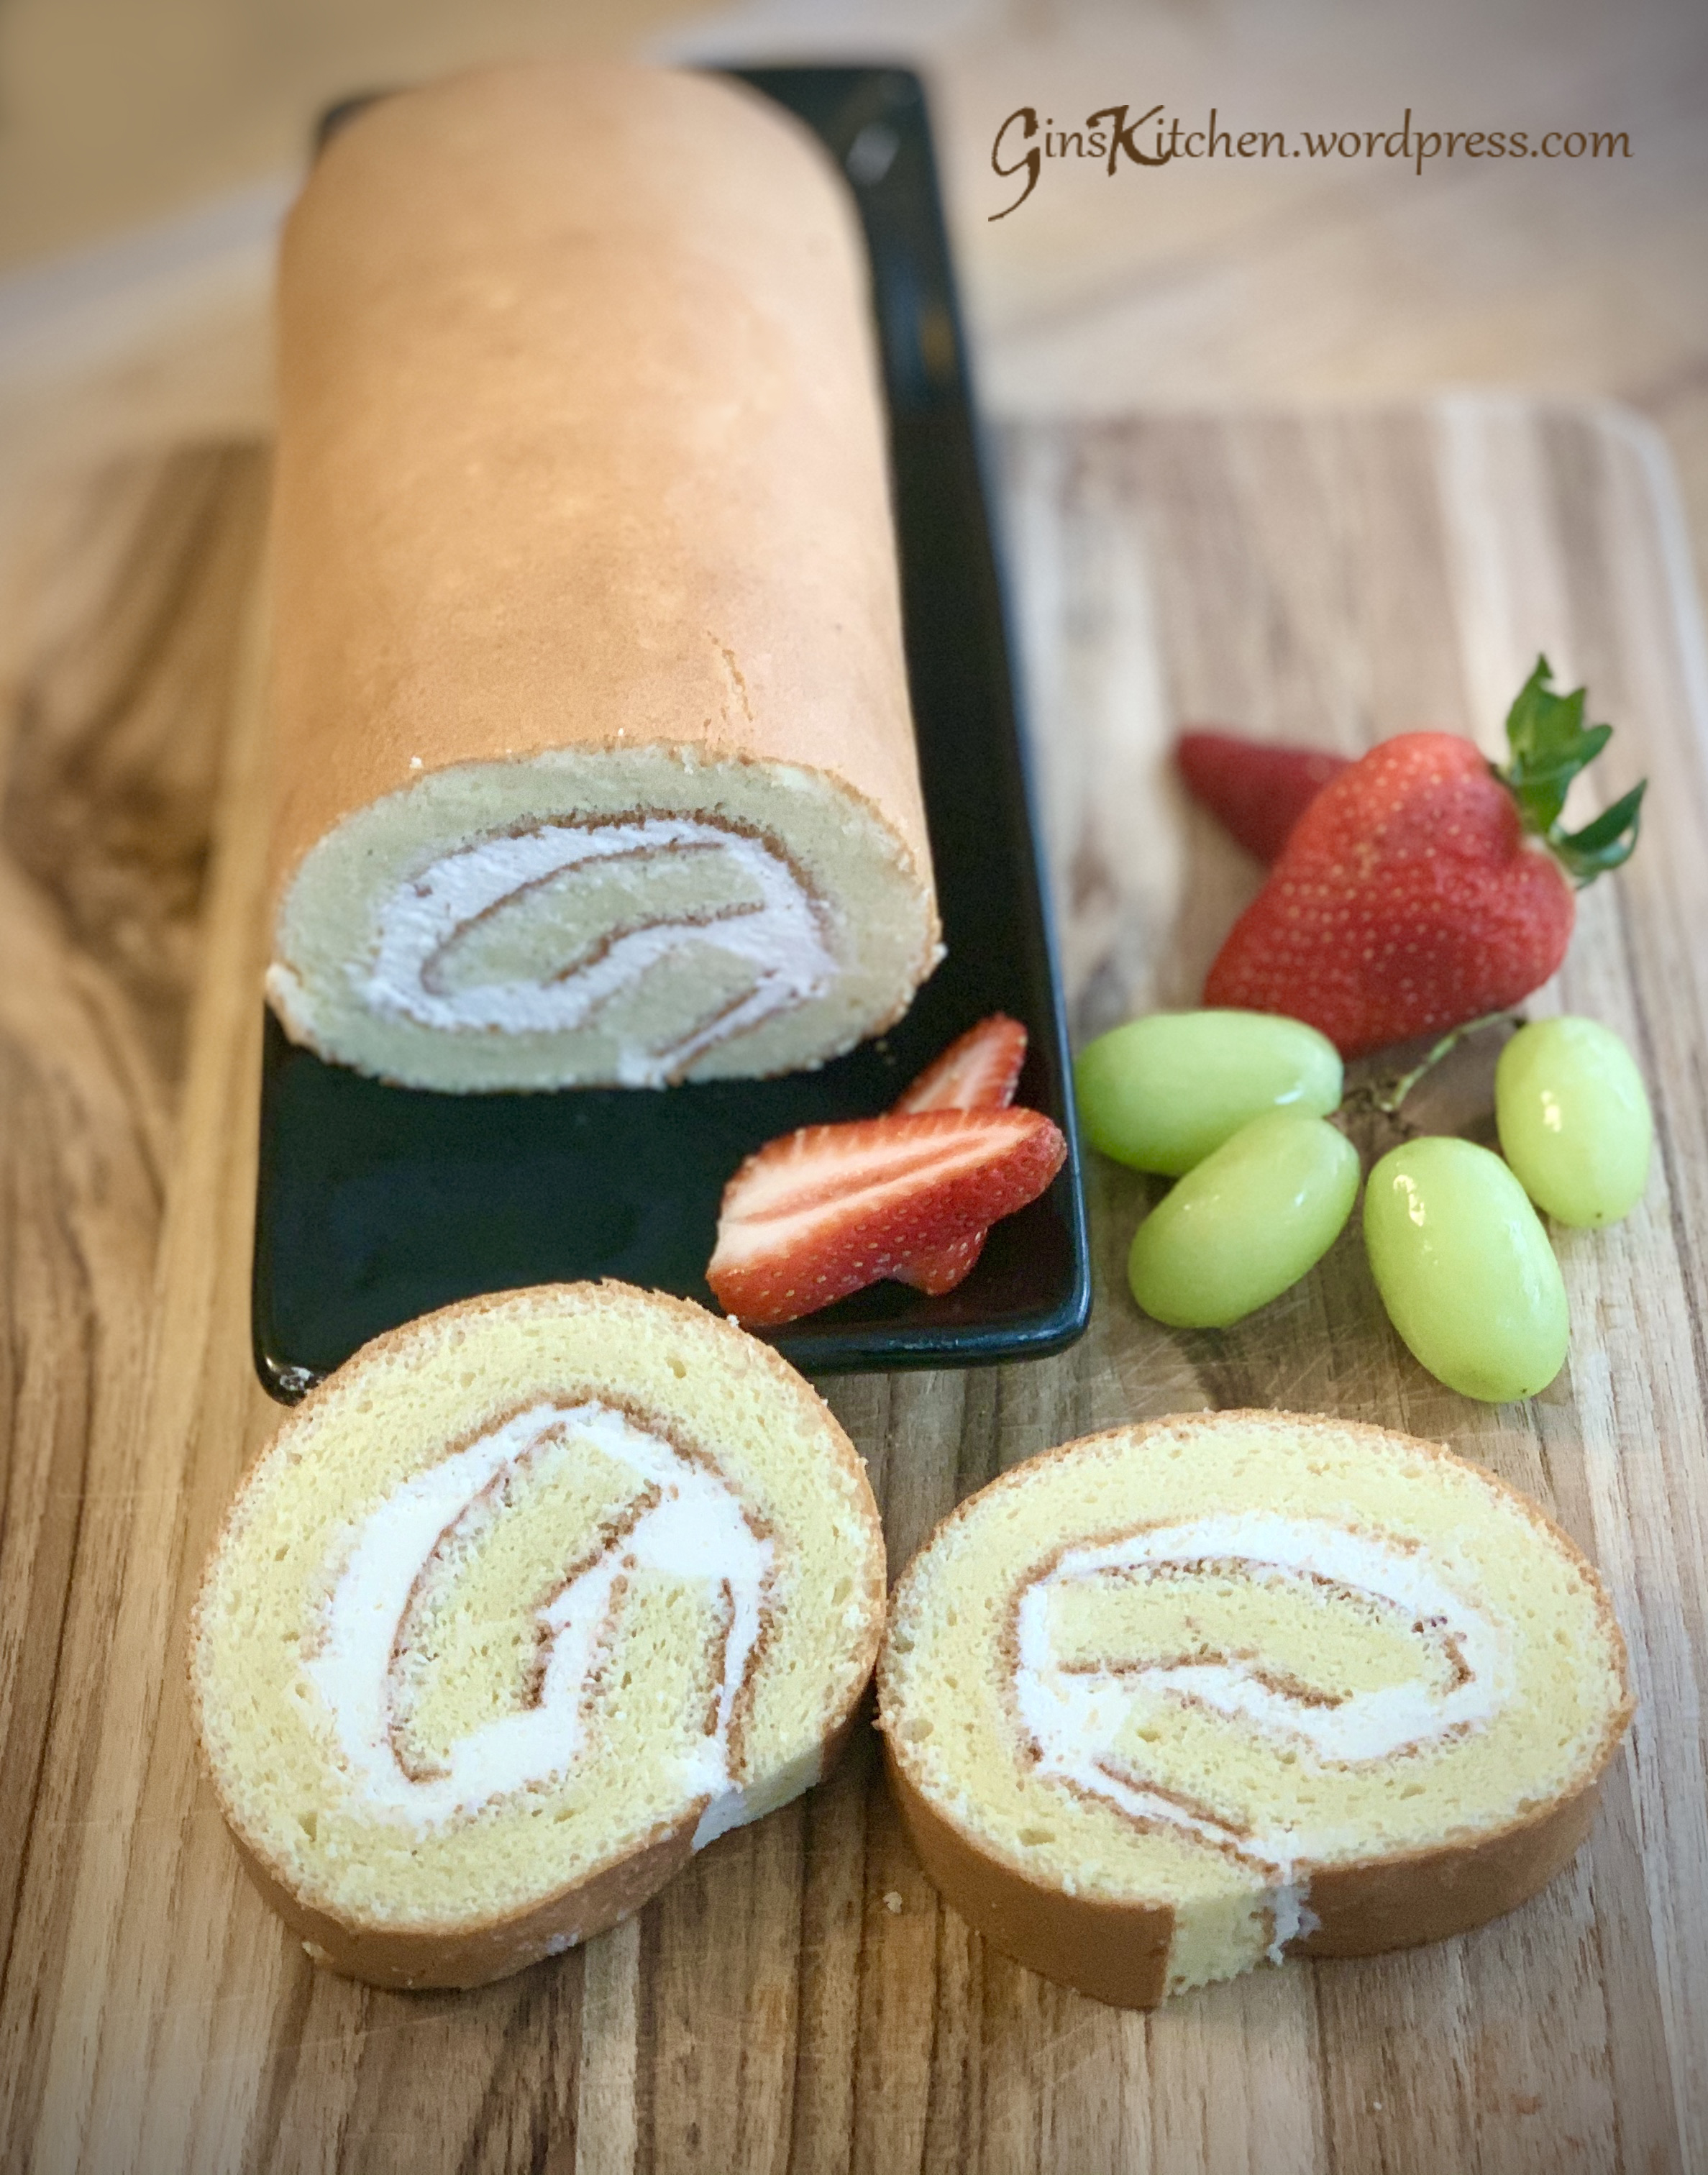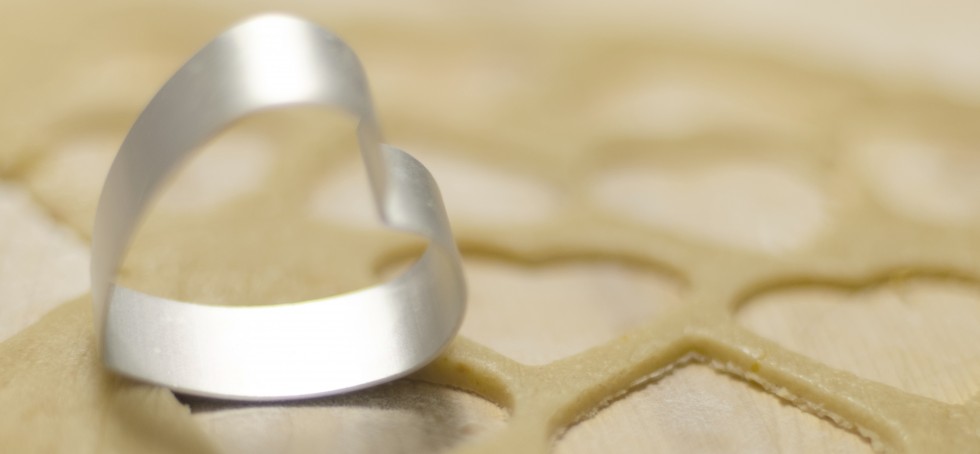
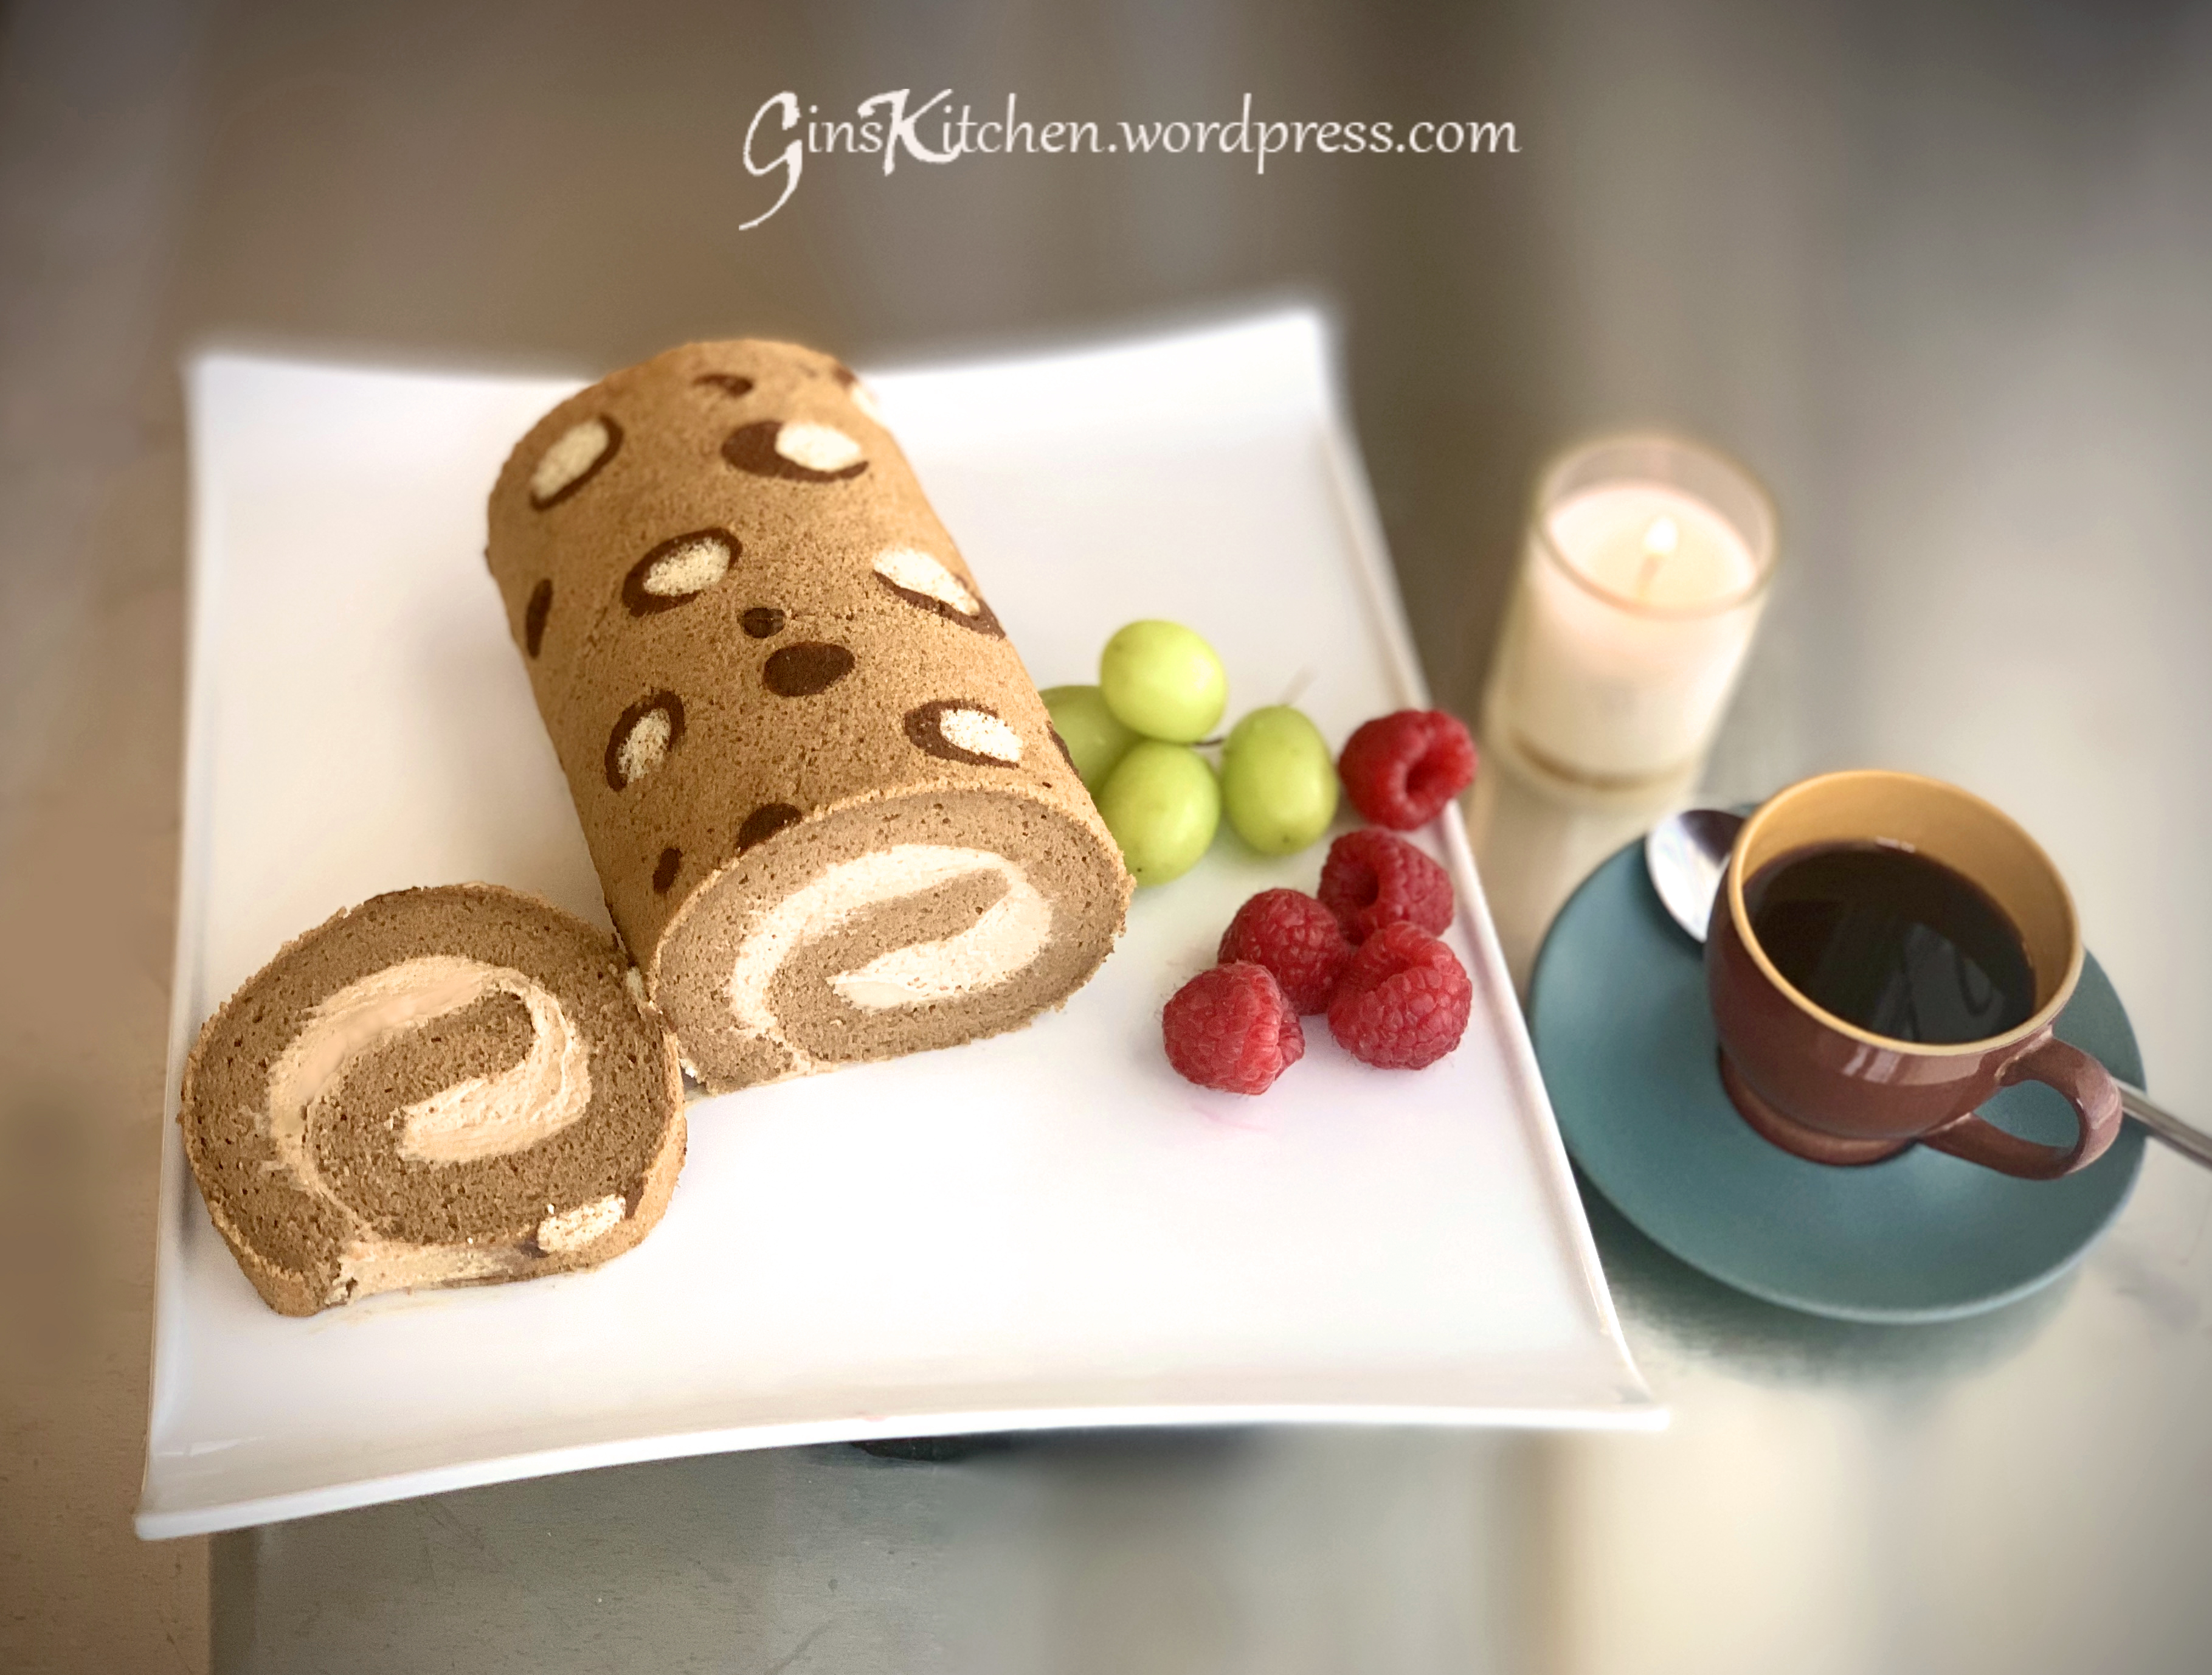
Patterned roll cakes have been on my to-bake list for the longest time. Today, I’m posting this mocha roll cake with a brown polka dot design. This was made following the same basic Swiss roll cake recipe, but instead I added instant coffee for the mocha flavor. As for the patterns, I opted for cocoa powder for the natural coloring. You may need to use food coloring for some of them, as it depends on what flavor your cakes are and what color you want your patterns to be. I have tested different methods of adding patterns but failed several times to get a good result. I personally prefer freezing the patterns over pre-baking the patterns.
Ingredients for the circle pattern paste:
| 10g | Unsalted butter (softened) |
| 10g | Powdered sugar |
| 10g | Cake flour |
| 10g | Egg white |
| 1 Tbsp | Cocoa powder |
Ingredients for the roll cake:
| Ingredients A | |
| 80g | Egg Yolk |
| 1g | Salt |
| 35g | Sugar |
| Ingredients B | |
| 45g | Oil |
| 40g | Milk |
| Ingredients C | |
| 72g | Cake flour |
| 2 Tbsp (4g) | Instant Coffee |
| 2 Tbsp | Hot water |
| Ingredients D | |
| 120g | Egg white |
| 55g | Sugar |
| Cream filling: | |
| 1 Cup | Heavy whipping cream |
| 1 Tbsp | Powdered sugar |
| 1 Tbsp | Instant black coffee |
| 1 Tbsp | Vanilla instant pudding |
Directions for making the pattern:
- You can draw your own pattern template or download one online. Line a 9×13-inch baking sheet with parchment paper and place the pattern sheet beneath it.
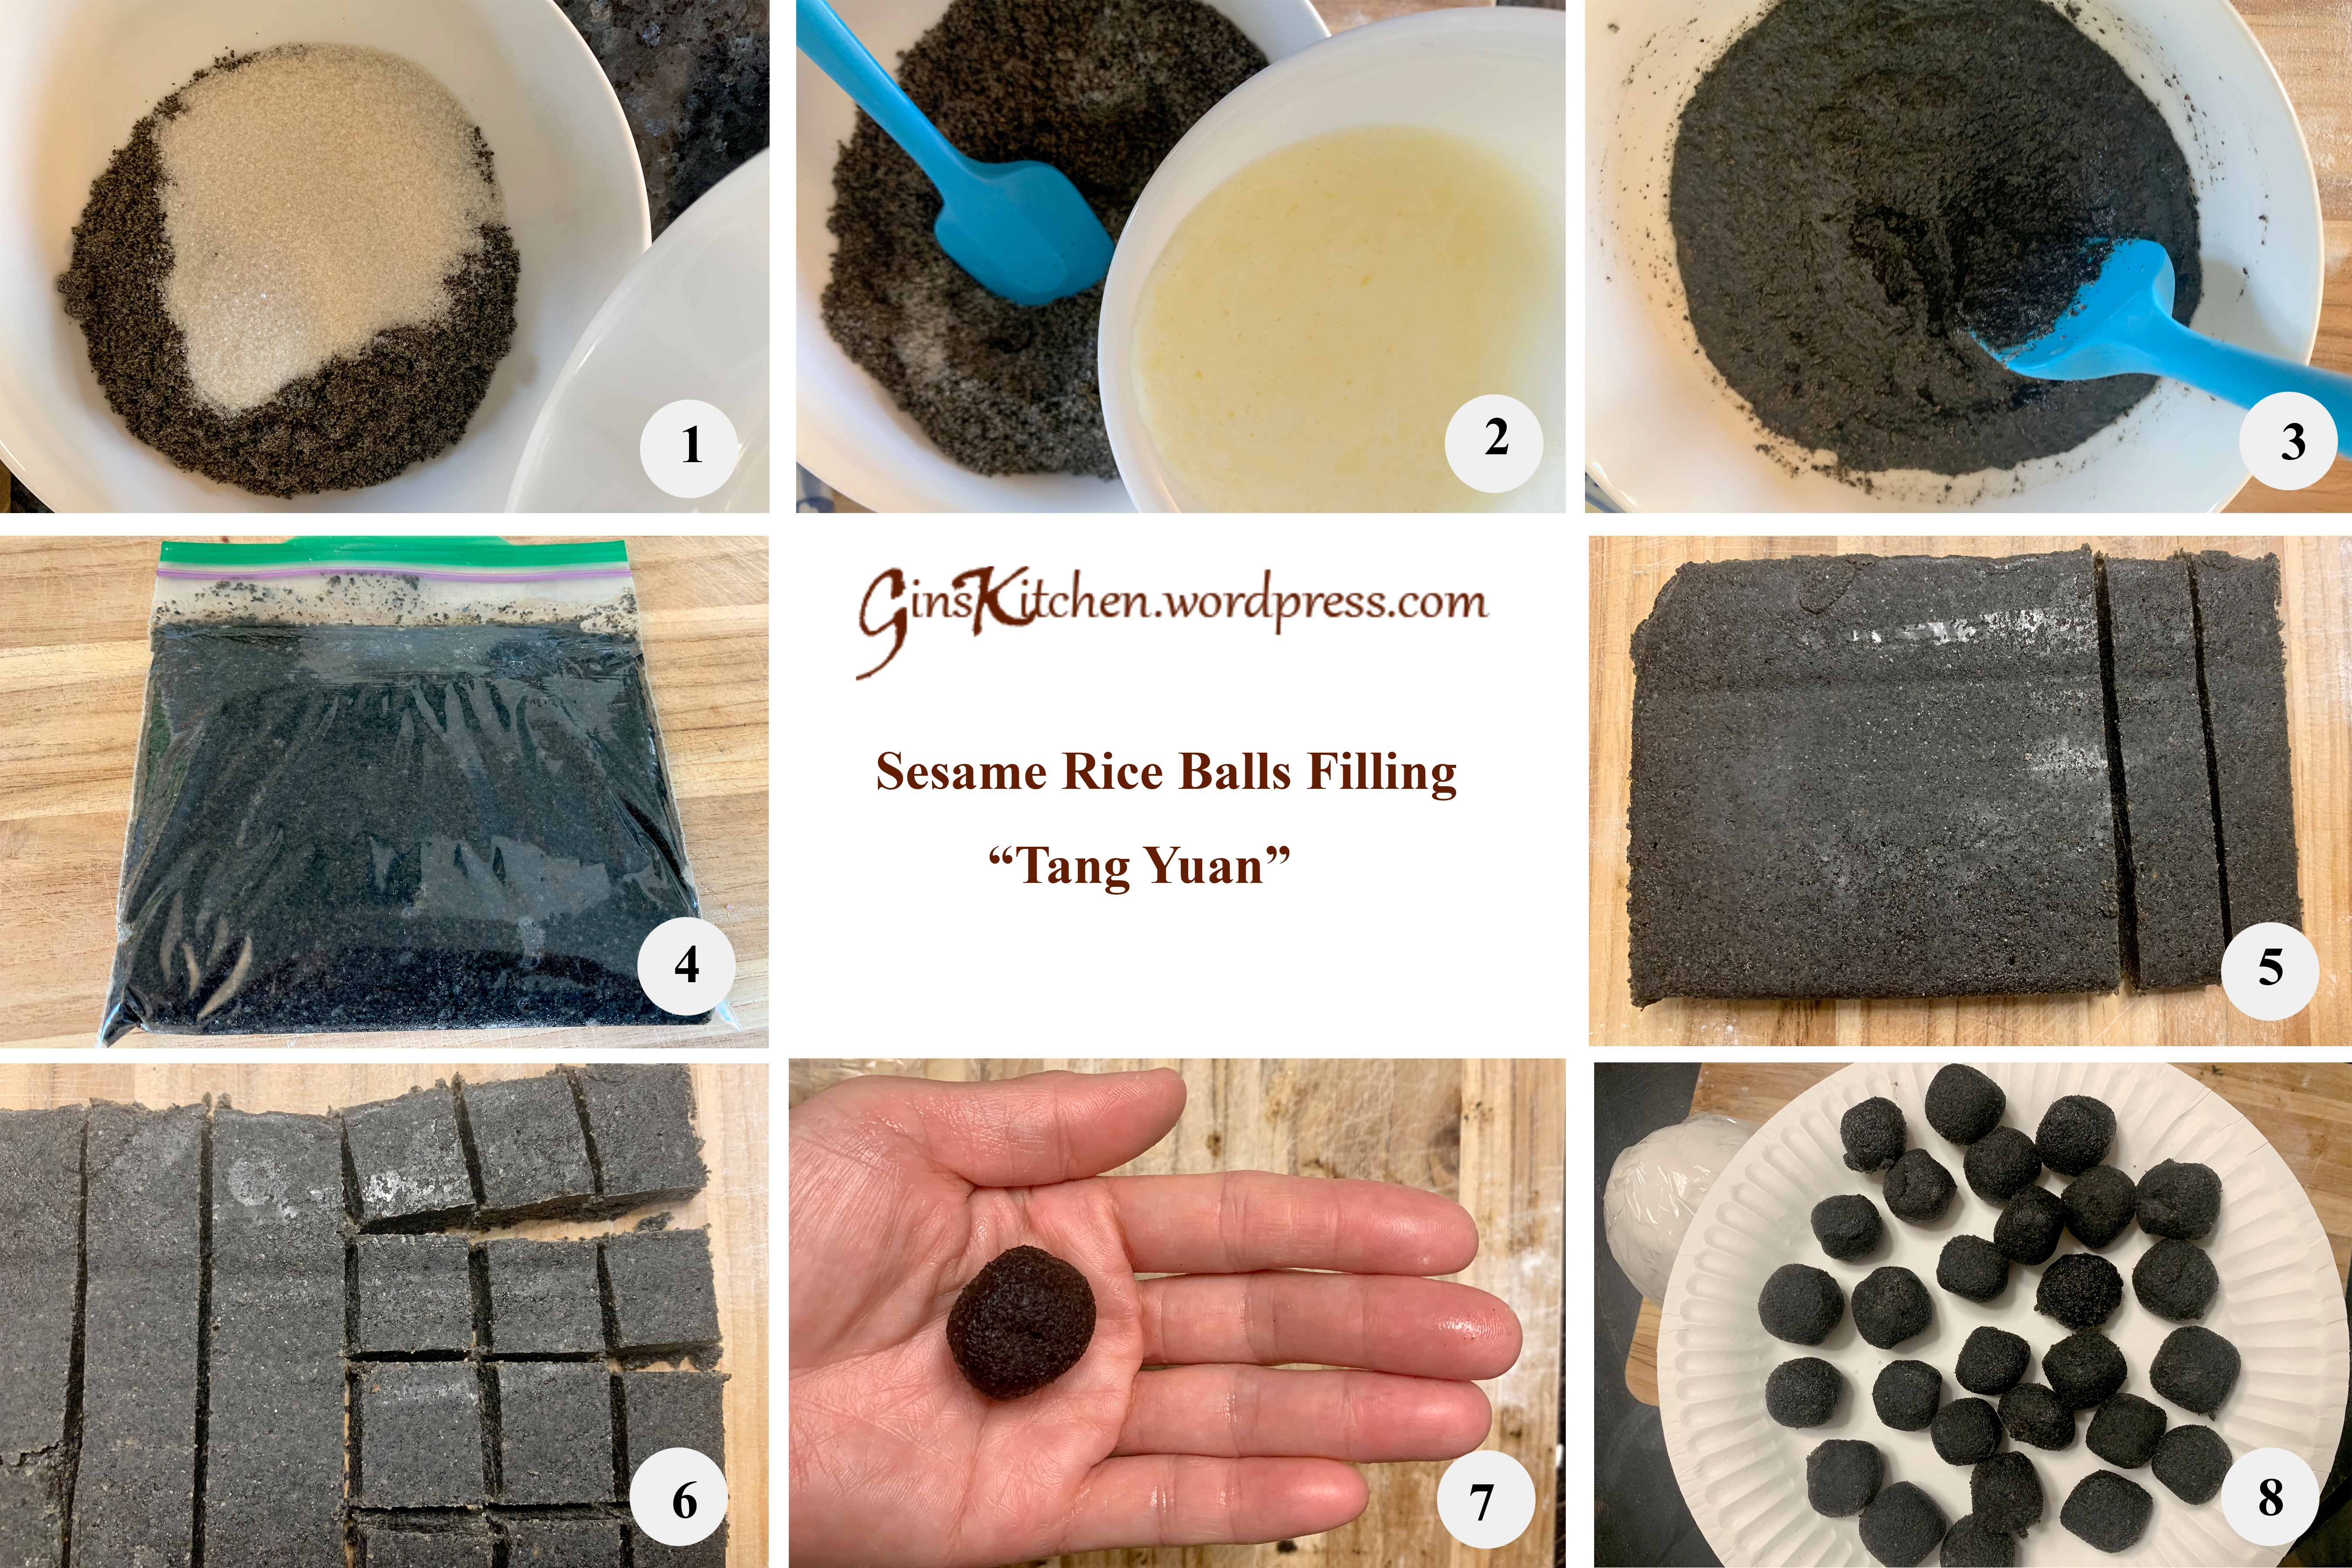
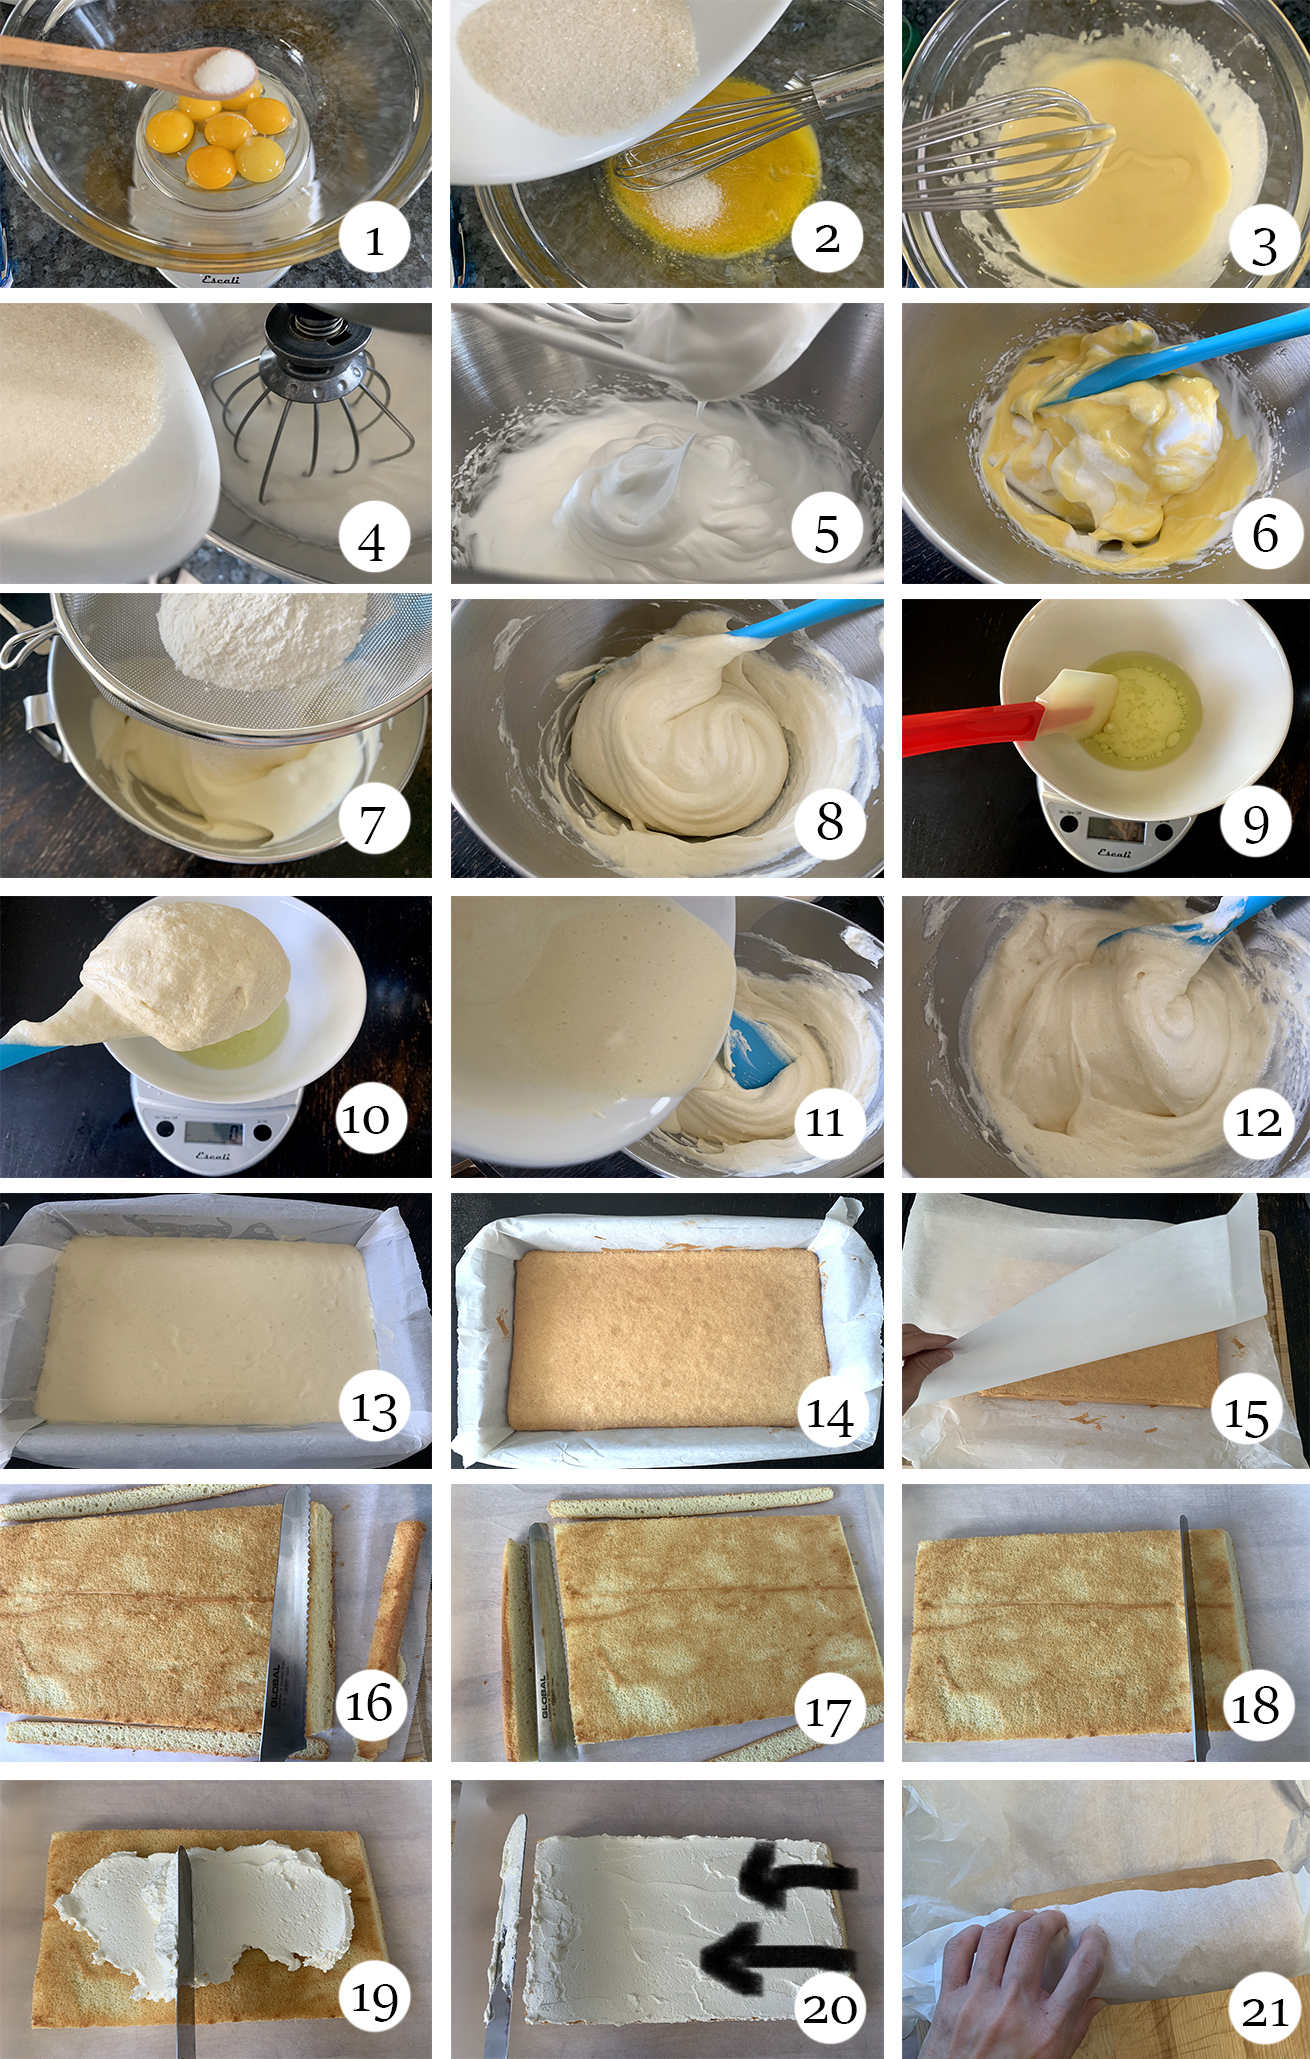
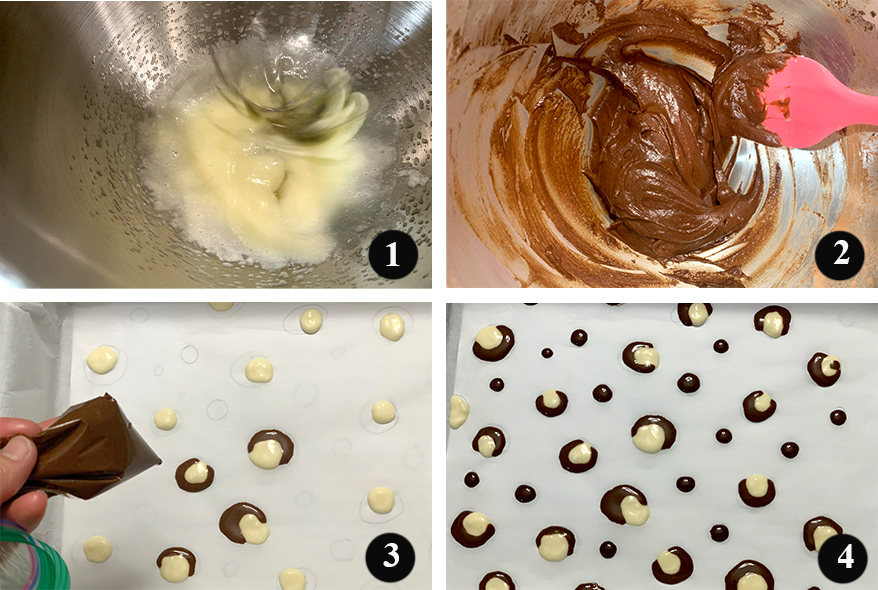
- In a bowl, mix egg white, sugar, butter and flour until you get a smooth paste (DO NOT add cocoa powder yet). In a separate bowl, take out half of the mixture (one half for the white circles and one half for the brown circles) and slowly add in cocoa powder (add little by little until you get the color you want). (Pictures 1 & 2)
- Fill the Ziploc bag with the mixture and seal the top. Use scissors to snip off one corner of the bag – creating a tiny hole makes it easier to trace the patterns. (Picture 3)
- Once all patterns are done, place the whole baking sheet in the freezer. (Picture 4)
Directions for making the roll cake:
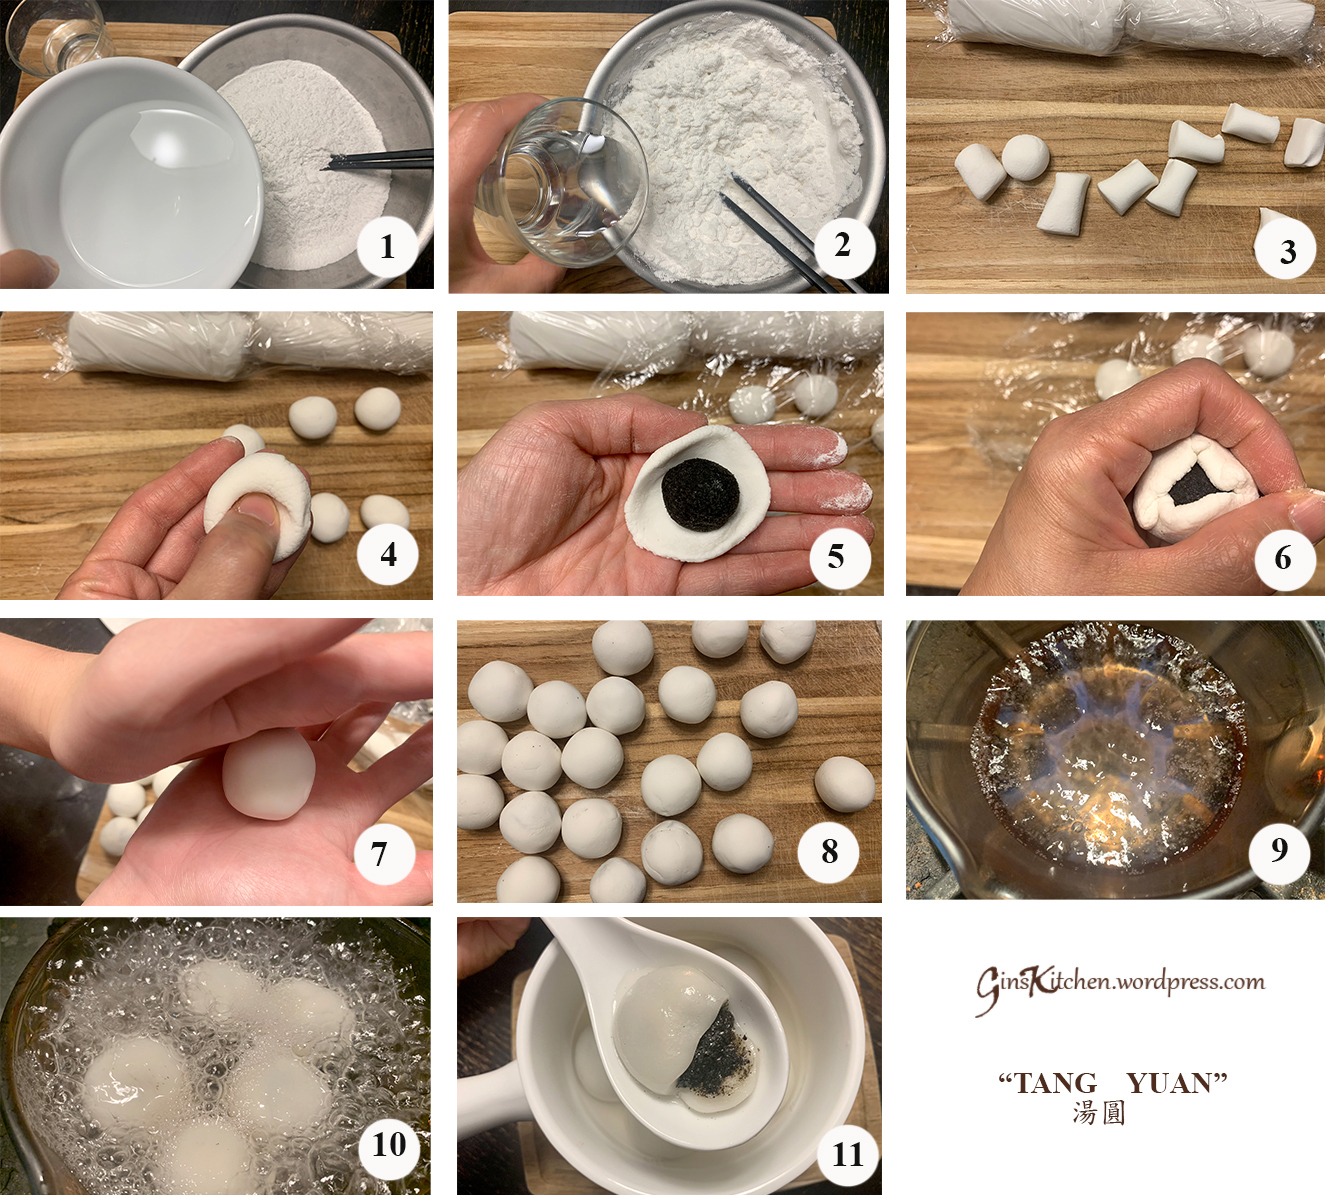
- Preheat oven to 340°F.
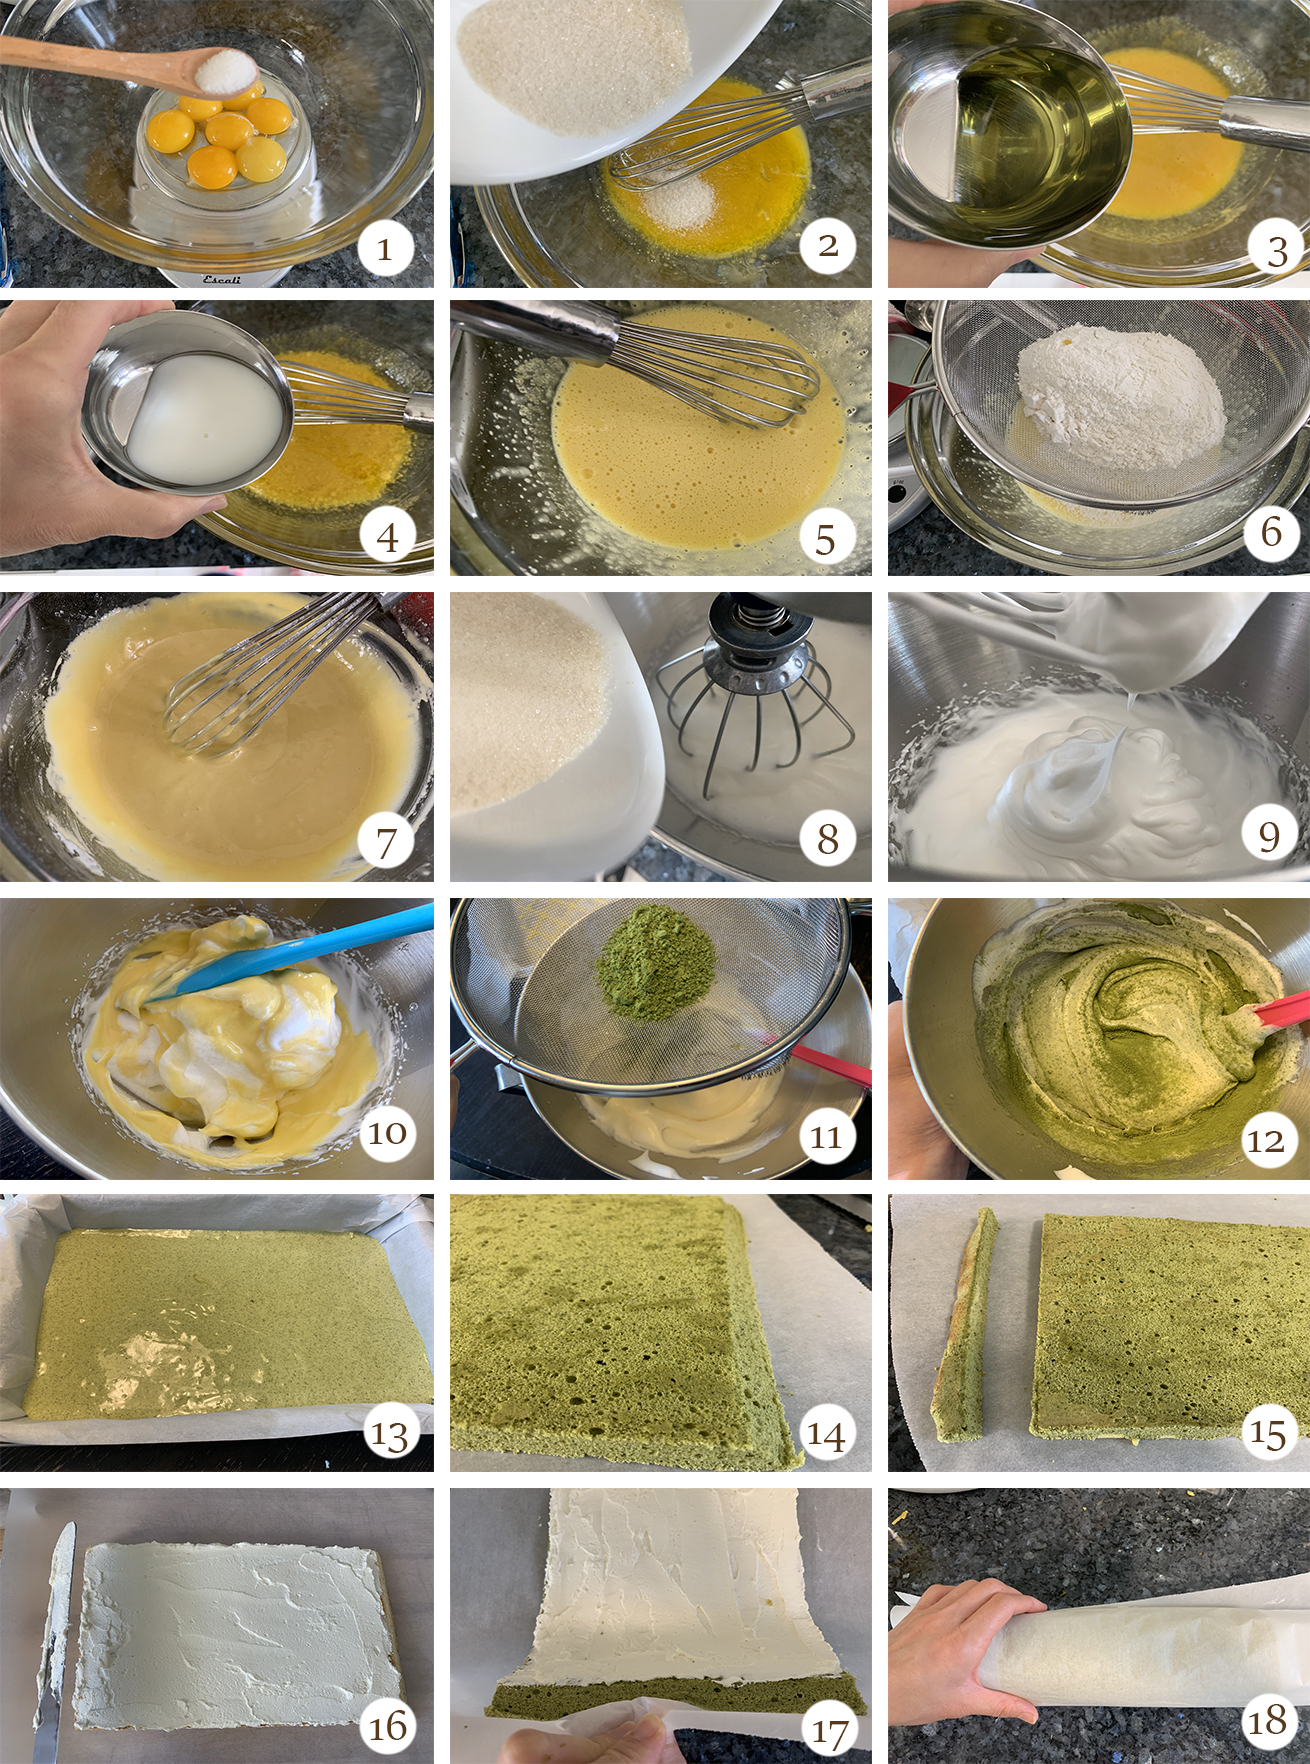
- Separate the egg yolks and egg whites into two bowls.
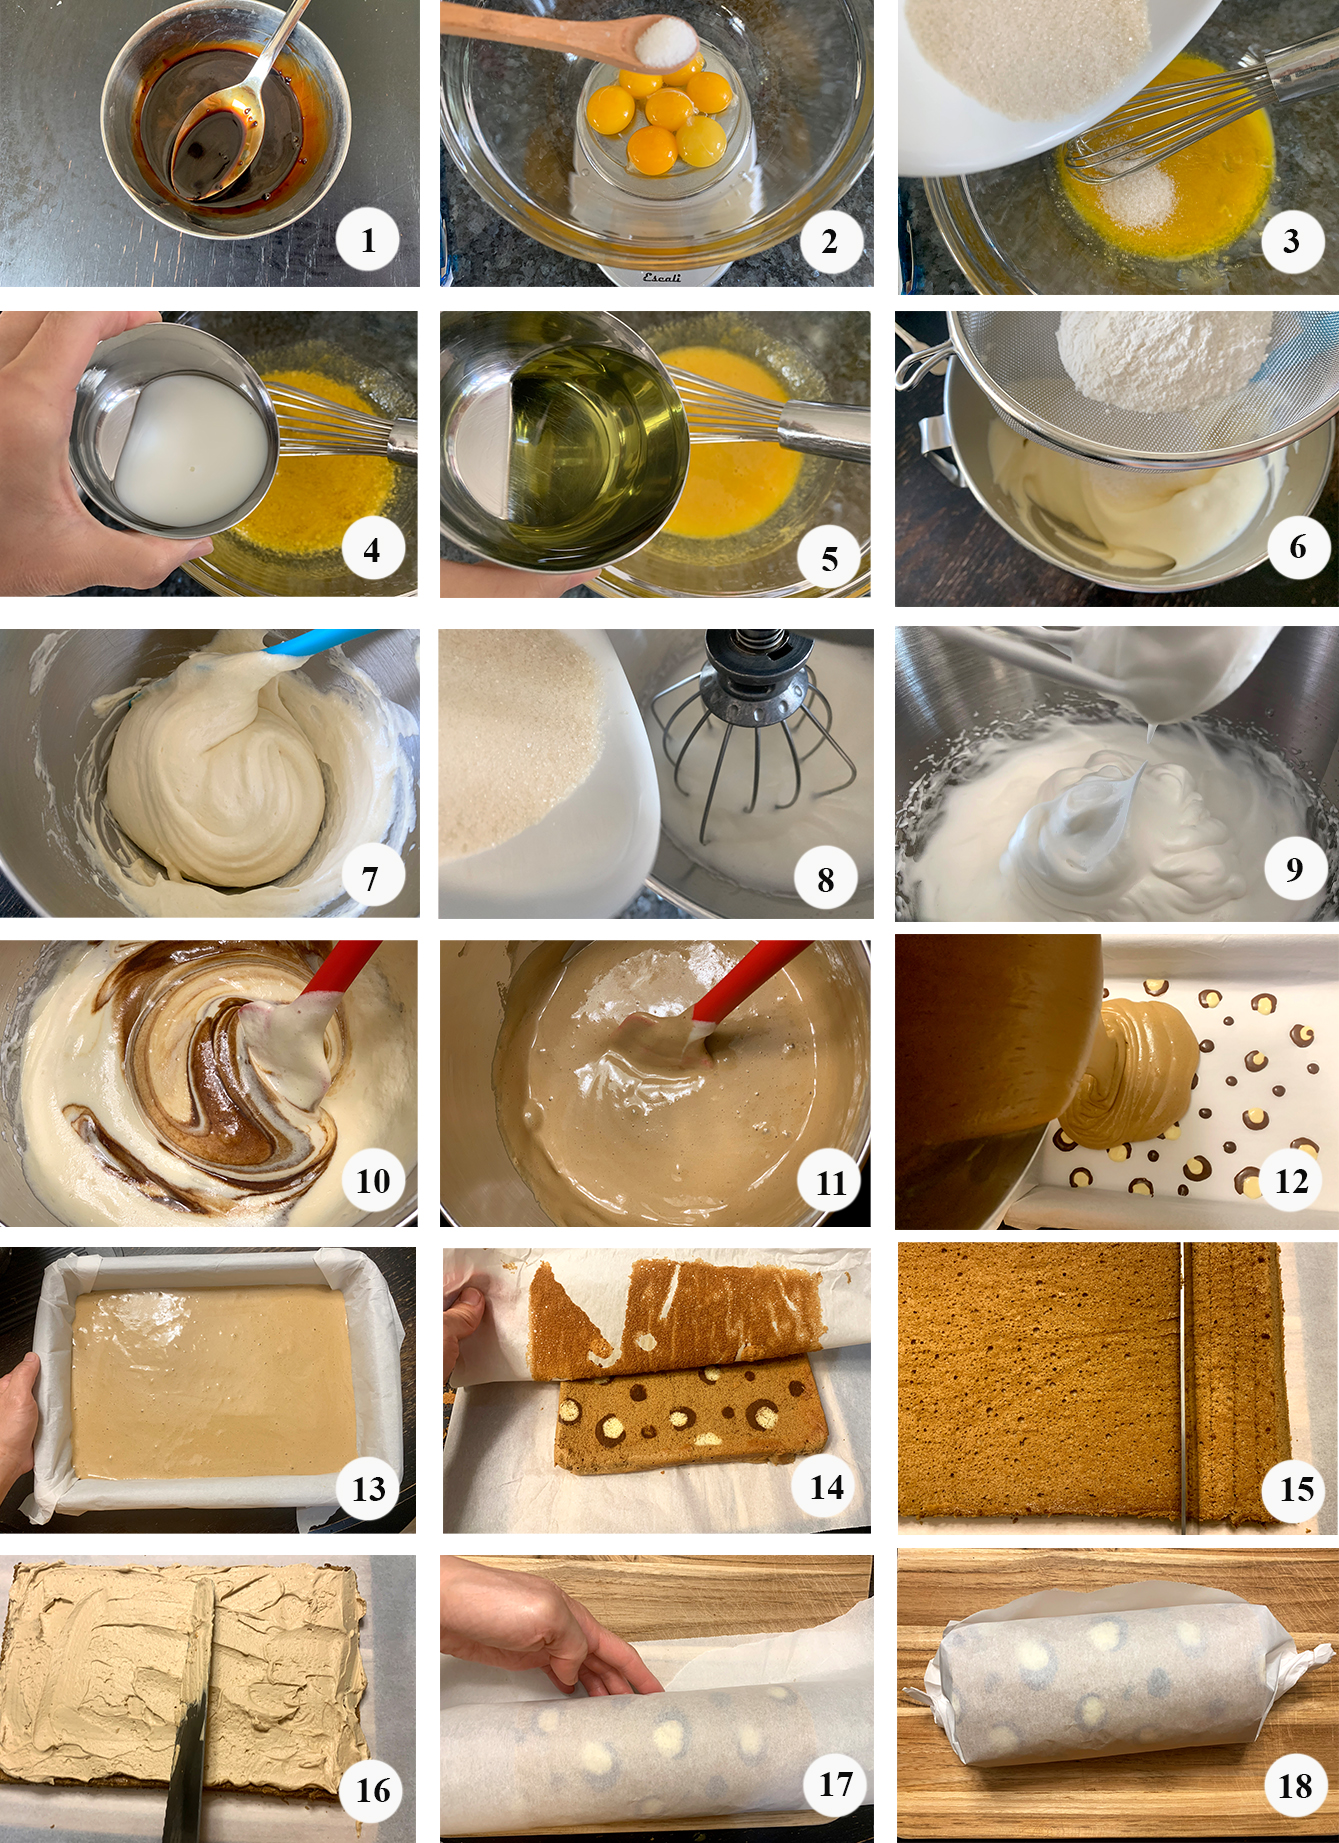
- Dissolve instant black coffee in hot water, set aside and let it cool. (Picture 1)
- In a large bowl, add salt to egg yolks and mix well. Add in 35g of sugar, beat until well combined. (Pictures 2 & 3)
- Add oil and milk to the egg yolk mixture and beat until the mixture is pale. (Pictures 4 & 5)
- Sift the flour into the egg mixture and gently fold to combine. (Pictures 6 and 7)
- In a mixing bowl, beat egg whites until foamy, gradually add sugar and beat until soft peaks form. (Pictures 8 and 9)
- Add in black coffee liquid to the egg whites and fold to combine. (Picture 10)
- Pour the egg yolk mixture into the egg whites and gently fold to combine with a spatula. (Picture 11)
- Pour the batter into the prepared pan. Spread the batter evenly and tap the pan several times. This will remove any air bubbles inside the batter. (Pictures 12 & 13)
- Bake for about 13 minutes, remove the cake from the pan as soon as it is ready. Allow it to cool for about 10 mins. Put a piece of parchment paper on top of the cake (you may want to lightly spray the parchment paper with oil to prevent the outer layer from sticking), and flip the pan over so that the pattern is on top. Peel away the original parchment paper from the bottom of the cake. Trim the top and bottom edges. Hold the knife at a 30 degree angle and trim the right and left edges. (Picture 14)
- Using a knife to score 2 vertical lines along the cake from the right edge, careful not to cut all the way into the cake. (Picture 15)
- Spread an even layer of whipped cream over the cake. (Picture 16)
- Tightly roll the cake from the side you just scored toward the other end. (Picture 17)
- Secure the roll by taping or twisting the parchment paper at both ends. Refrigerate for 1 hour before serving. (Picture 18)
Directions for making the filling:
- Dissolve instant black coffee powder in 1 tsp. of hot water, set aside and let cool.
- Whip the heavy whipping cream on medium speed until it is smooth and firm, add powdered sugar and whip for another 1-2 minutes.
- To make the cream firmer, add vanilla instant pudding and whip for 1-2 minutes.
- Add in coffee and whip for another minute.