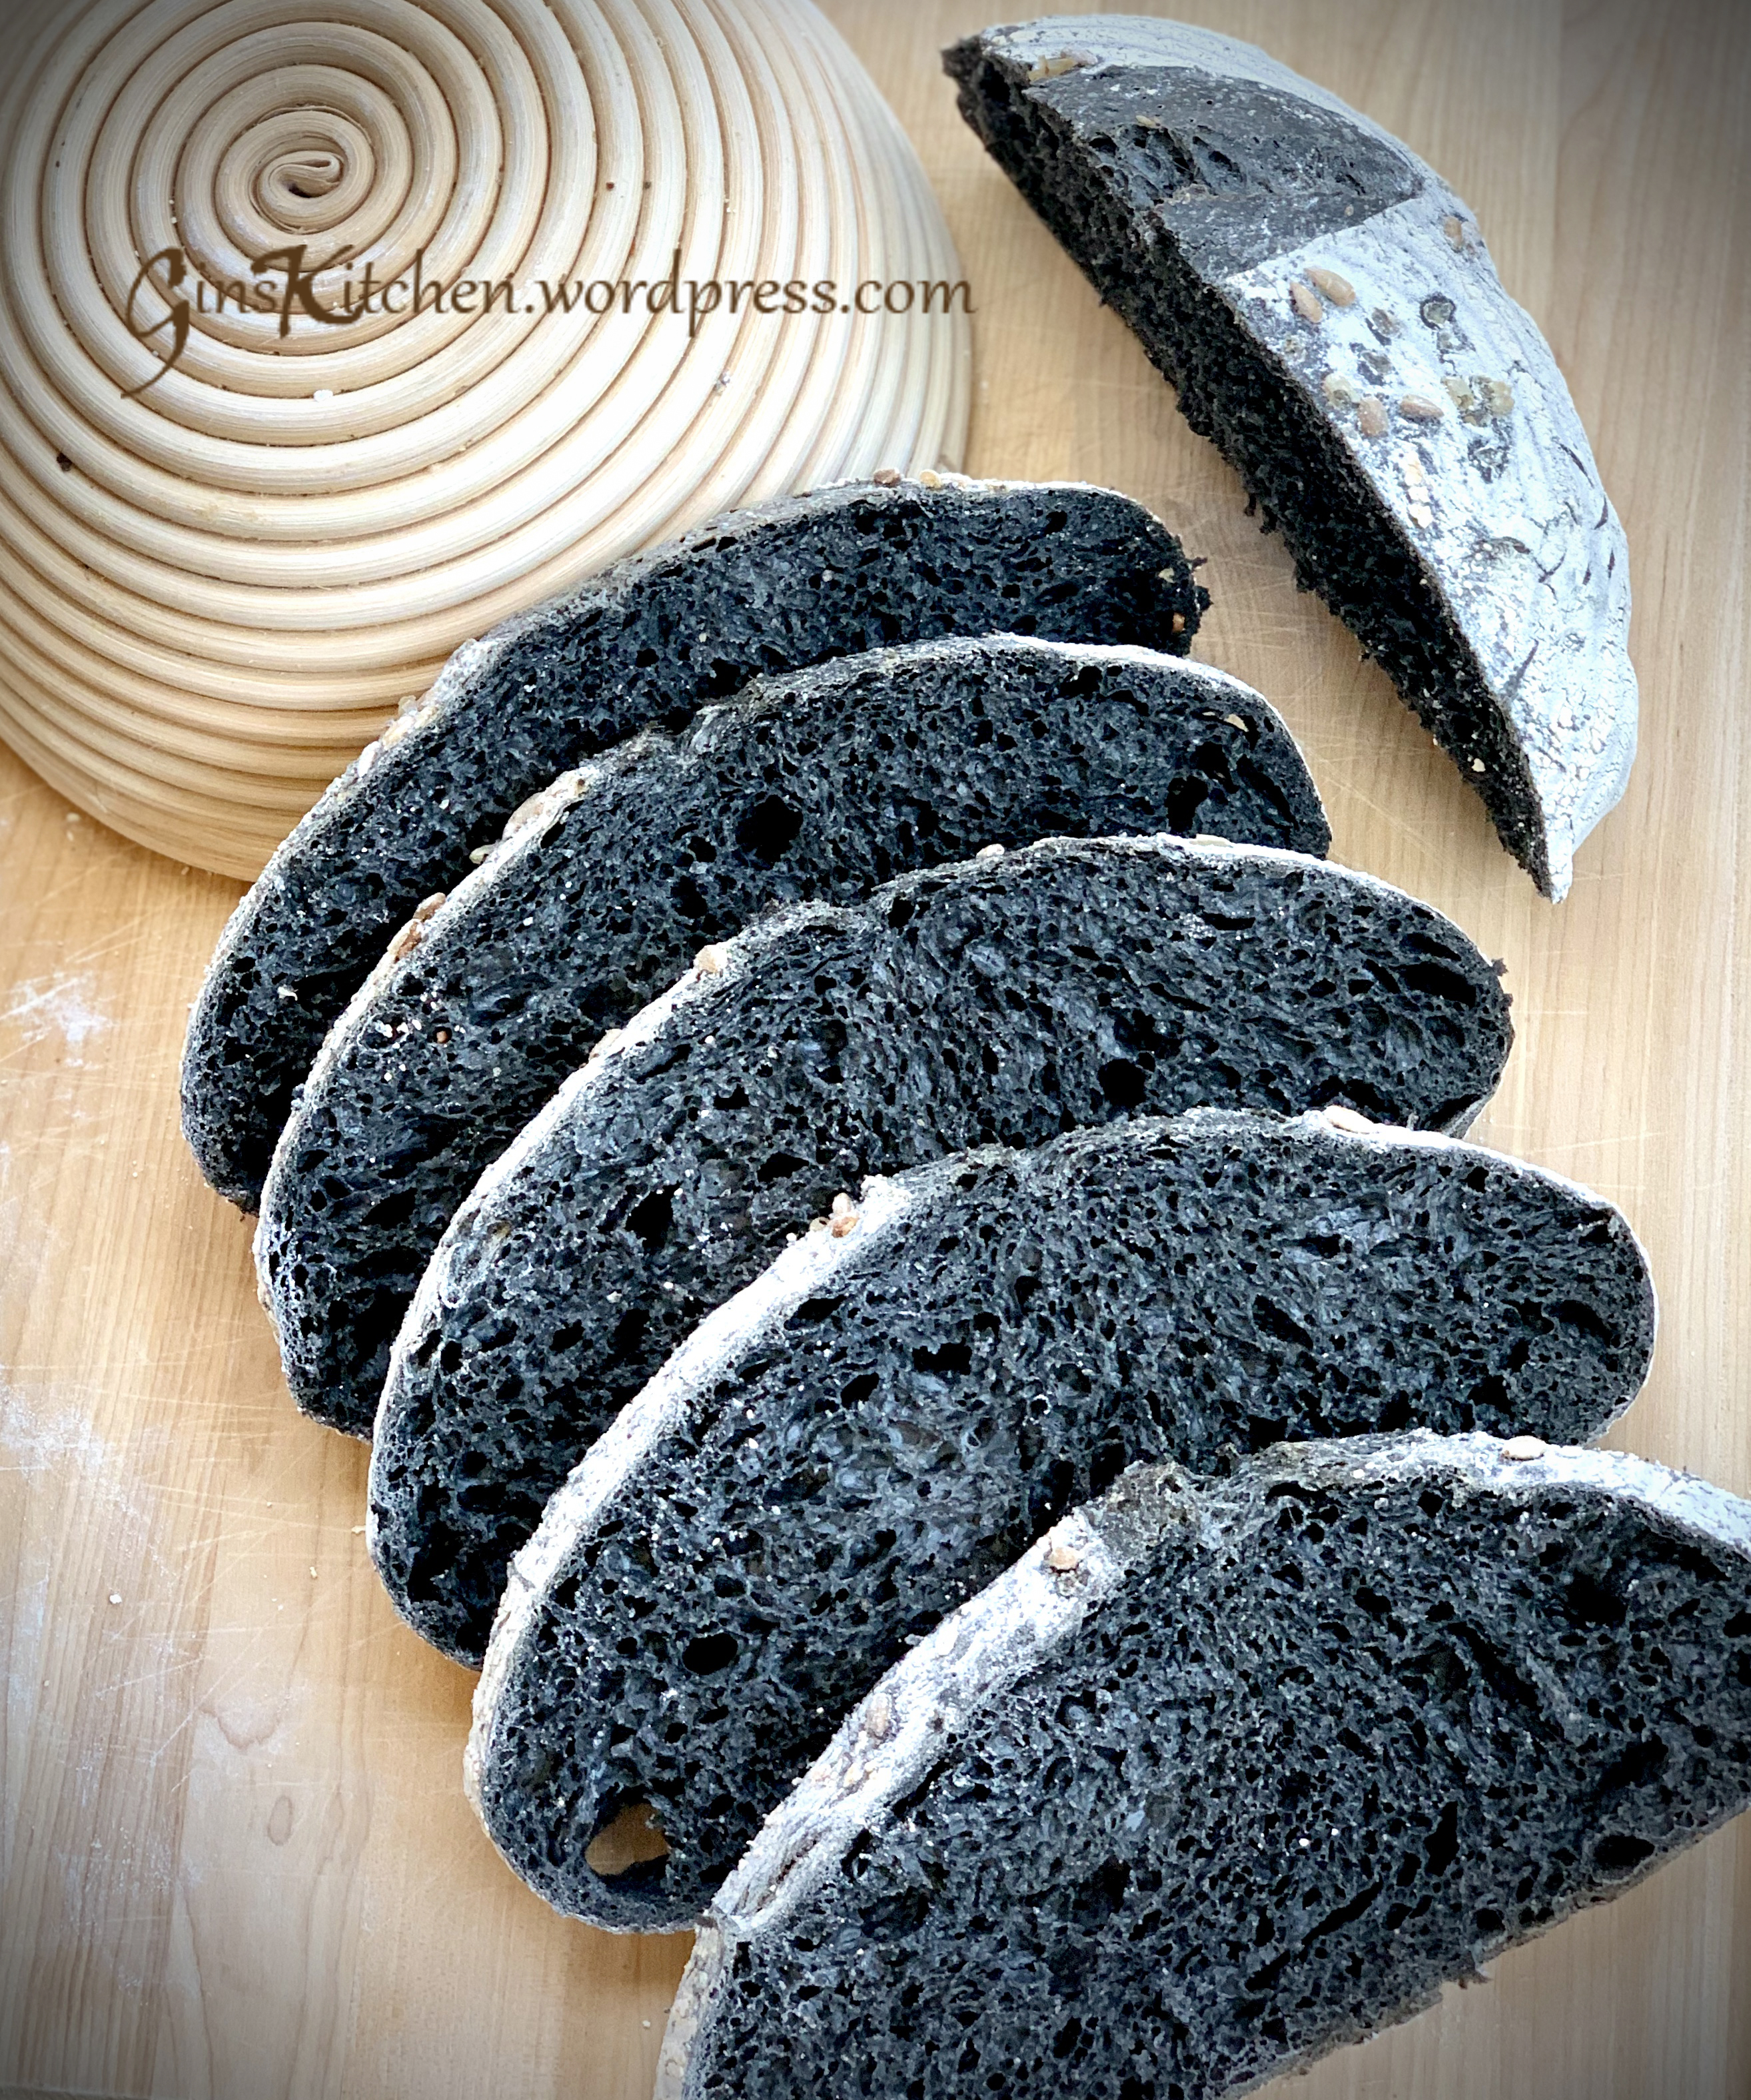
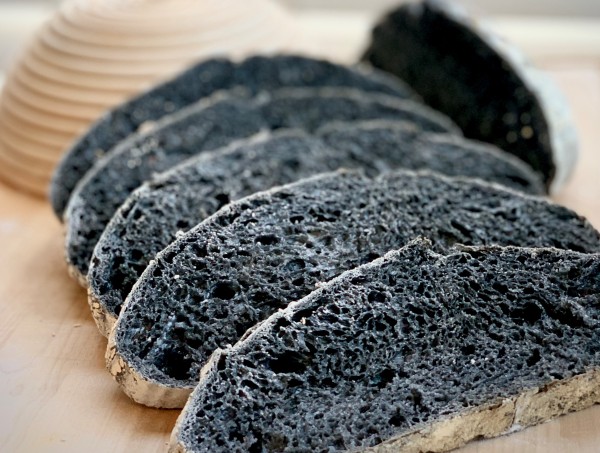
It’s 105°F in Southern California today, the outdoor air is so suffocating and unbearable. This, however, gave me a chance to stay indoors and pick up where I left off on my blog – It’s been a long time since I last saved a recipe here. This charcoal sourdough is one of my kids’ favorites among all other flavors. It’s not because of its taste (charcoal doesn’t bring much taste to the bread at all), but its texture – it’s soft and chewy, perfect to dip in vinegar and olive oil or to spread butter on.
Ingredients (Hydration is about 72%)
Step 1 – Prep for the dough:
| 400g | Bread Flour |
| 30g | Dark Rye Flour |
| 20g | Spelt Flour |
| 1g | Activated Charcoal Powder |
| 2 Tbsp | Cocoa Powder (optional) |
| 320g | Water |
| 1 tsp | poppy seeds (add in later) |
Step 2 – Mix and rest for 30 mins:
| 10g | Salt |
| 90g | Starter |
Directions:
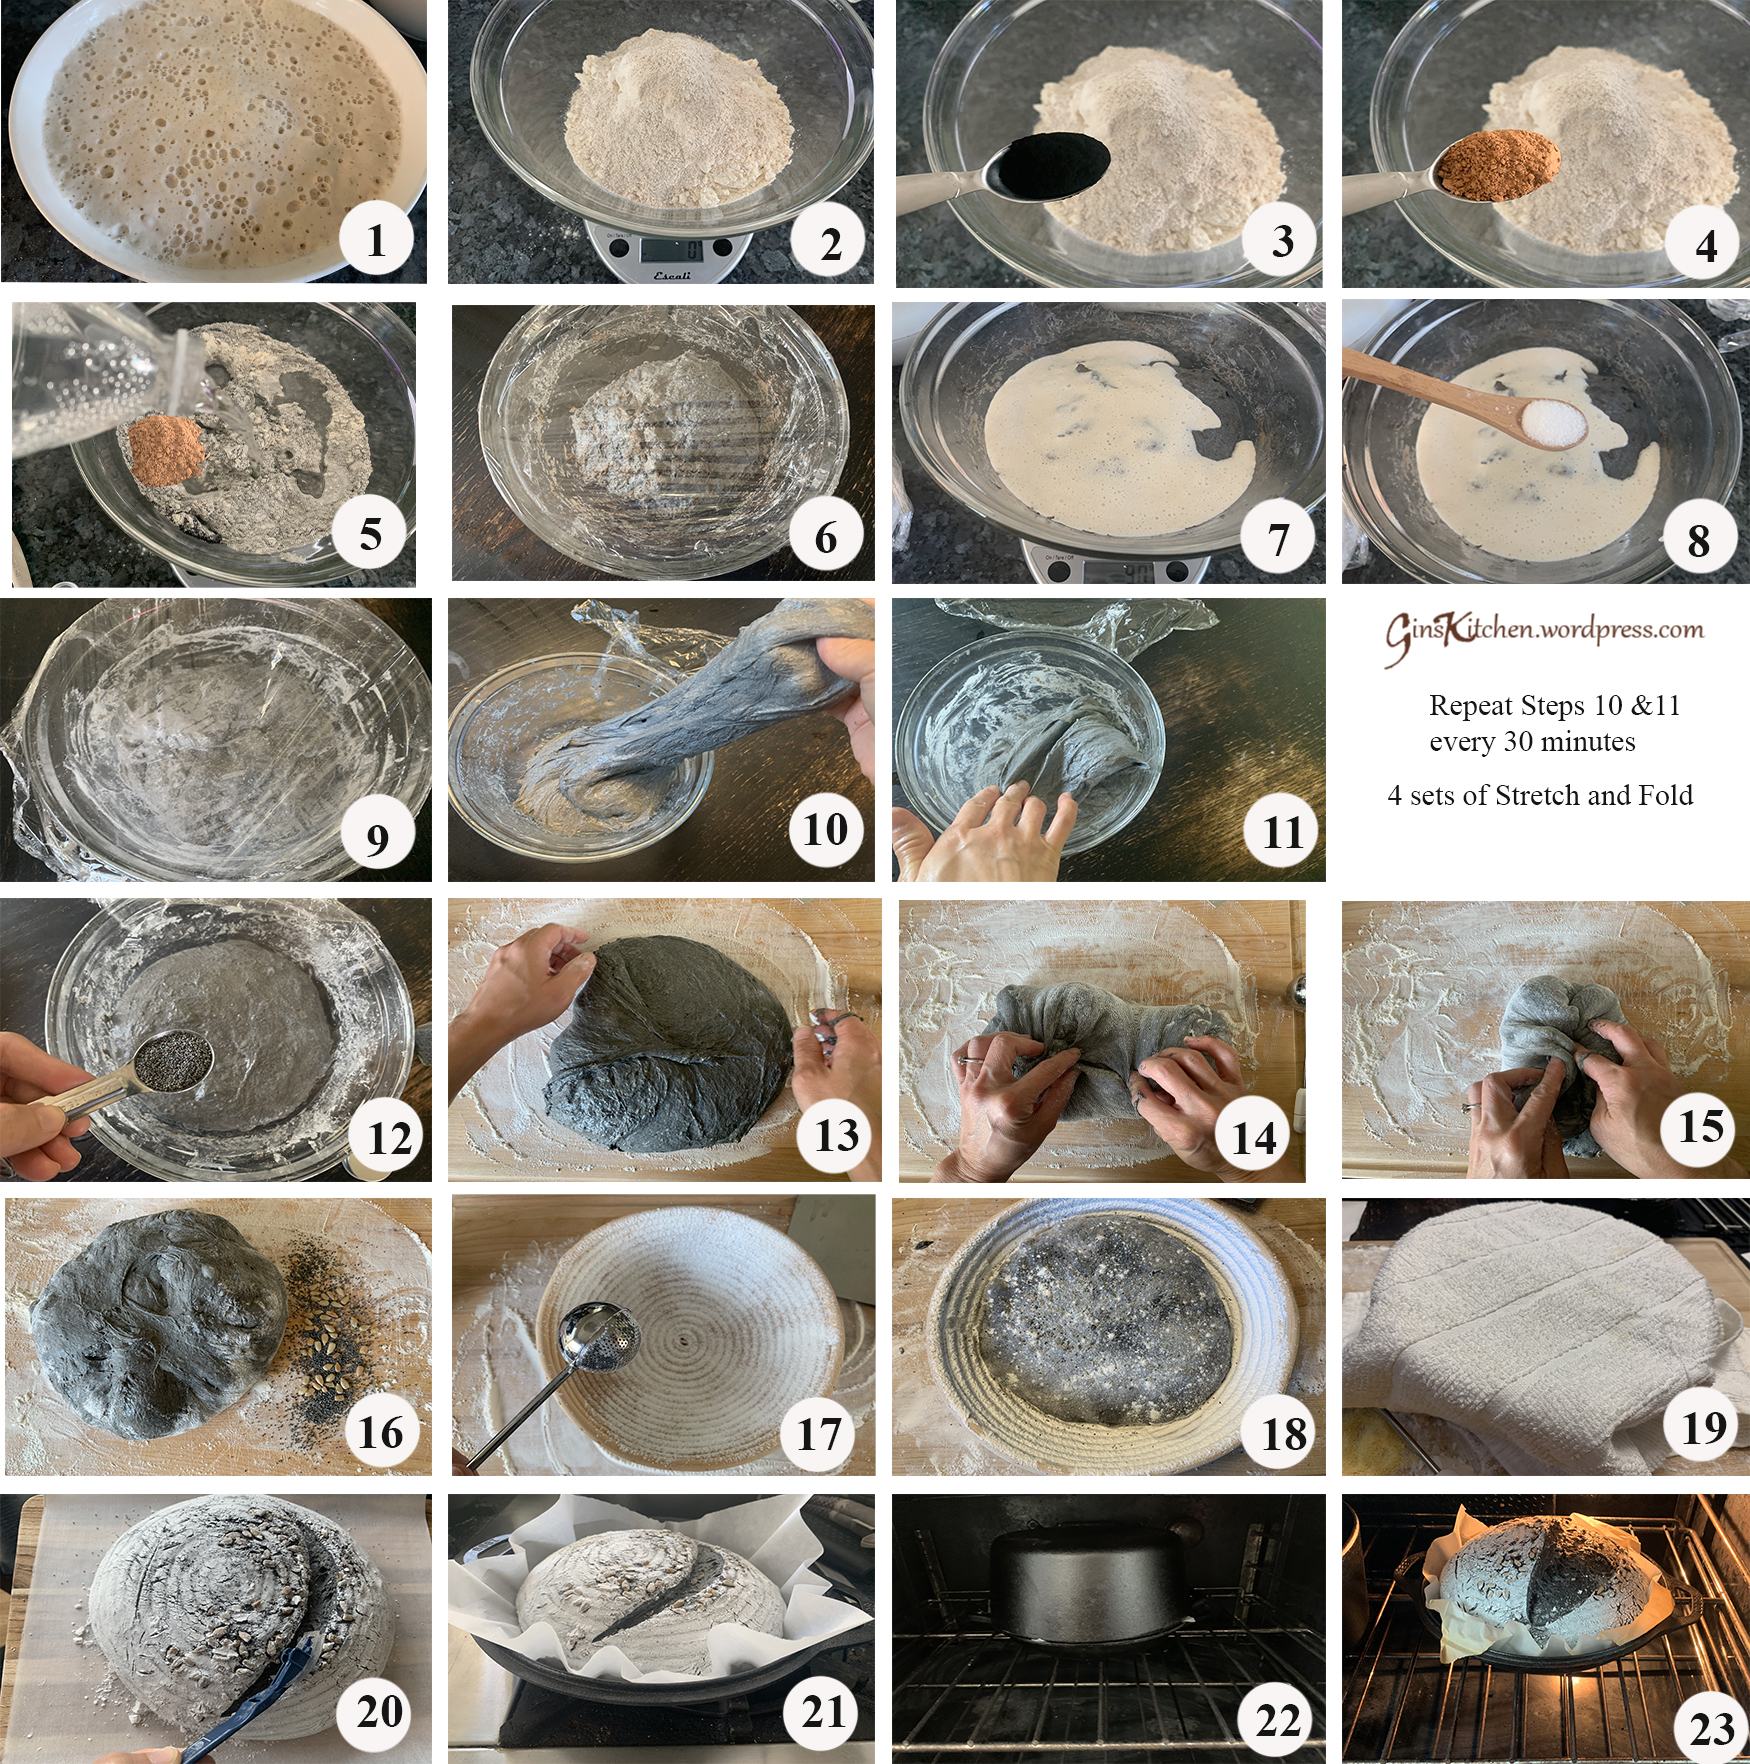
- Feed your starter with equal amount of water, flour and starter until it is active and ready to use (you may want to start feeding the starter a few days ahead of time if the starter is stored in the fridge). When starter is ready to use, there will be a lot of bubbles – see picture 1).
- In a mixing bowl, combine all flour, charcoal powder, cocoa powder and water. Cover with a towel or plastic wrap and let it rest in room temperature for 1 hour. (Pictures 2-6)
- After 1 hour, add 90g of starter and 10g of salt. Use your hand to pinch and fold the dough over and over to get it nice and mixed. The dough is more wet and sloppy than it was during the first mix. Cover the dough and set the timer for 30 minutes. (Pictures 7-9)
- Now we are going to stretch and fold the dough – Lift one side of the dough straight up until you meet resistance and fold it across the center. Turn the bowl 90 degree and perform the stretch-and-folds (the dough is probably very relaxed in the beginning). Once you have finished all the way around the bowl back to where you started, you have completed one set. Cover the dough with plastic wrap and set the timer for 30 minutes. (Pictures 10 & 11)
- Repeat Step 4 above three more times. Add in poppy seeds during the last round of stretch and fold. (Picture 12)
- After the last set of Stretch-And-Fold, lightly fold the dough a couple of times, cover the dough and let it rest for 1-2 hours instead of 30 mins.
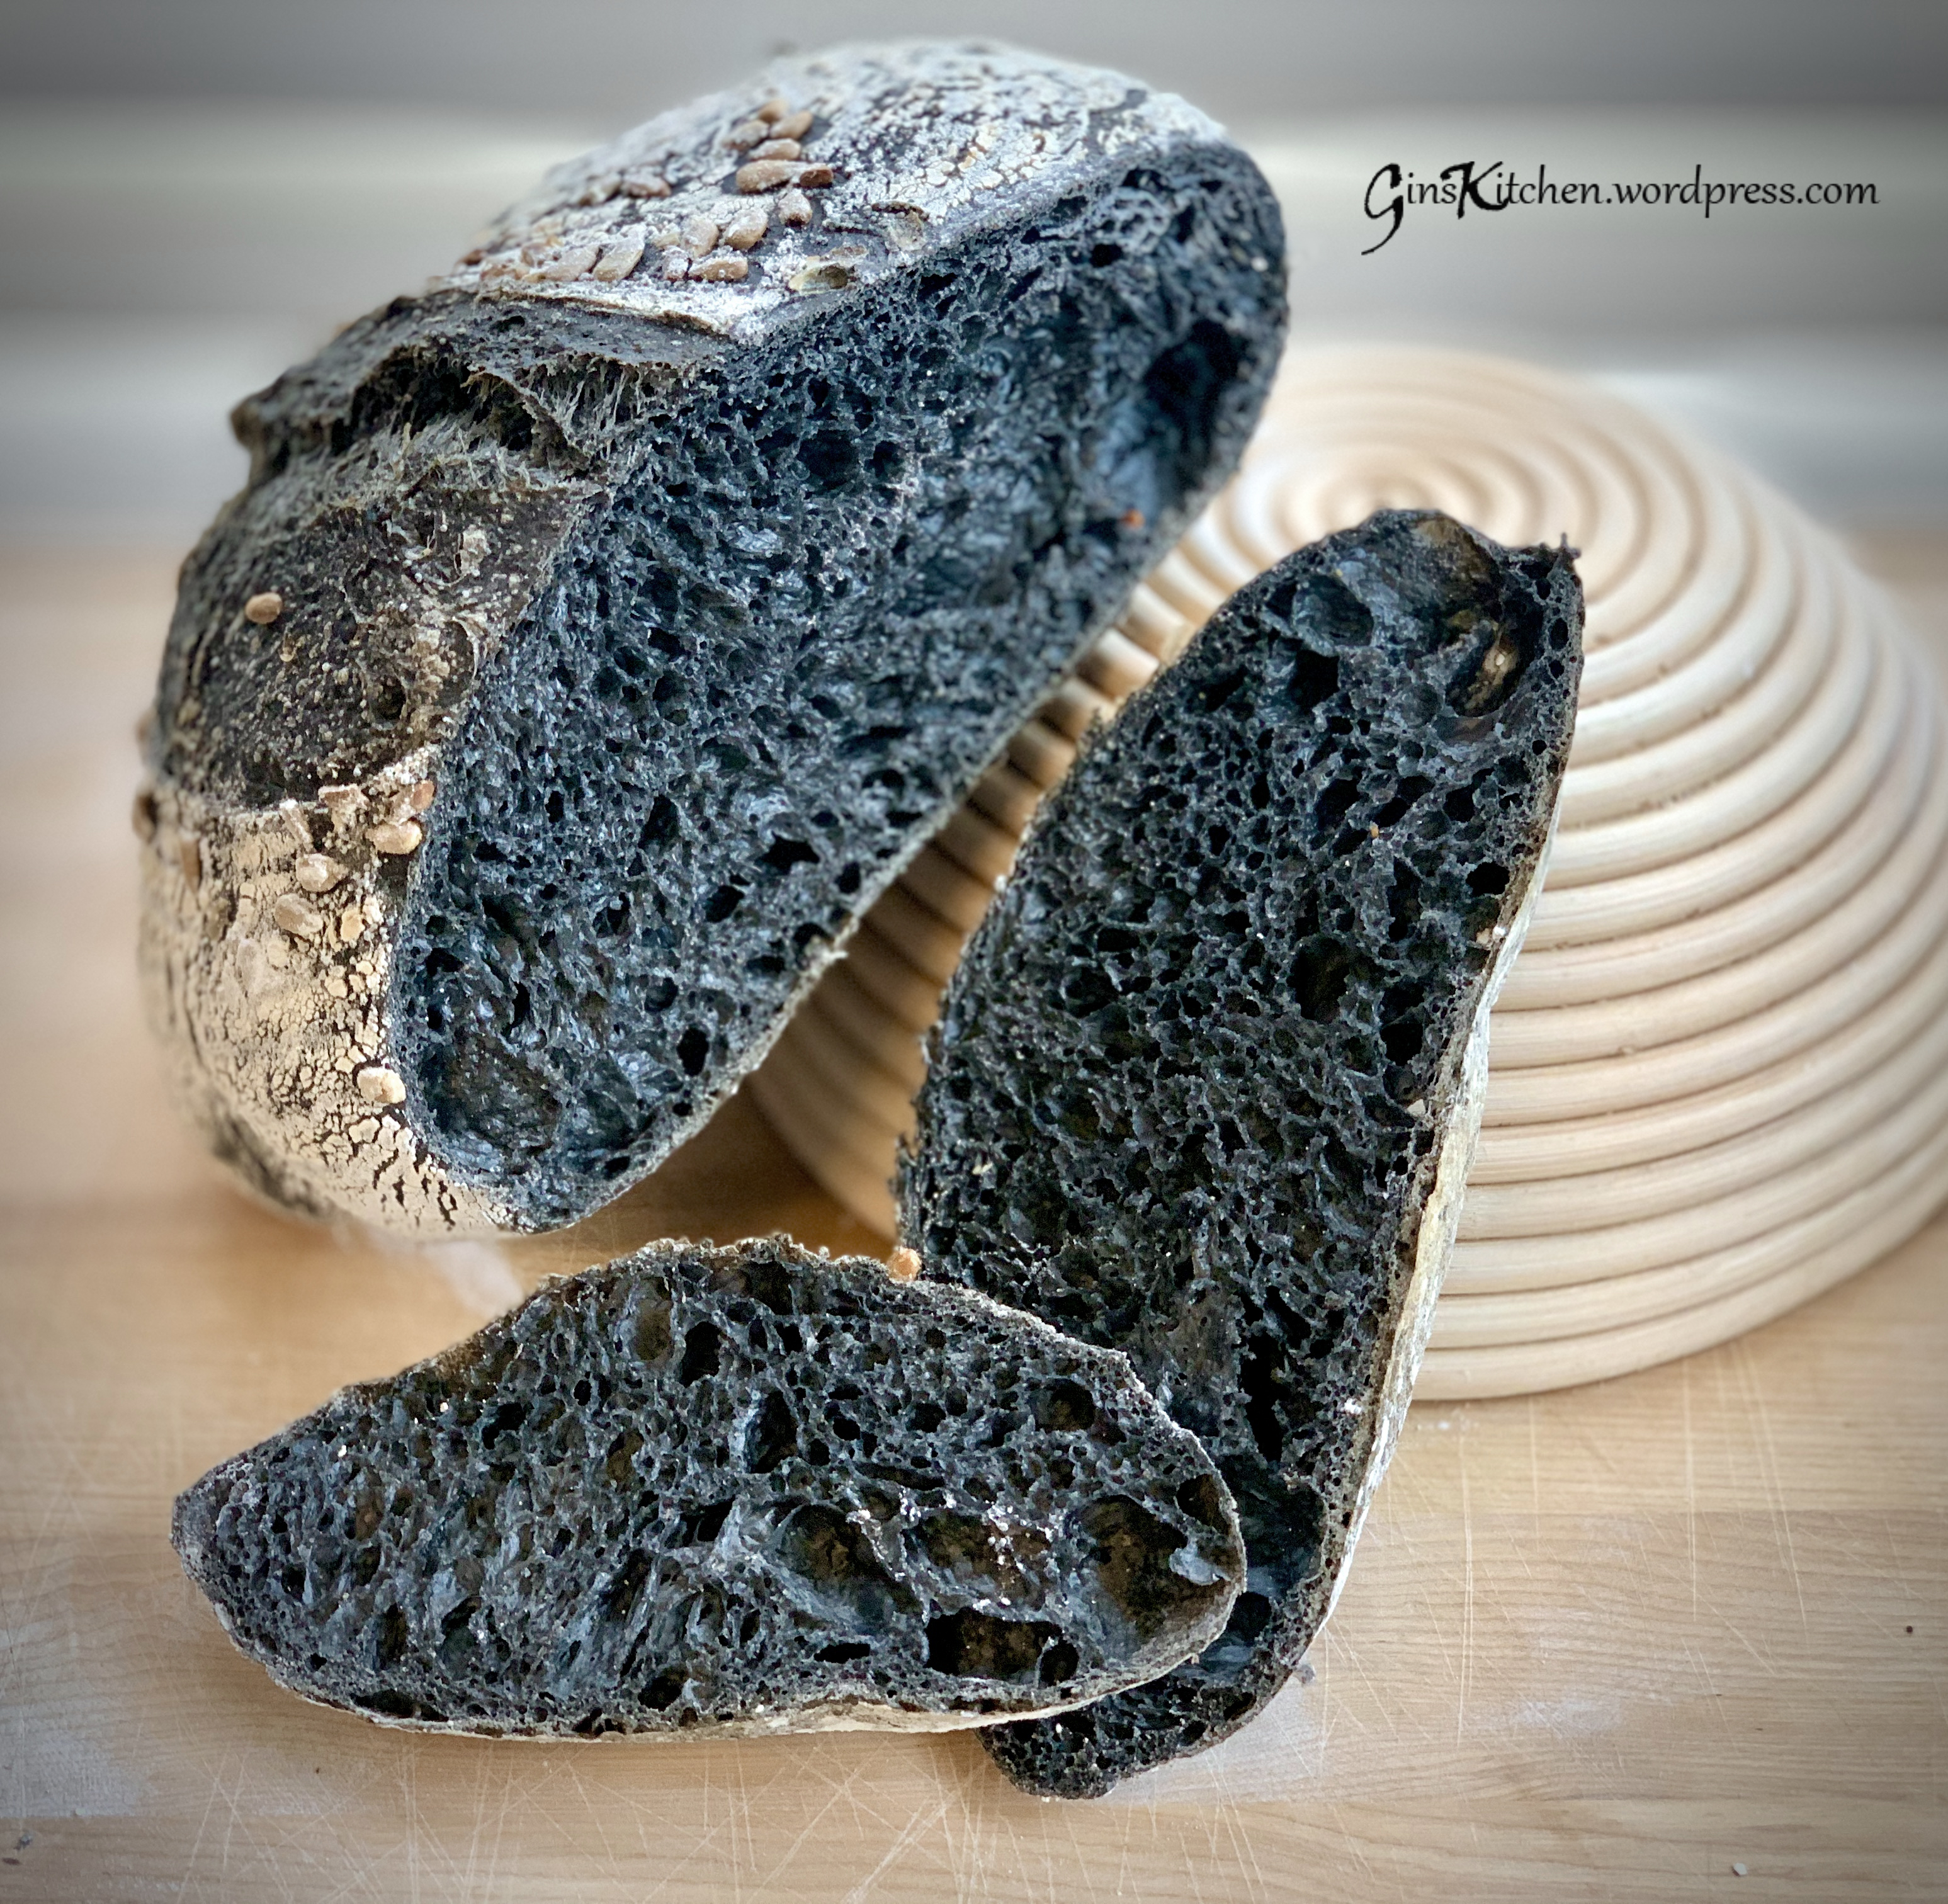
- Dust the banneton basket with rice flour. Dust your work surface with flour and fold the dough a couple of times and shape the dough to a ball, carefully transfer the dough to the basket. Cover with a towel and put it in the refrigerator for 5-10 hours/overnight. (Pictures 17-19)
Baking the bread:
- During the dough’s last 45 minutes of final proof, preheat the oven and the cast iron pan at 500F (preheating the pan for at least 45 minutes).
- Remove the basket from the fridge. Put a piece of parchment paper on top of the banneton basket and put a chopping board on top of the parchment paper. Now hold the basket and chopping board tight and flip over the banneton basket.
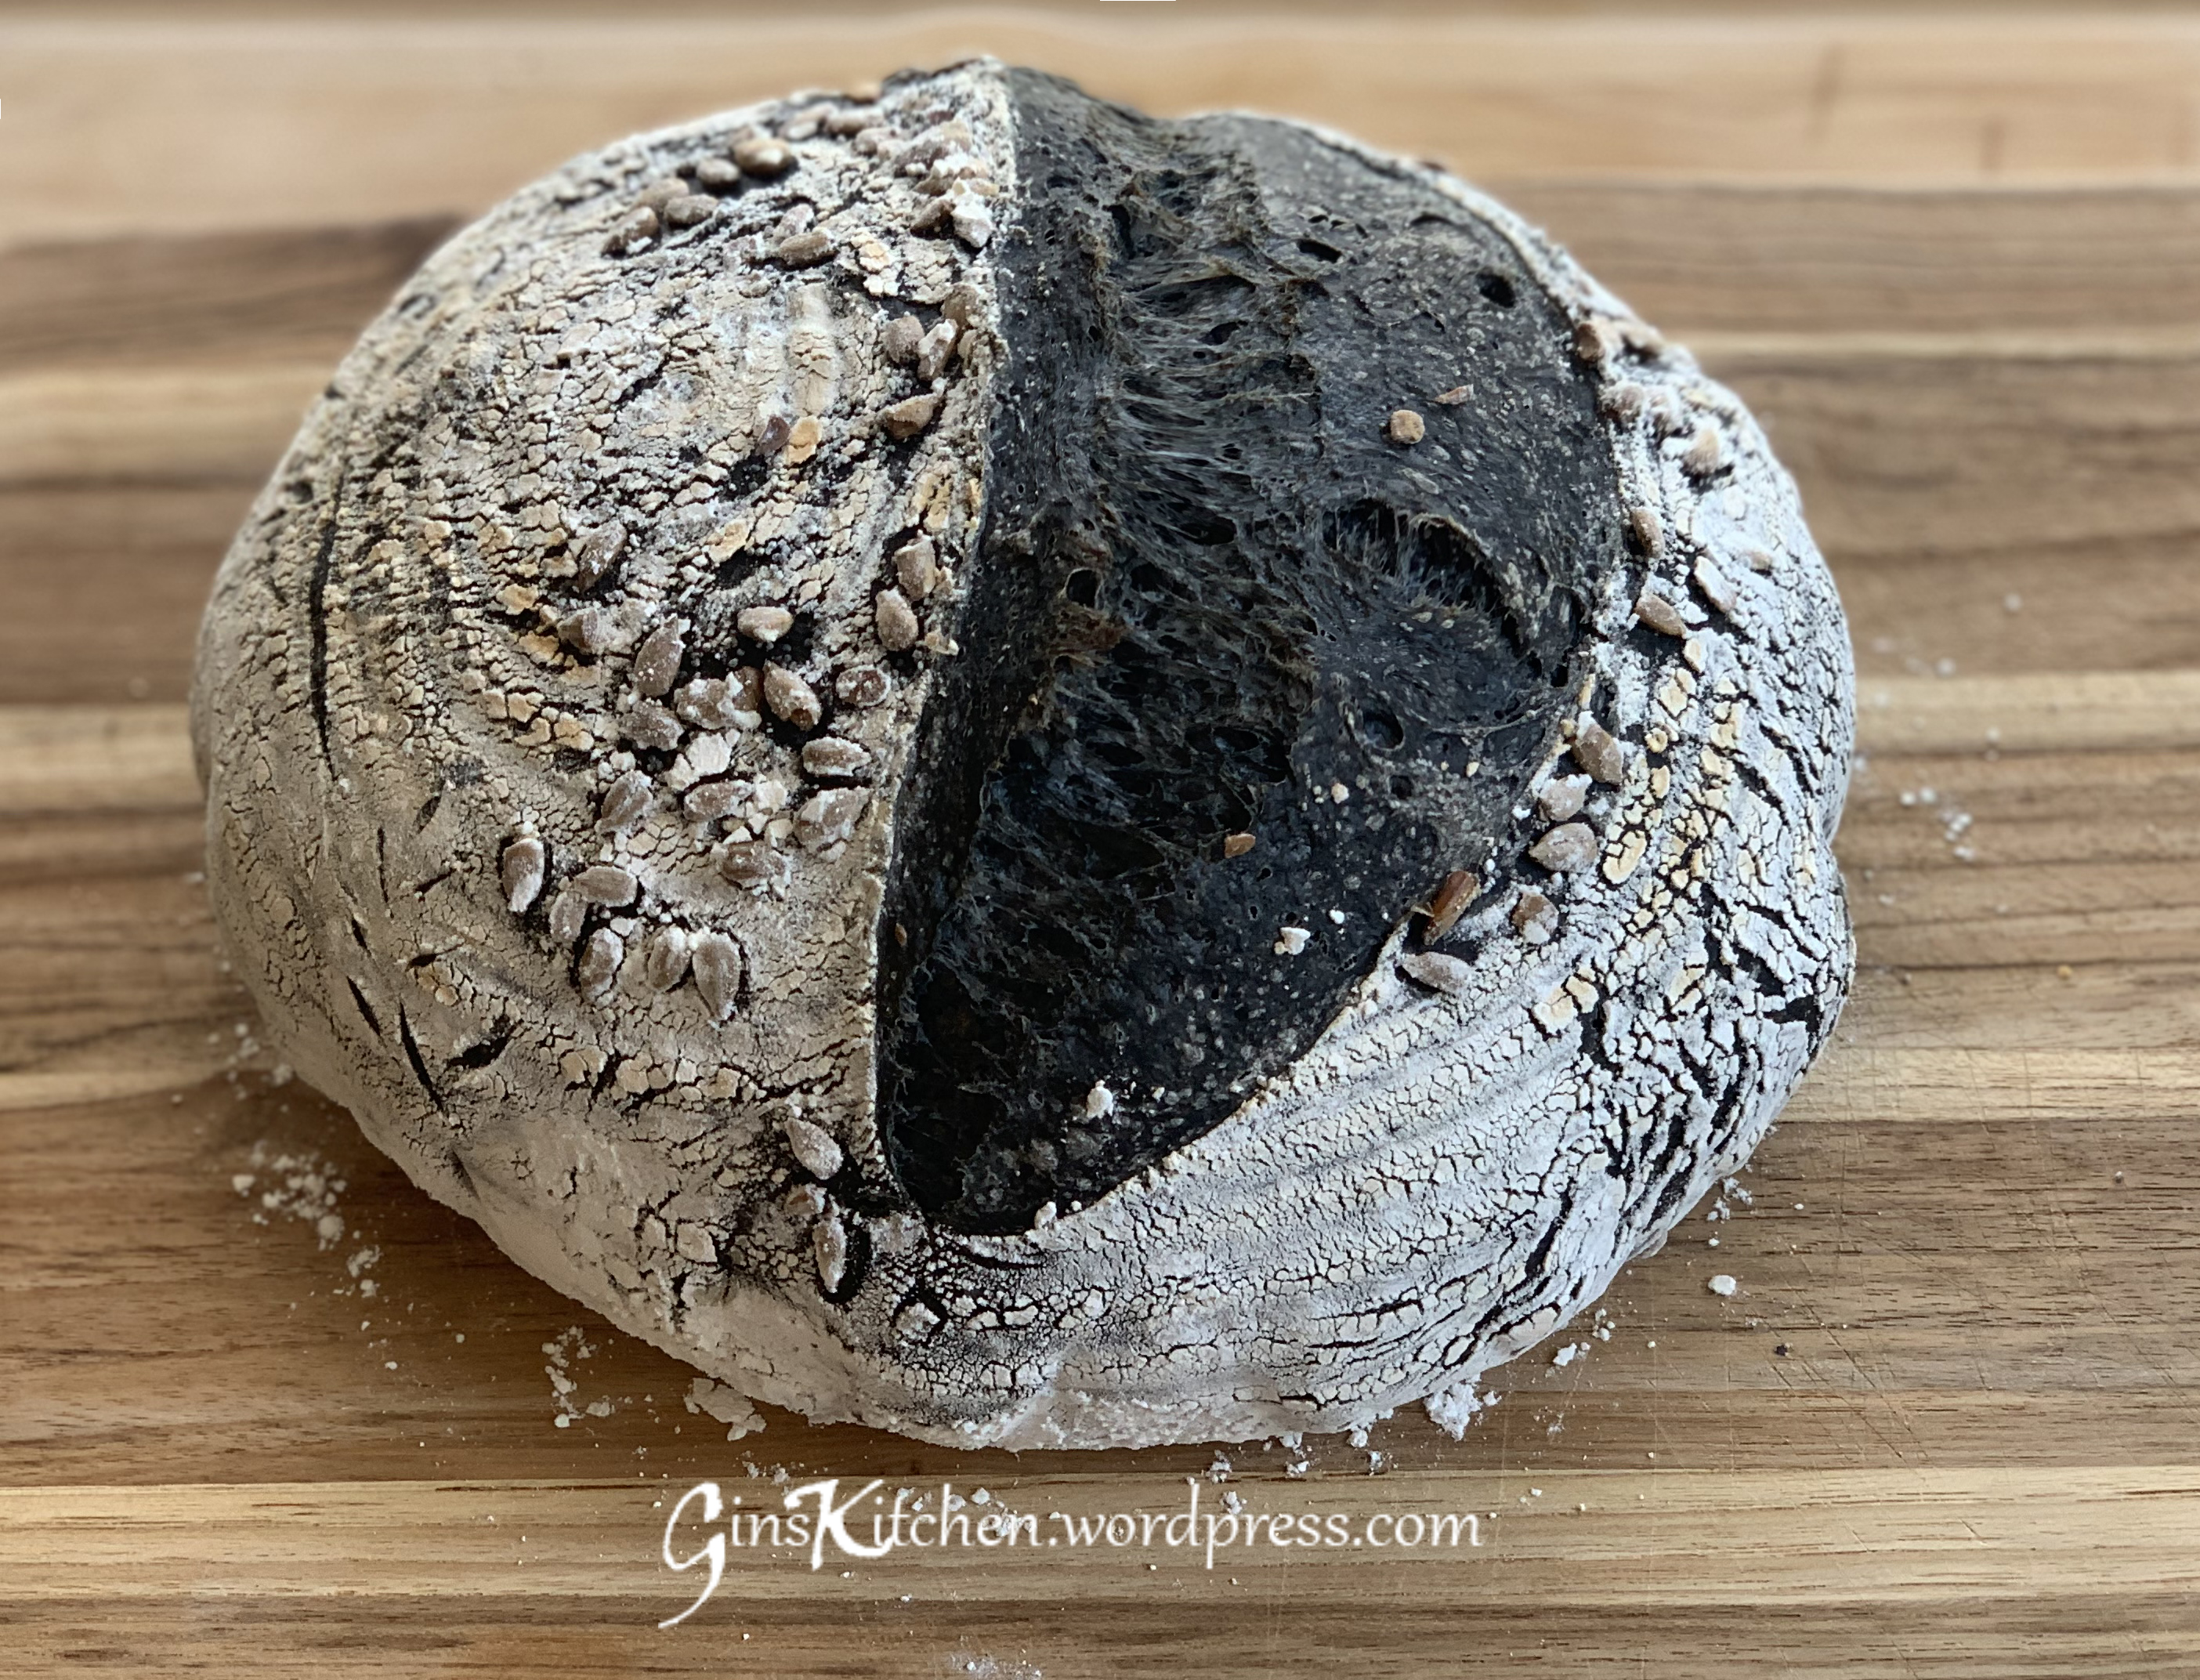
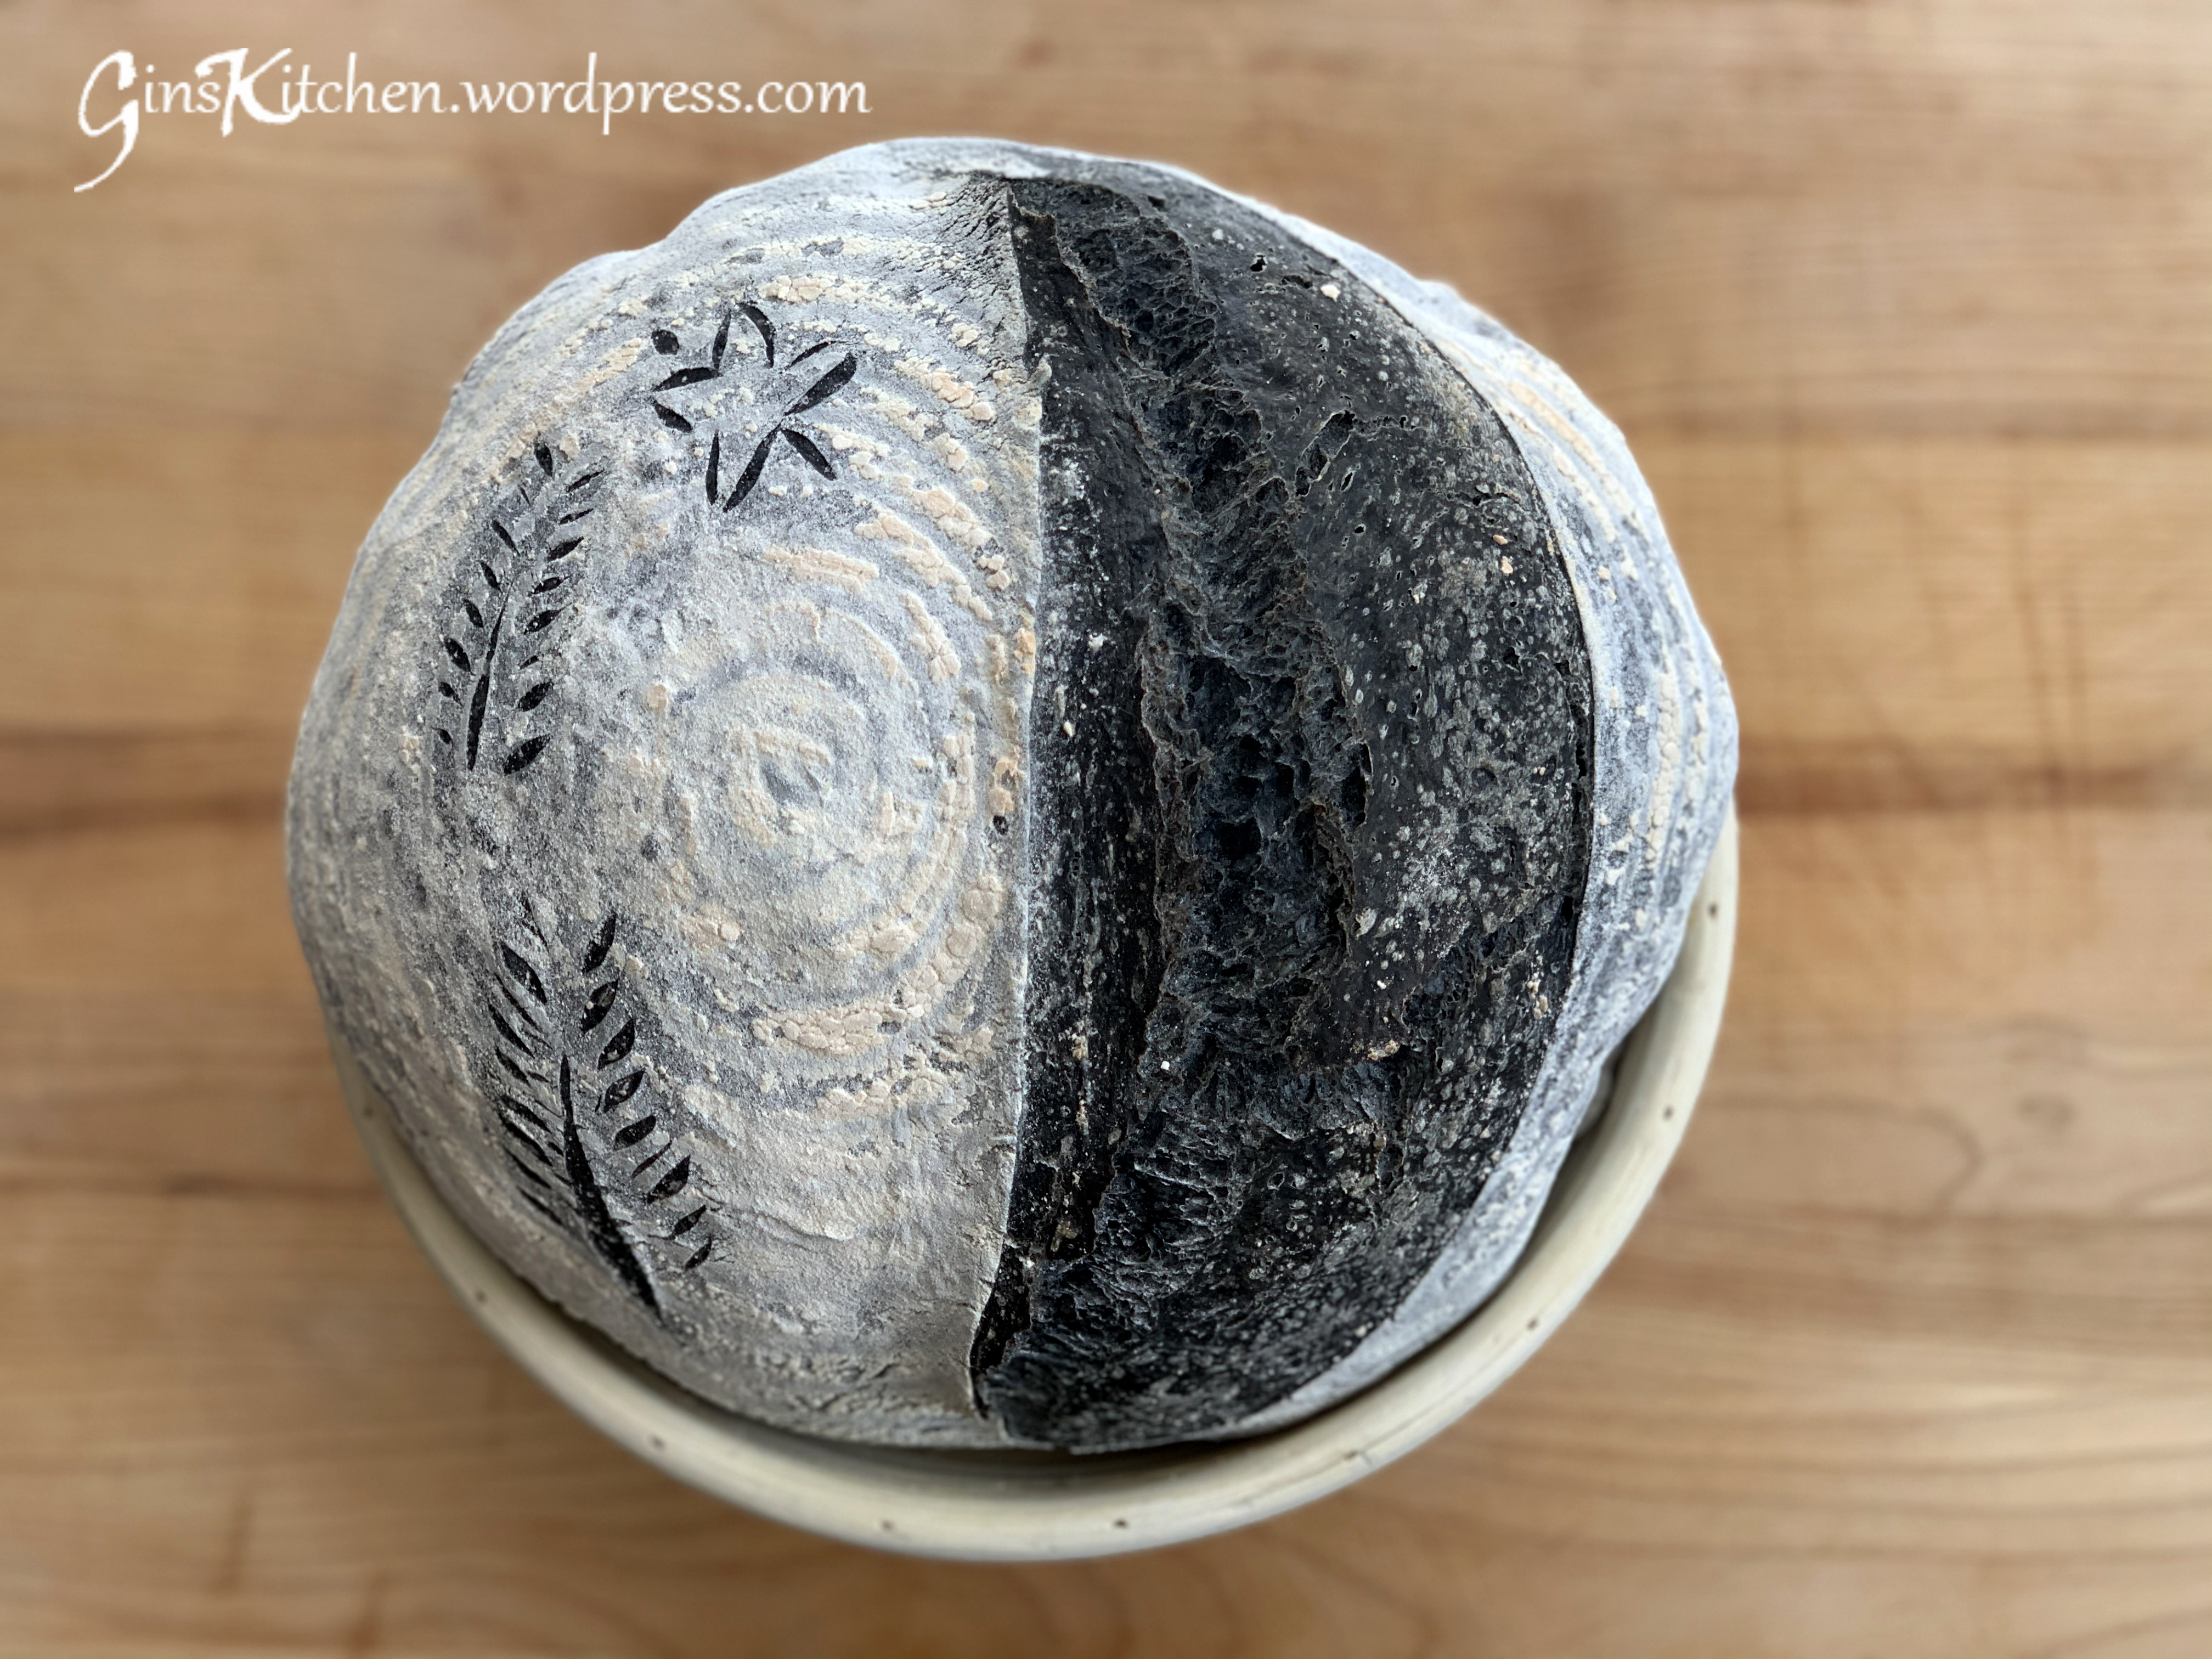
- You can score the dough either a line or a cross. (Picture 20)
- Remove the cast iron pan from the oven and slide the dough to the pan. (Picture 21)
- Cover the cast iron pan and turn the oven temperature down to 450F and set the timer to bake for 20 minutes. (Picture 22)
- After 20 minutes, uncover the pan and continue to bake for another 20 minutes.** (Picture 23)
- Let the bread cool down completely on a cooling rack before slicing it.
**Note: Each oven is different, you may need to adjust the cooking time for longer.